
“…unlike birds, for instance, who keep building the same nest over thousands of years, we tend to forge ahead with our projects far beyond any reasonable bounds” “…the architectural style of the capitalist era… the compulsive sense of order and the tendency towards monumentalism evident in law courts and penal institutions, railway stations and stock exchanges, opera houses and asylums, and the dwellings built to rectangular grid patterns for the labour force” “(whereas)… domestic buildings of less than normal size – the little cottage in the fields, the hermitage, the lock-keeper’s cottage, the pavilion for viewing the landscape, the children’s bothy in the garden – are those that offer us at least a semblance of peace” W. G. Sebald
This page is rather long to scroll down, so if you only want to read about a specific topic then just click on the chapter heading below to access it:
- finding a site (and the various eco-house building options)
- how our off-grid house in Spain worked
- the walls
- the roof
- the interior
- the bed on a platform (with storage below)
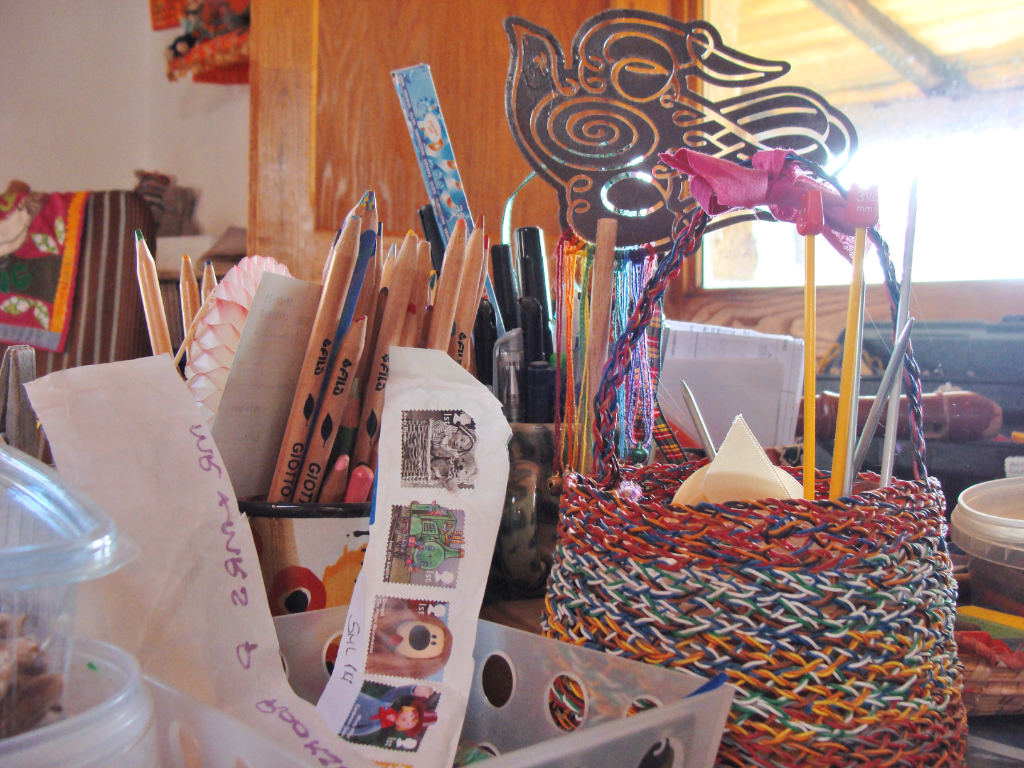
- hand tools
- heating
- electricity
- lighting
- tools
- water
- hot water
- kitchen
- bathroom
- waste water (grey) treatment
- off-grid washing machine
- paintwork
- wood treatment
swipe to see more photos
finding a site (and the various eco-house building options)
Finding a site and making a home exactly how you want it isn’t easy. We’ve spent forty odd years doing that and still haven’t managed to nail it. During which we must have lived in about twenty different geographical zones and experienced a whole range of building types.
In an attempt to simplify the process, we started making a list of everything that was absolutely essential. The last thing we wanted was to put all our (finite) resources and energy into something only to discover we’d made a fundamentally error. Then as we searched and learnt more the list got longer and started to change.
Let’s start with where to look. This is neither simple nor does it get any easier with time. We began in the 1980s, pre-internet days and the only way then to find out anything was to physically to go and see it. Eco-house design was virtually unheard of at this point and self-build made up less than 1% of new construction in the UK. Architects at that time were basically ignorant and there were very few books on the subject, so we had to learn for ourselves. Oh, we tried architects, it was our first port of call and biggest lesson. For folk who like to consider themselves professionals (they certainly charge as if they do), they haven’t the slightest clue as to what is required to make a building sustainable, or work as a home. Even now I have yet to come across a single architect who understands these most important issues. For them it is still all about making as much money as they can, while puffing up their credibility among their peers in the industry. The idea of designing a home that costs as little as possible, takes up the smallest footprint (around 60m2), while being as healthy, practical and sustainable as possible, would be of zero interest.
So having discarded that option, we then moved on to the possibility of designing one ourselves. I don’t know how many years it takes to qualify as an architect, but once we discovered books like Lloyd Kahn’s seminal work SHELTER (ISBN 0-89815-364-6) in the now sadly defunct Compendium Bookshop (Camden Town, London), it was clear this wasn’t going to be anywhere near as hard as we had imagined. Amazingly, SHELTER is still in print and there are now several (even better) sequels, all by the same author – including HOME WORK (ISBN 0-936070-33-1), TINY HOMES (ISBN 978-0-936070-52-0), and SMALL HOMES (ISBN978-0-936070-68-1). The latter featuring one of our homes, El Pocito. All packed with photos of mainly self-built houses, often created by people without any previous experience or skills, from the 1970’s onwards.
Another classic reference, which I discovered totally by accident misfiled in what has to be my favourite library ever (Leeds Central – Reference & Art), is PATTERN LANGUAGE by Christopher Alexander et al (0-19-501919-9). This copy had been lying on the shelves unloved and unread for over twenty years yet contains all the practical advice you’d ever need on how to make a house feel and work like a real home. As opposed to what has become the standardised conventional layout. There is even a chapter dedicated on designing outdoor spaces.
Our next break came when we heard about a novel self-build project in nearby central Leeds (Chapel Allerton), the construction of three Walter Segal houses. This is a system devised, not surprisingly, by an architect called Walter Segal. Who in a more enlightened period (the 1970s), worked for the London borough of Lewisham housing department and came up with the original idea of getting prospective tenants to build their own homes, using a method that anyone could learn. He then went on to develop this further by creating a national charity to disseminate the information for anyone to use. Sadly, I think the latter has now folded, though the homes that were built using this system are all still standing and in good repair. A testament to the brilliant design and the work of their builders.
The three families who were building the ones in Chapel Allerton were not only using his method but taking it one step further, by incorporating as many natural/ ecological features as possible. Though when I first visited there wasn’t anything to see, as work hadn’t actually begun. This proved providential, because it turned out one of the owners (Harriet Walsh) was looking for volunteers to help build theirs and that’s how I ended up working there, for nearly a year. An experience totally unlike any other and I heartily recommend volunteering as an intern for anyone who is thinking of self-build (or training to be an architect!). For starters, there are no conventional foundations and everything kicks off by putting together the entire framework. Which is assembled flat on the ground, utilising massive lengths of timber in much the same way as Amish barns are built in the USA. Then when they are all ready, each one is lifted vertical (using lots of people, or in this case a giant crane) and secured together with giant bolts. The floor joists are then fitted, to make it all semi-rigid, followed by the roof and finally walls. At which point the house is fully rigid and we had a weather-proof shell to work on the rest. None of us had ever done anything like this before, yet right from the start it all seemed really straightforward. The most important skill being able to measure accurately. Because even on a scale as big as this (a three-storey building built on a very steep slope), a few millimetres out anywhere can make all the difference. I still haven’t forgotten how to check everything three times before sawing, or how to test for squareness. You also become super-fit. Not only from hauling the huge pieces of timber around, often single-handedly and (it seemed) always across a very muddy and uneven site. But by drilling/ sawing/ nailing/ and bolting for hours on end, day after day. Often whilst bent double/ perched on a ladder/ balanced high up on a beam/ or wobbling about on the roof, the majority of the time in the worst sorts of weather. That winter was particularly awful, always below-freezing/ wet/ and often snowing. Made a lot worse by no proper provision for somewhere to go and thaw out, or a proper kitchen to keep us sustained with hot drinks and meals. Not even a conventional toilet. I have never felt so exhausted and hungry! But at least I got to go home each night, where there was a hot meal/ woodstove/ and a hot bath. Harriet and her family were stuck there for three long miserable years, camping out in a temporary caravan. At one point the standpipe (our temporary connection to the mains) froze and we ended up melting snow to make water for coffee. And this was after having spent the previous ten years working outside all year round – planting trees/ digging ponds/ assembling polytunnels/ hauling tons of gravel. Yet I was still not prepared enough physically. On top of that there was also the constant issue of safety. For even though there were rarely more than two or three of us there at any one time, the potential for getting hit/ cut/ or crushed by things seemed to be endless. Even kitted out in all the right gear, including a proper hard hat/ work gloves/ and steel-toe-capped boots, I still managed to fall from the upper floors twice, get hit by tools and materials falling from above and electrocute myself. Any of which could have been fatal or worse. Add in the financial pressure they were under the whole time, not surprisingly this did not become our system of choice.
Over the years that followed we encountered many more examples of self-build and natural/ ecological construction, including:
straw-bale/ a wooden pyramid/ adobe/ adapting shipping-containers/ yurts/ tepees/ earthships/ even a family who’d literally burrowed into the side of a hill with a JCB. None of which actually turned out to be anywhere near as simple, healthy or cheap.
But we did at least learn something. Like what to avoid. That just because something is new doesn’t necessarily mean it is any better. And most important of all, the environmental cost of building new is unacceptable. The only reason there is hardly any species diversity left in the UK is because we keep destroying their habitats by building on them. Plus there’s also a huge environmental cost elsewhere on the planet to produce all the materials this requires.
Creating shelter has never been so unsustainable. The last time we could honestly say we were doing it without harming anything was around ten thousand years ago, which was the global population was no more than a million in total and we had been living for three-million-years nomadically.
The only thing we have found close to being sustainable since then, a system that offers tried-and-tested engineering/ is healthy to live in/ where the majority of materials required can be found on-site for free/ and makes all the rest seem ridiculously overworked and unsustainable, is the one most people, including us, always overlook. We had even lived in several, in Galicia/ the Alentejo (Portugal)/ and Andalucía. Traditional building methods.
In Galicia, until recently, they built with the local piedra (stone/ granite). Either using huge boulders, arranged dry-stone fashion, or carving them into blocks like massive Lego bricks. The roof/ floors/ windows/ and doors were made of the locally abundant sweet chestnut. Which could cope best with the wide range of temperatures/ humidity Spain experiences and already contained enough natural oils to preserve it from insect attack and rot. The roof was covered with thatch or shingles of stone. Typically these homes were very basic and small. The upper floor was used for sleeping and cooking, the lower for the livestock (utilising their heat to warm upstairs). In the Alentejo (Southern Portugal), where the geology is totally different, the most readily available material was shale and this used to create a process they call taipa, which basically means rammed earth. It has a much lower weight-bearing capacity than stone, so they were built only on one level and with a narrow/ long profile, creating a series of interlinking rooms. The livestock housed at one end.
Both methods are the perfect combination of sustainable/ natural/ healthy/ energy-efficient/ and affordable. The thick/ solid walls (typically around a metre deep) possessing excellent thermal and acoustic qualities, so they never get too hot or cold. A small wood stove is enough to heat the entire space in winter. The roof is insulated inside with local cork. Humidity is effectively zero. No chemicals or artificial materials used. In fact, the only niggle we could find with this method was the windows, which had to be tiny and therefore let in very little natural light. But that could be solved by replacing some of the roof tiles (which are terracotta these days) with glass ones. The quality of light from above is also a lot better as well as an additional bonus of solar heat gain in winter (shaded by a blind in summer).
This then became our choice of design for building. Until we discovered how hard it was to find someone with the relevant experience, how much they would charge, and how many years we’d be kept waiting until our planning application passed through all the interminable and corruption-riddled stages at the town hall. Which explains why all new buildings today shun this method. Utilising instead, the vastly inferior and environmentally destructive method of building on greenfield sites with poured cement and cheap cinder blocks. On top of this, there were a vast number of restrictions and requirements for new builds that we didn’t want or pay for. It may sound crazy, but building standards have actually made house building more even environmentally destructive by demanding things we don’t actually need. Twenty years ago (in Iberia and Canada) there was none of this petty bureaucracy, no dictating what you can or can’t build, no exorbitant fees or backhanders to pay. If you wanted to build in the traditional way the materials were on-site and free, you built it yourself with the help of family and friends, often free too, and had total control over the quality.
At that point we were left in rather a quandary, especially as by then we’d lost nine years trying to make then right decision. Now we had to factor in that wanting a new home is not only unsustainable but selfish. Imagine if everyone were to do this. How long before there was nothing left of the remaining species?
In the end the solution was quite simple. We stuck with the idea of having a home built using traditional methods, but shifted our focus to finding an existing uninhabitable building and repairing that using found and recycled materials. This would be substantially more expensive for us to buy (than a piece of land to build on), and a lot harder to find, but thereafter a whole lot easier/ quicker to finish. This is because the rules for renovation (at least in Spain when we did it) are basically do whatever you want and don’t bother the town hall about it. The other bonus was we could move in straight away and get the work done at our own pace.
Which left just the small issue of where to find this mythical ruin.
What we did know was we wanted a large piece of land, at least ten hectares (24.7 acres). Which sounds really big, especially if you’ve only lived in a city or town, more like a farm than a garden. But even with all that space around us it still actually meant we could end up being only a few hundred metres from a neighbour, and we didn’t want to live that close to anyone who didn’t share our views. Also, it takes a lot more land than you think to be totally self-sufficient sustainably.
Prior to leaving the UK in 2000 we’d already spent ten years there searching for a place we could live our new moneyless existence, but without success. Then we looked at Ireland. The people we got to know there were still living well on very little, but they also adversely affected by the social pressures of religion, state (especially the police), as well as alcoholism. Not the kind of world we really wanted to be part of.
Spain, we knew absolutely nothing about, it was just happened to become a place to head for and start our search. In Galicia initially, the NW corner of the country because it seemed like the weather there would be similar to North Yorkshire and probably less populated. It was. They also had religion too sadly, but the land was cheap and readily available. In no time we’d found a lovely old stone ruin in the Parque Natural for just 2000€ and were on the point of buying it. But did we really want to settle for such a bleak landscape, with weather which was either too wet or too hot? In the end the answer was no, even though we had by now wasted another 18 months searching.
So, it was back to living in the camper van again, this time crossing the border over into Portugal. Which proved to be a wonderful country in so many ways, especially the ordinary people. We lived there very happily for five years. It also gave us a unique insight into their culture. Which included the corruption and injustice meted out by the local police and town hall. As well as the arson propagated by timber businesses, which we witnessed many times and many of our new friends lost their homes and everything else to.
A spell in Canada followed that and remains our favourite place in the world The nature there is so awesome it has to be seen to be believed. Everything we could ever wish for and more, if only the authorities would allow us to remain there (they didn’t). Which is how, eight years after setting out, we ended up in back in Spain, this time in Andalucia. A region unlike like anything we had previously seen or imagined, but with exactly the kind of magic and adventure we had been hoping to find. In particular an area (Sierra de Aracena) which contained 183,000 hectares of lush forestry and very few people, with the most beautiful town we’d ever come across, with the friendliest/ kindest people you’d ever wish to meet.
There was just one compromise. The amount of land we could afford. After nine years our savings were now worth 50% less and we had to settle for just 2.5 hectares (6 acres), but El Pocito was perfect in every other aspect.
What follows now is a description of the house we renovated, how eventually it all worked and when we do find our next place, here in Shetland (or perhaps somewhere else), followed by details of that.
*
how our off-grid house in Spain worked
(and there are more photos on my facebook page)
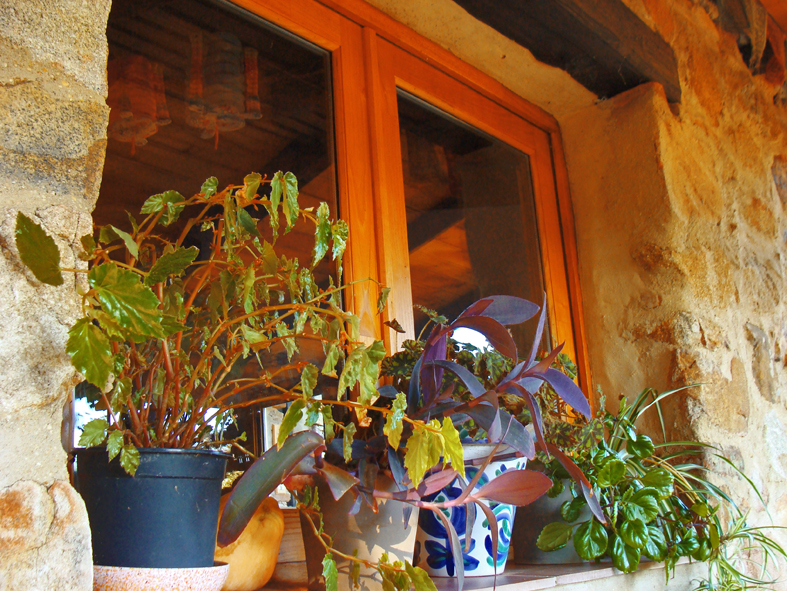
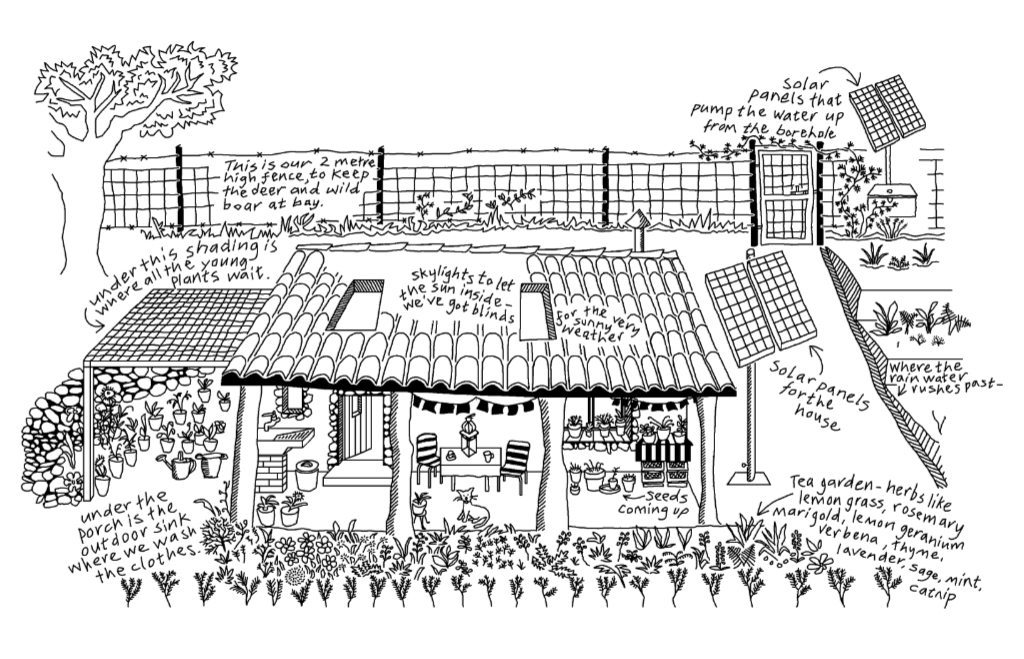
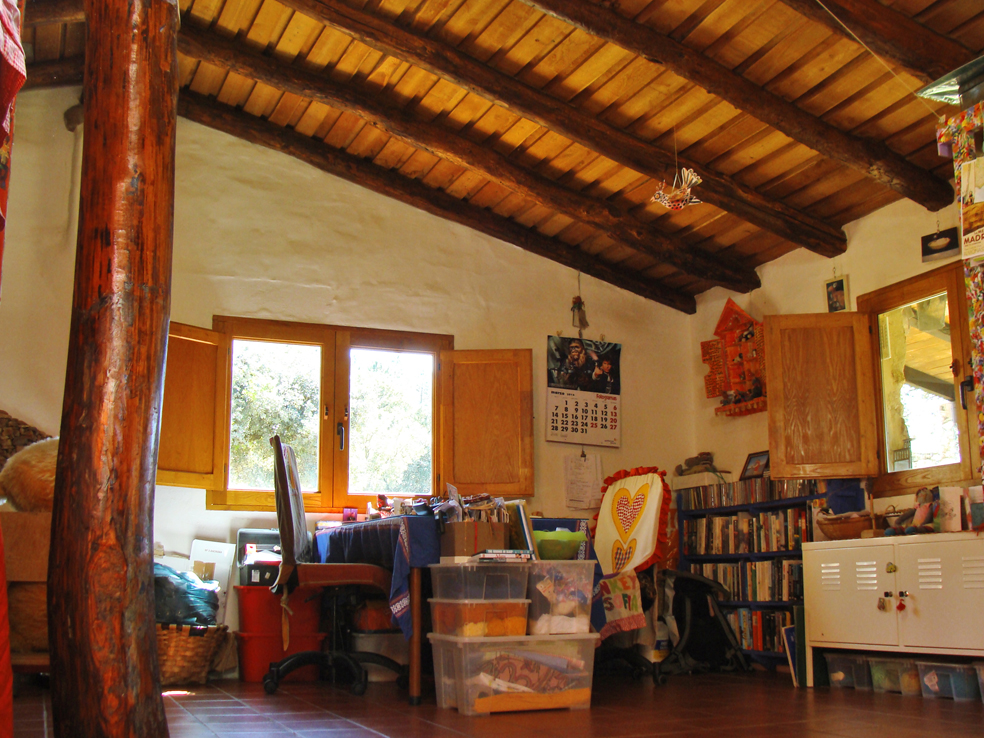
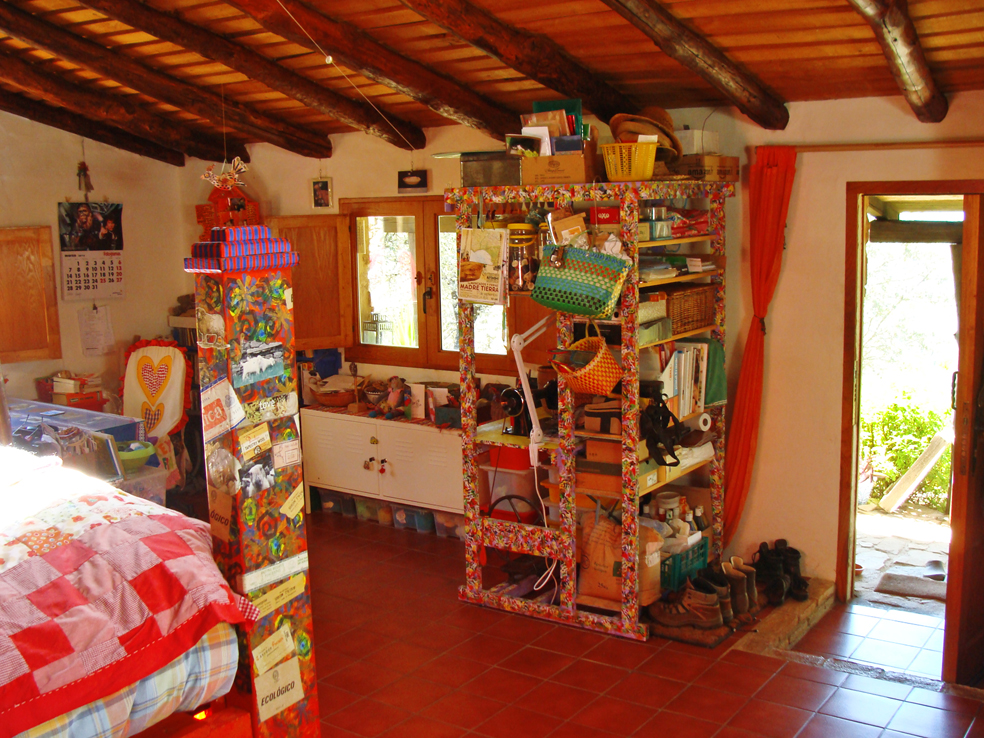
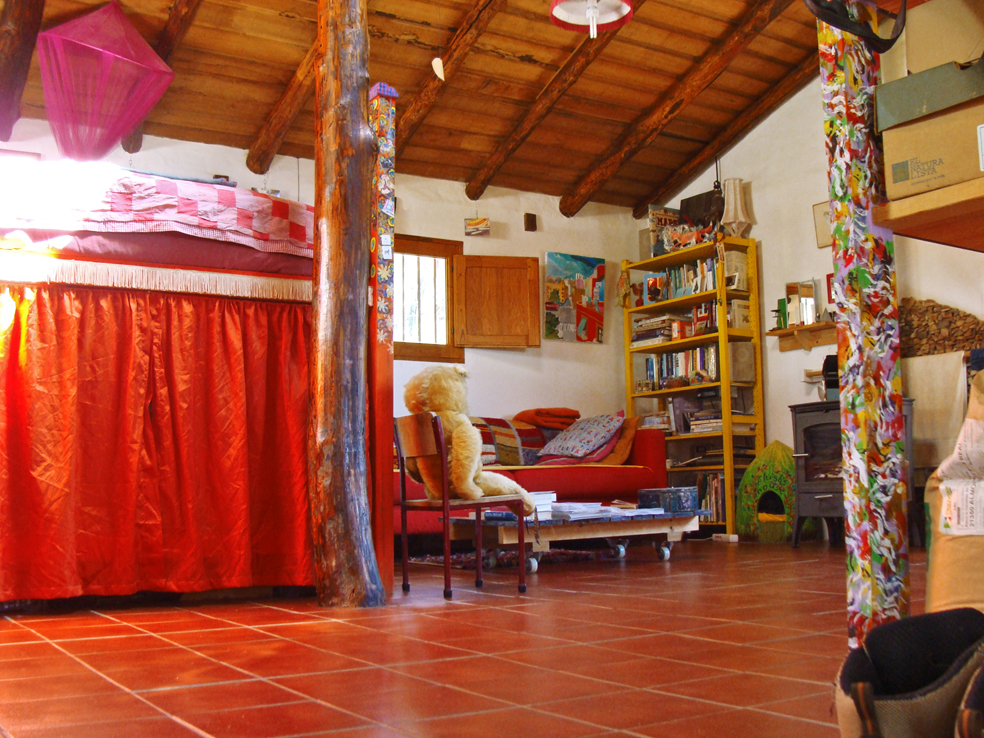
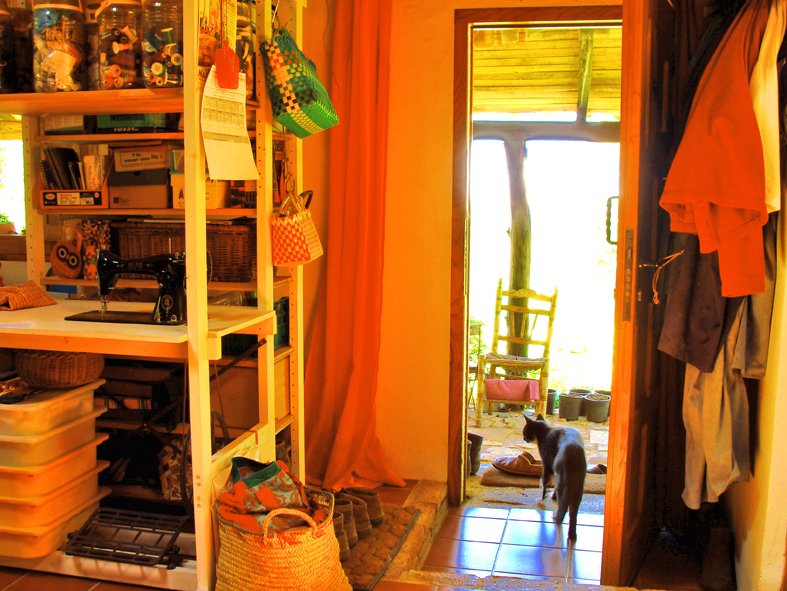
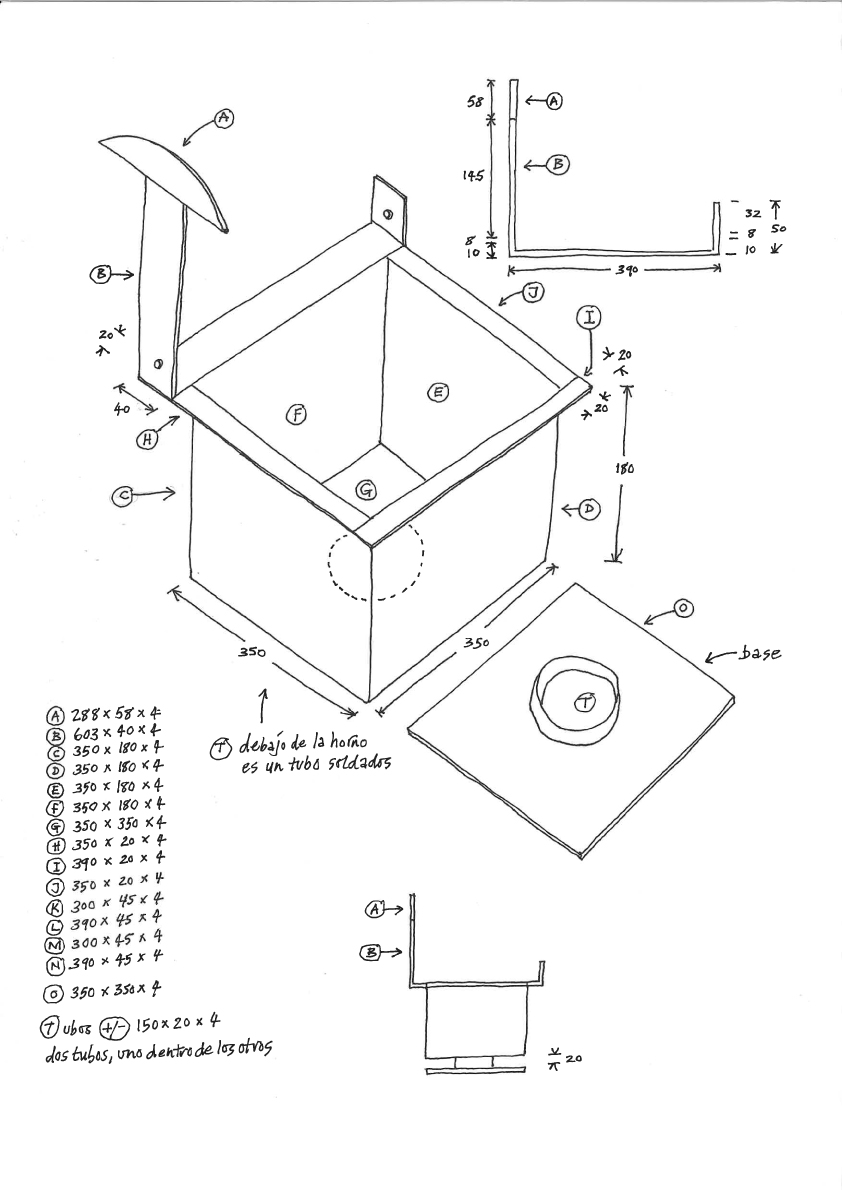
Basically it was just one big room (42 m2 – 6 m x 7 m/ that’s 19.6 feet x 22.9 feet in BREXIT speak), with no internal divisions apart from in one corner (1.5 m x 1 m) a tiny space partitioned off by two low walls, serving as our larder. The benefits of a just one room being there’s no wastage in corridors, you can change the layout as often as you like and there’s plenty of natural light. In this case we had at least one window in every wall and two skylights in the roof, though more of the latter would have been even better in hindsight. Heating the entire space was a lot easier too, requiring just one small wood stove.
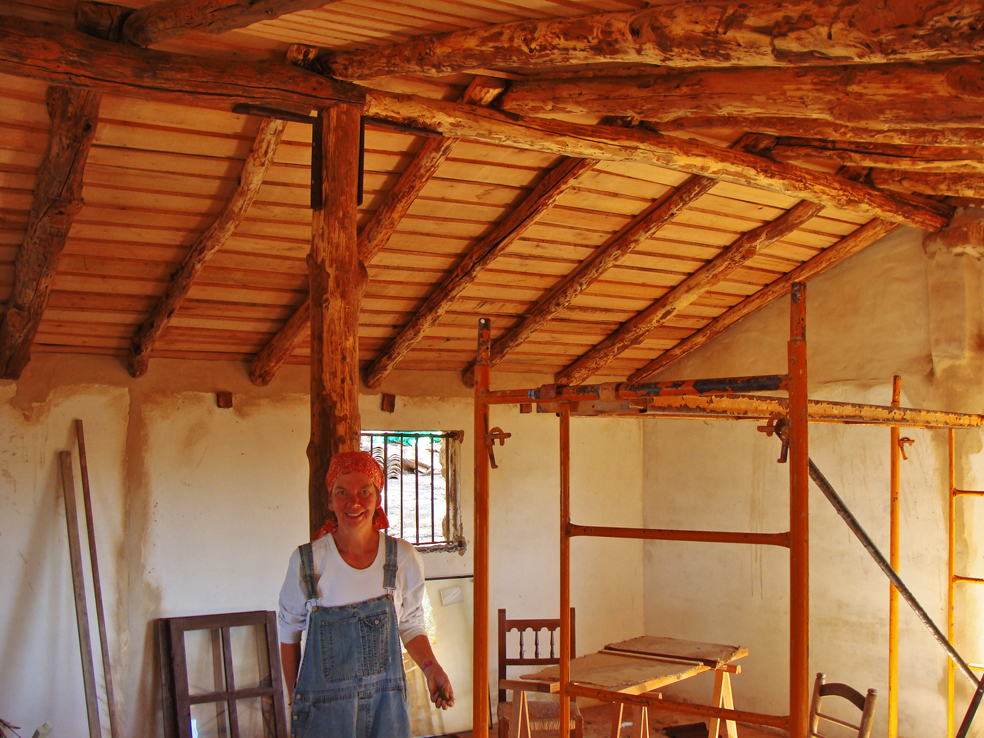
The renovation took three months. We began by knocking out the existing three partitioned rooms, along with an enormous fireplace and ceilings that were far too low for my height. Initially there was a worry it wouldn’t work, either as a living space or structurally (that the roof would fall in without the walls), but our hunch proved correct. The lack of ceilings made it look much bigger. More vertical space also allowed us to build vertically, creating valuable storage underneath. All in all, it’s the best home we’ve ever had.
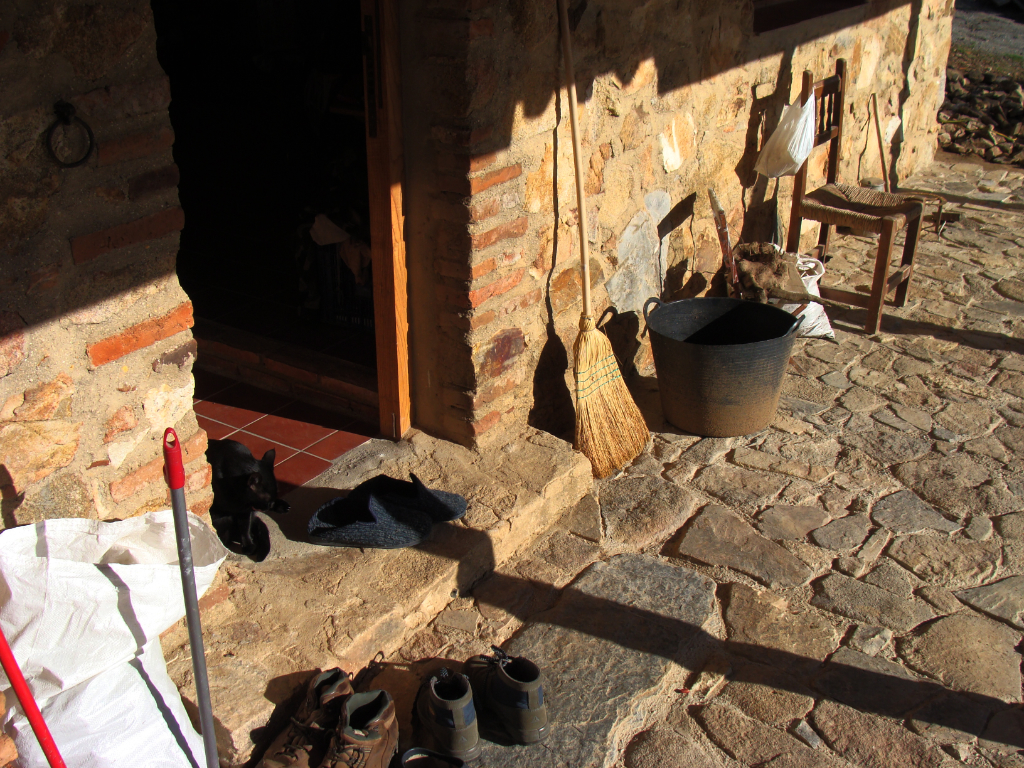
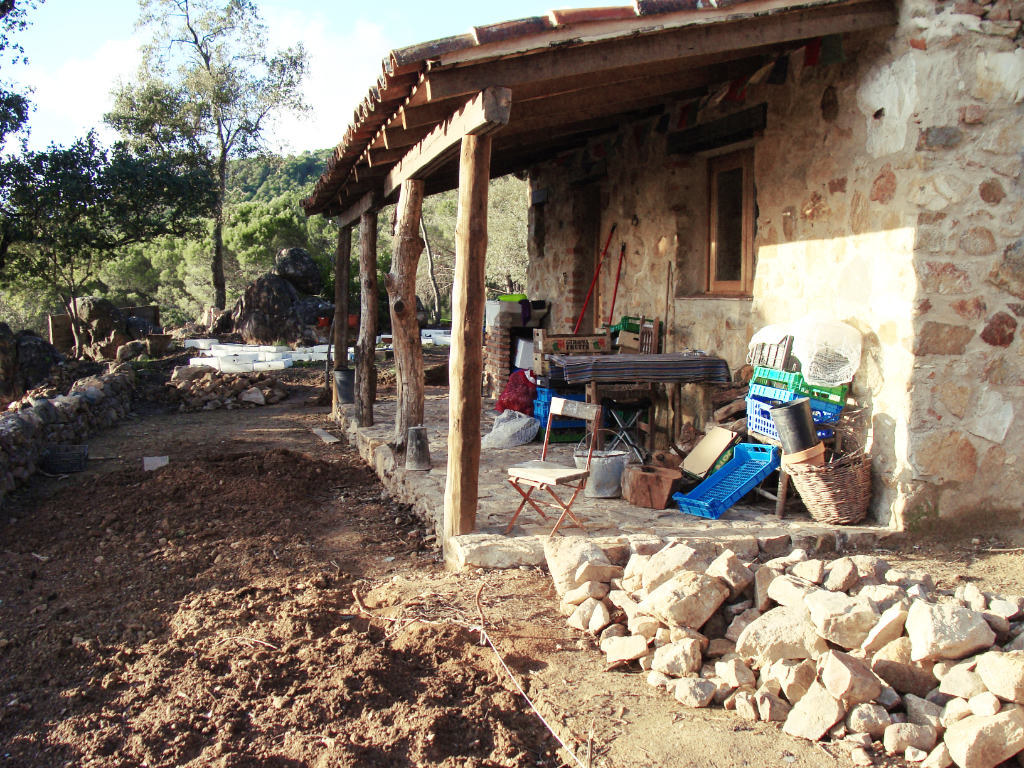
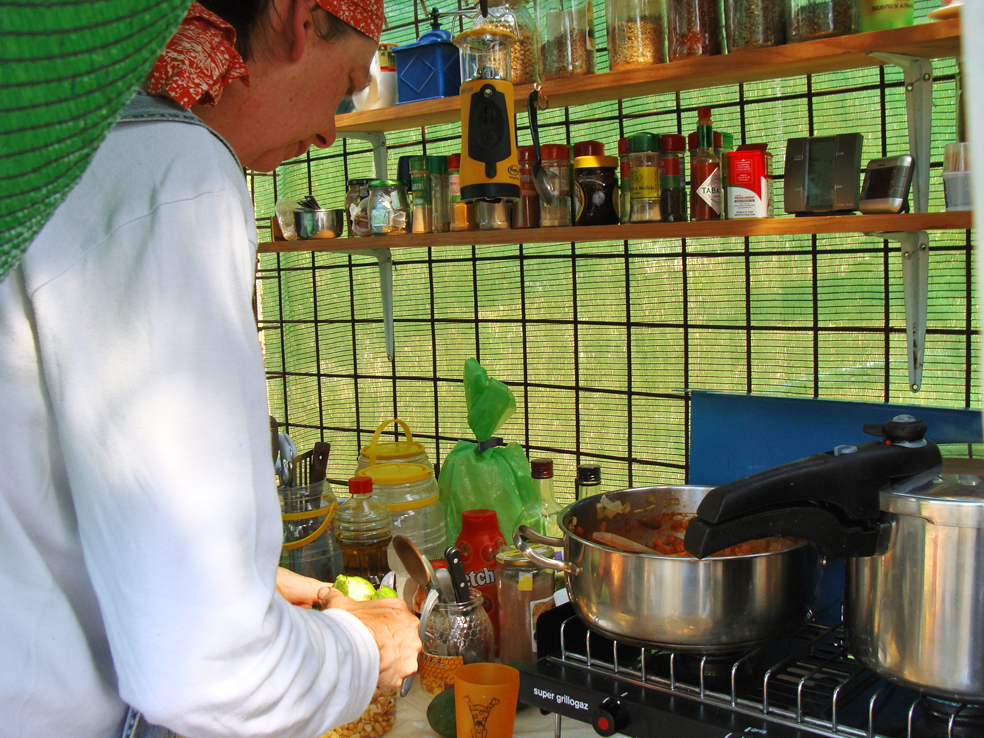
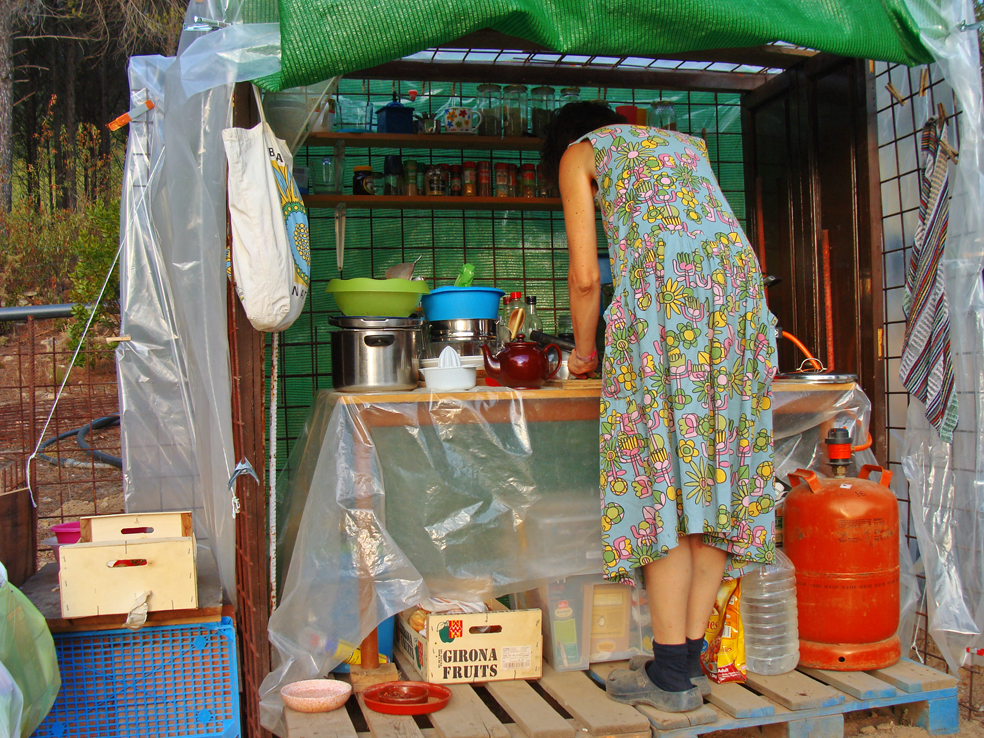
Here are some photos (click on them to enlarge) of the gutted space and our camp site while the work proceeded, including an outdoor kitchen.
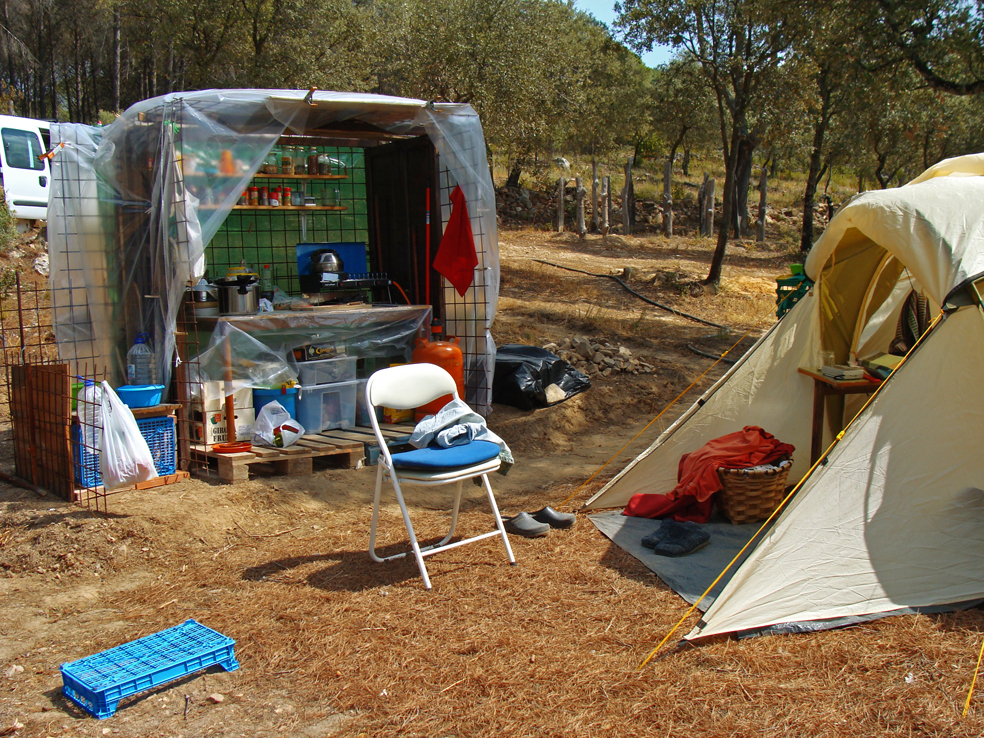
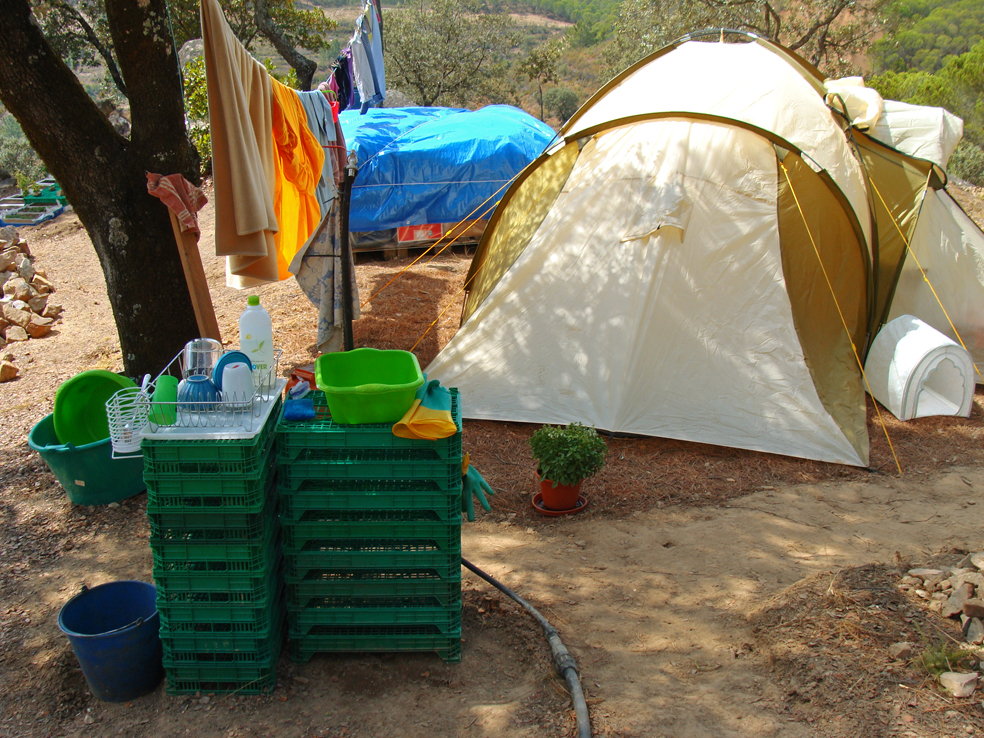
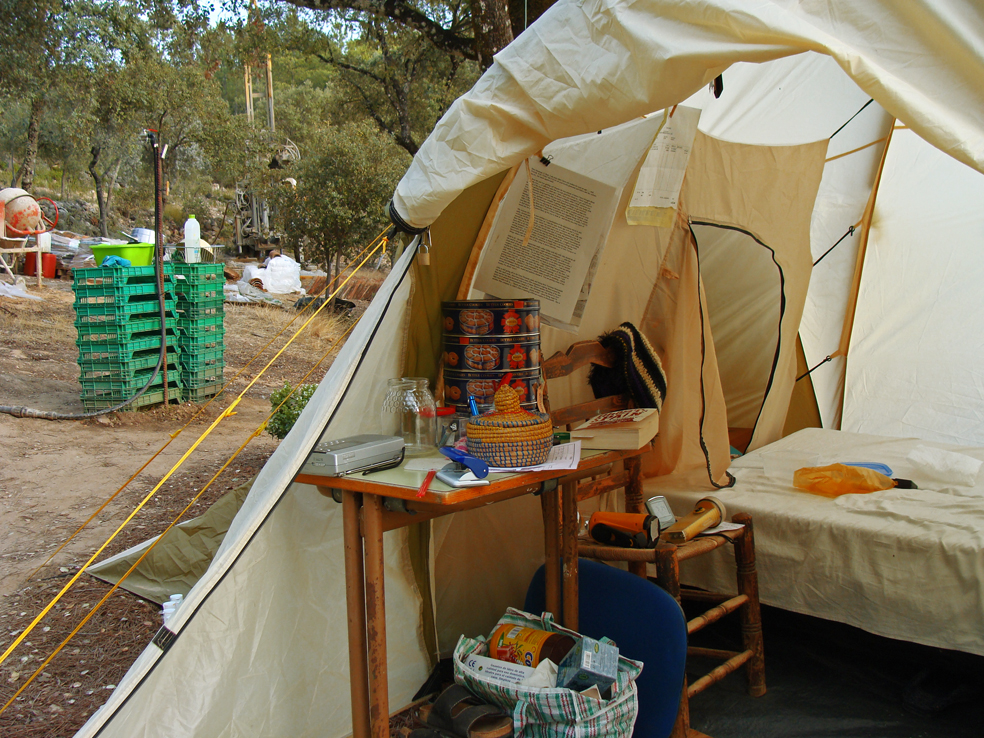
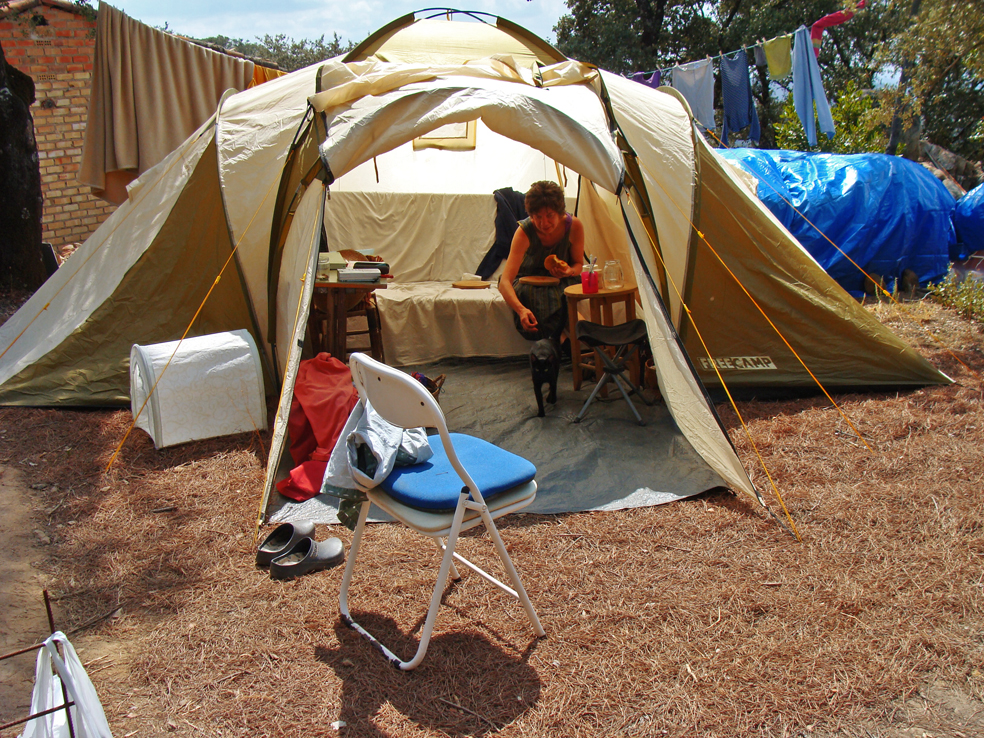
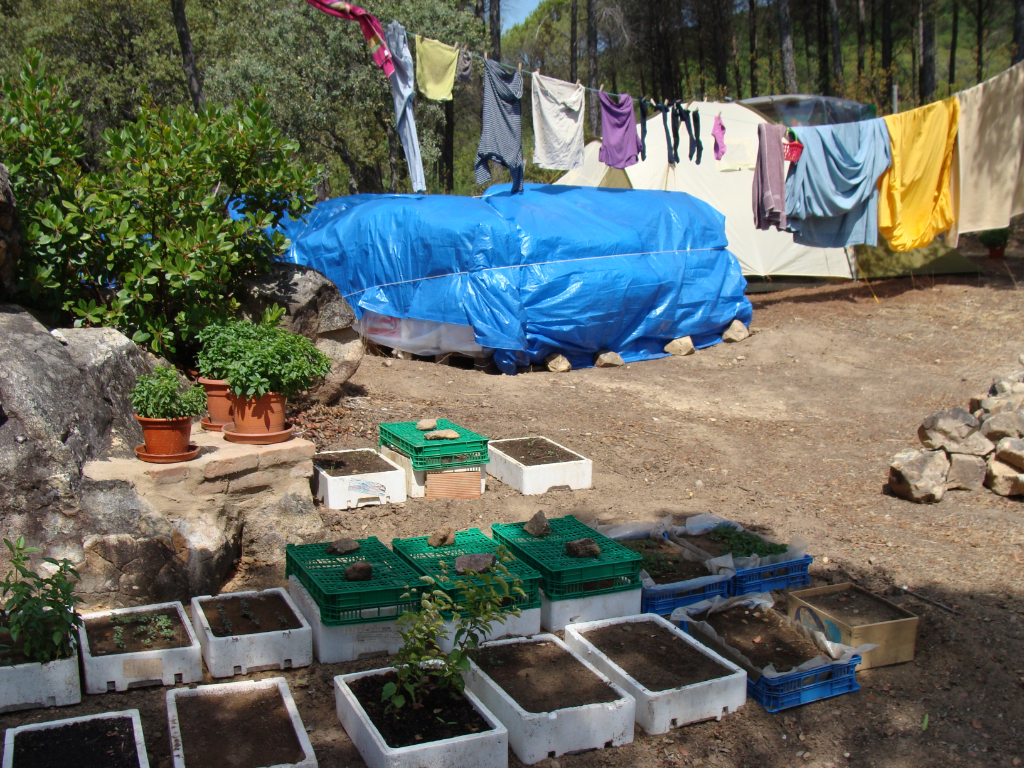
swipe to see more photos
*
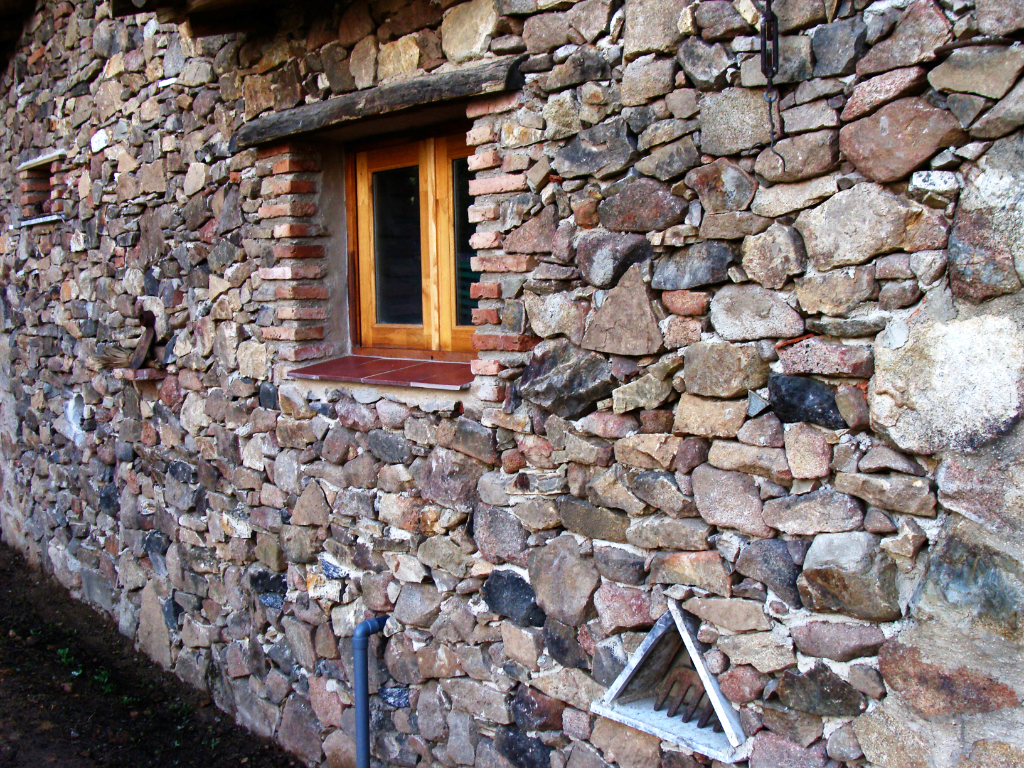
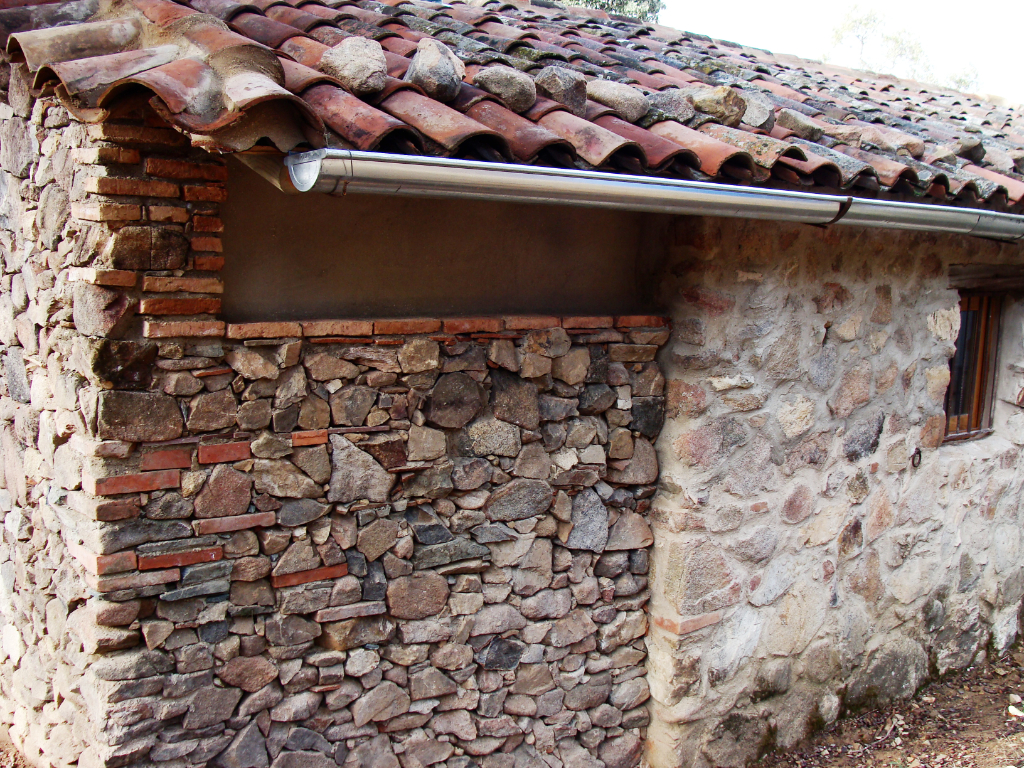
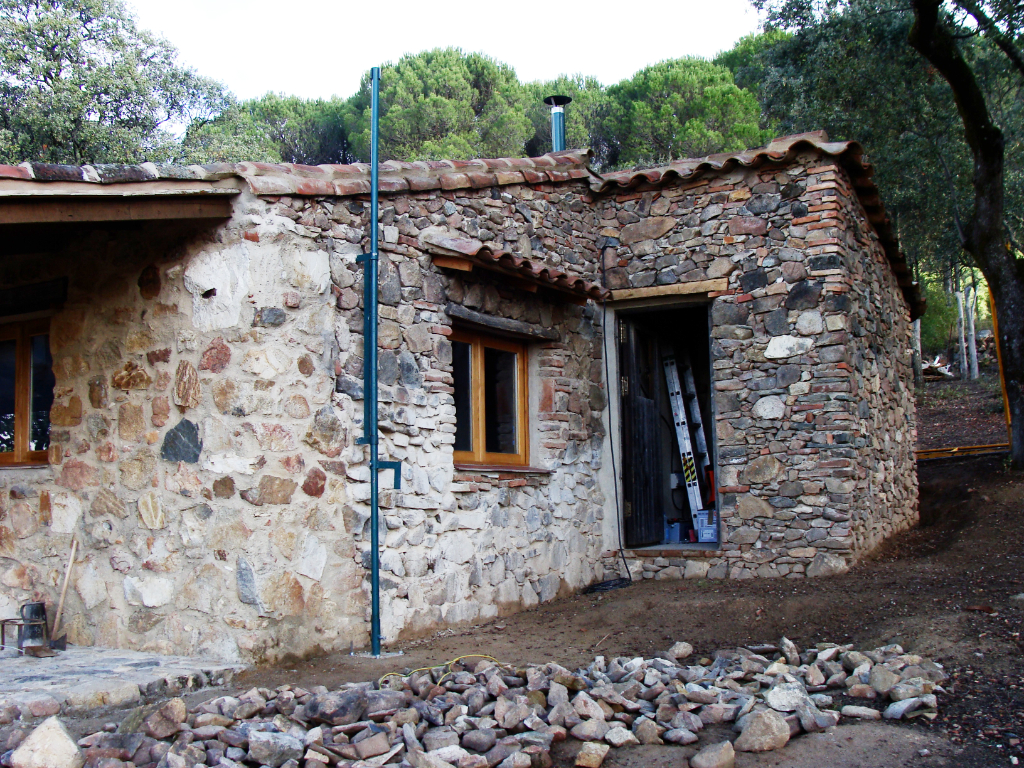
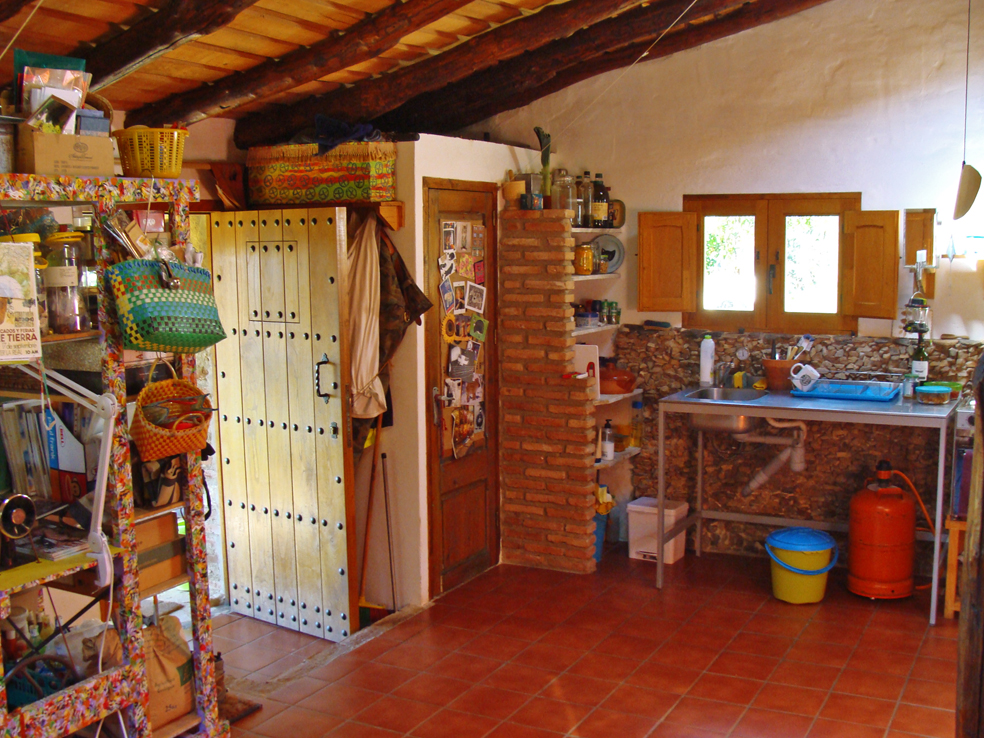
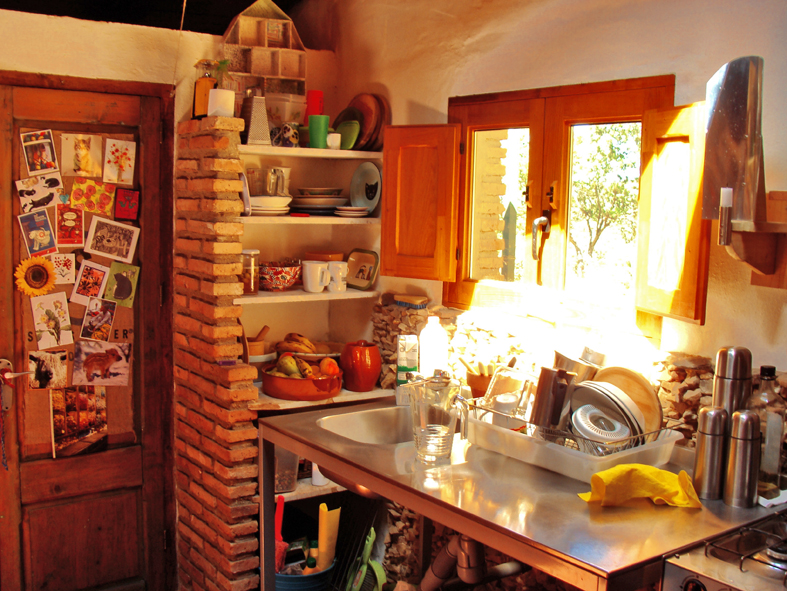
the walls
Are made from large pieces of stone (all found on-site), faced inside with a layer of locally recycled brick. On top of that a skim of local cal/ lime cement. Together it is thick enough to keep the temperature inside cosy throughout the year.
*
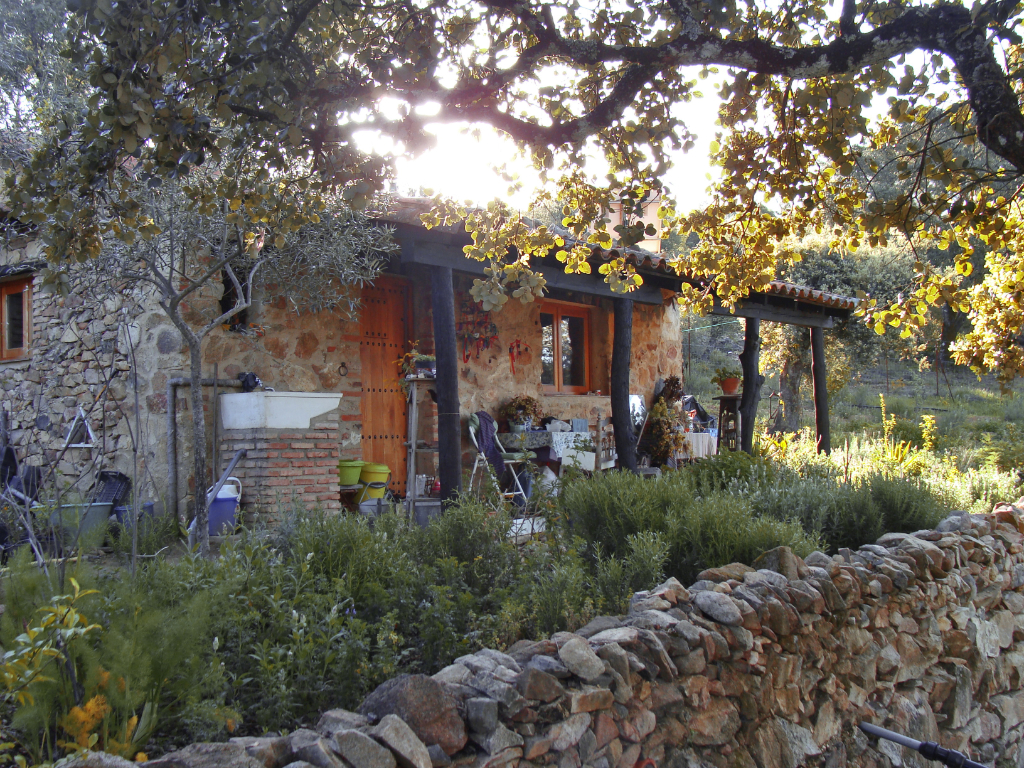
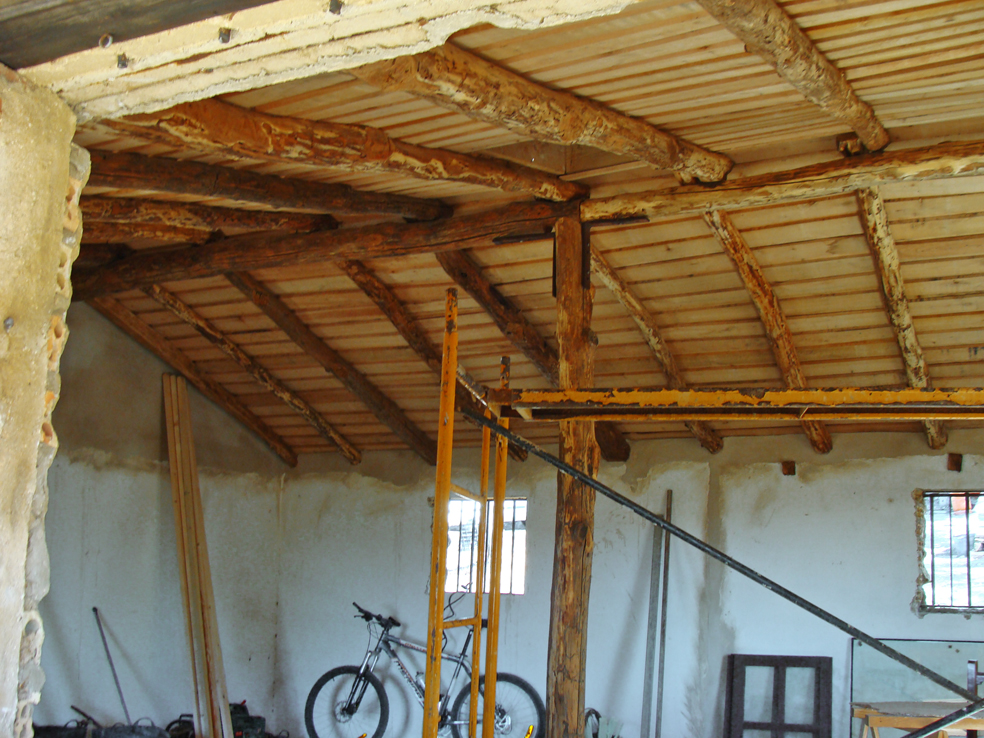
the roof
is mostly constructed from recycled materials. The weight bearing frame of sweet chestnut beams came from a house being demolished nearby and is probably about 200 years old. On top of which have been laid new chestnut planks, then insulation, topped off by locally salvaged terracotta tiles.
*
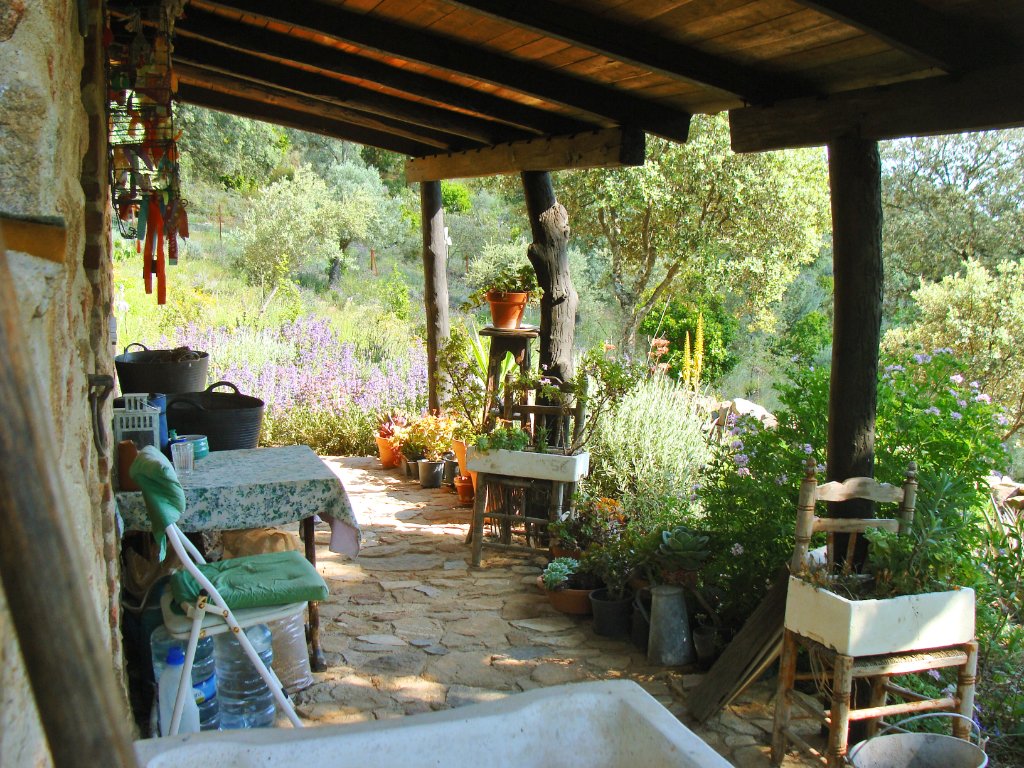
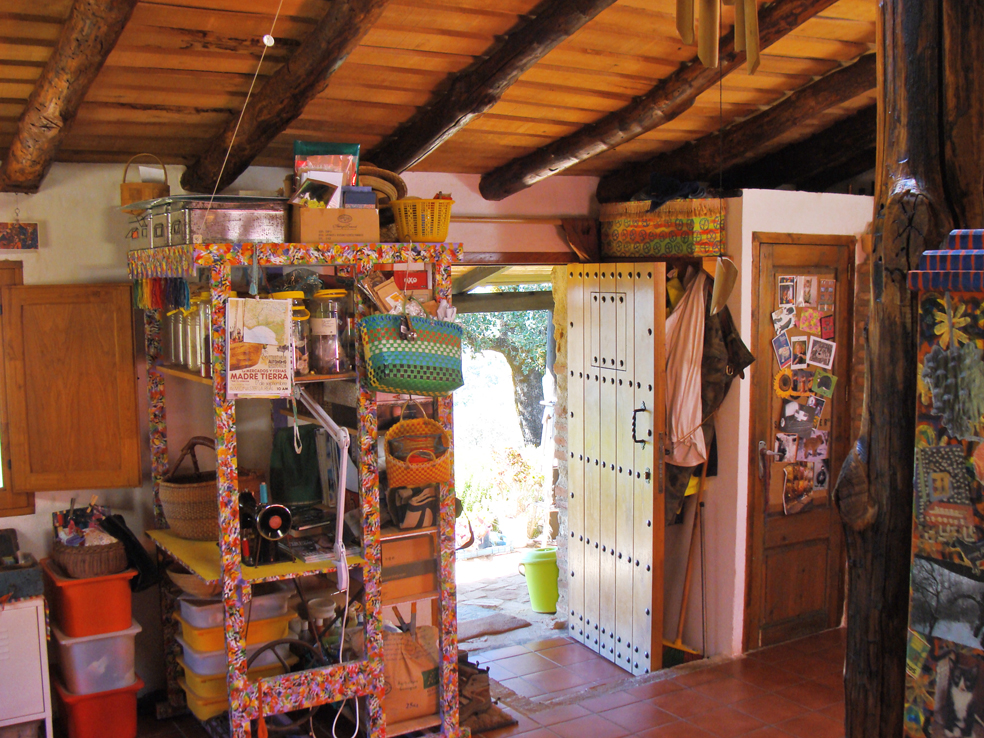
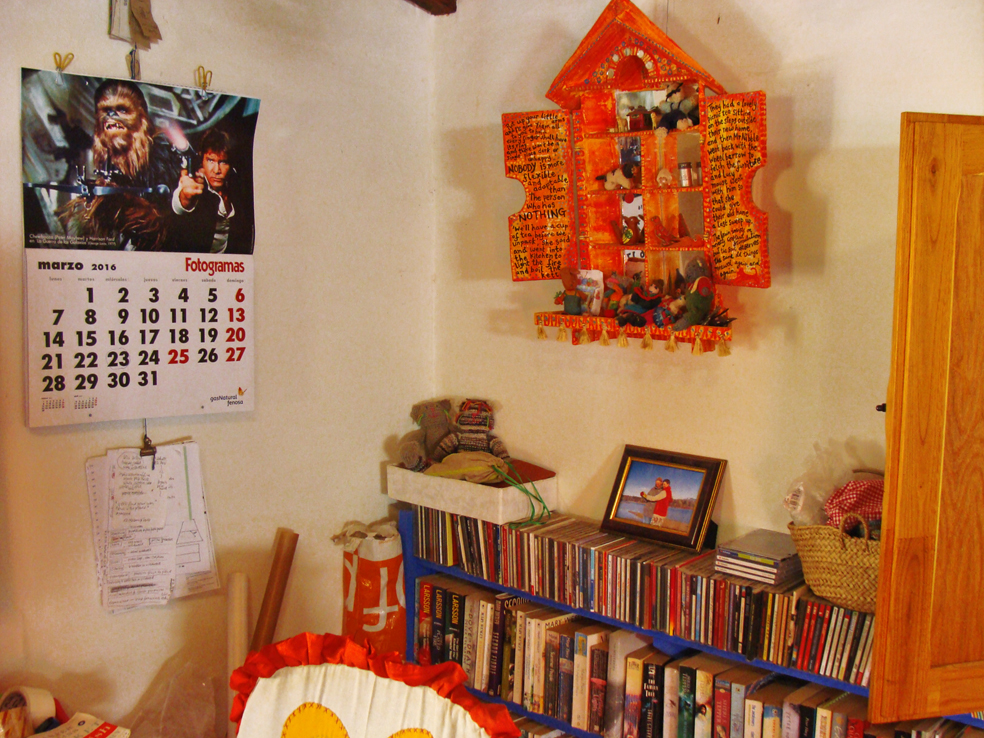
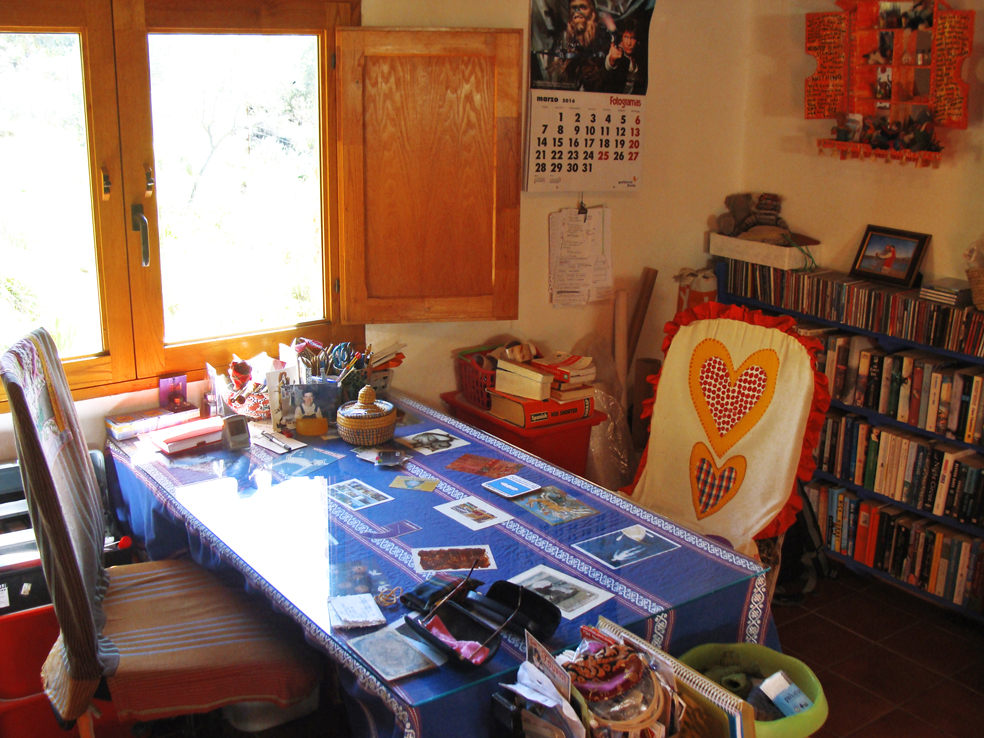
the interior
Here are some photos of what it looked like when renovated.
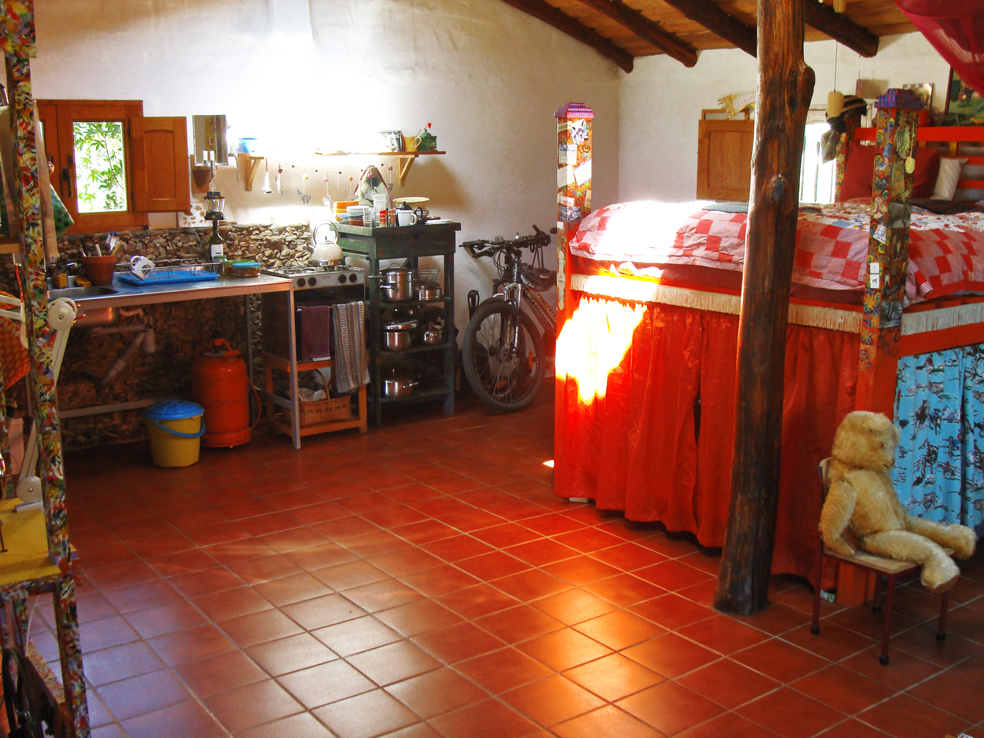
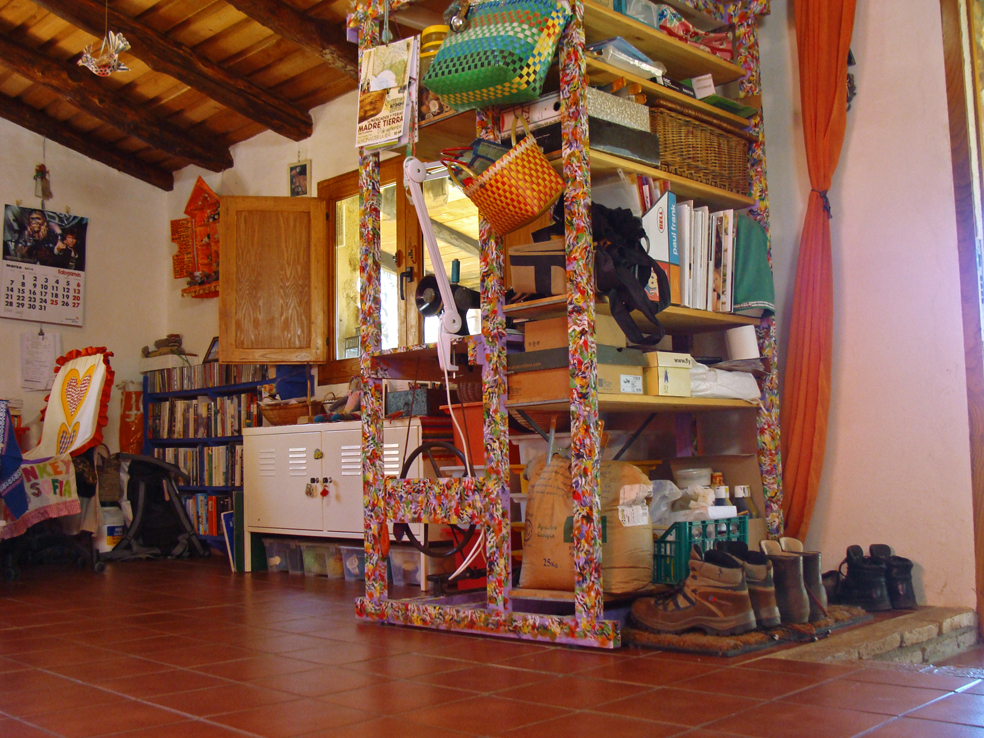
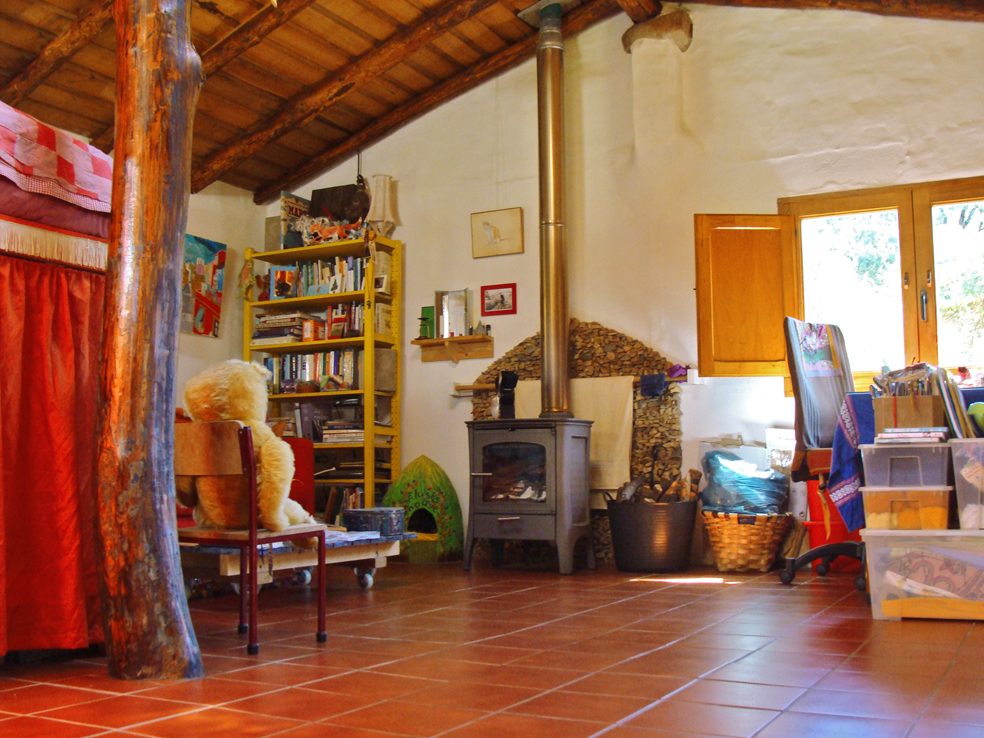
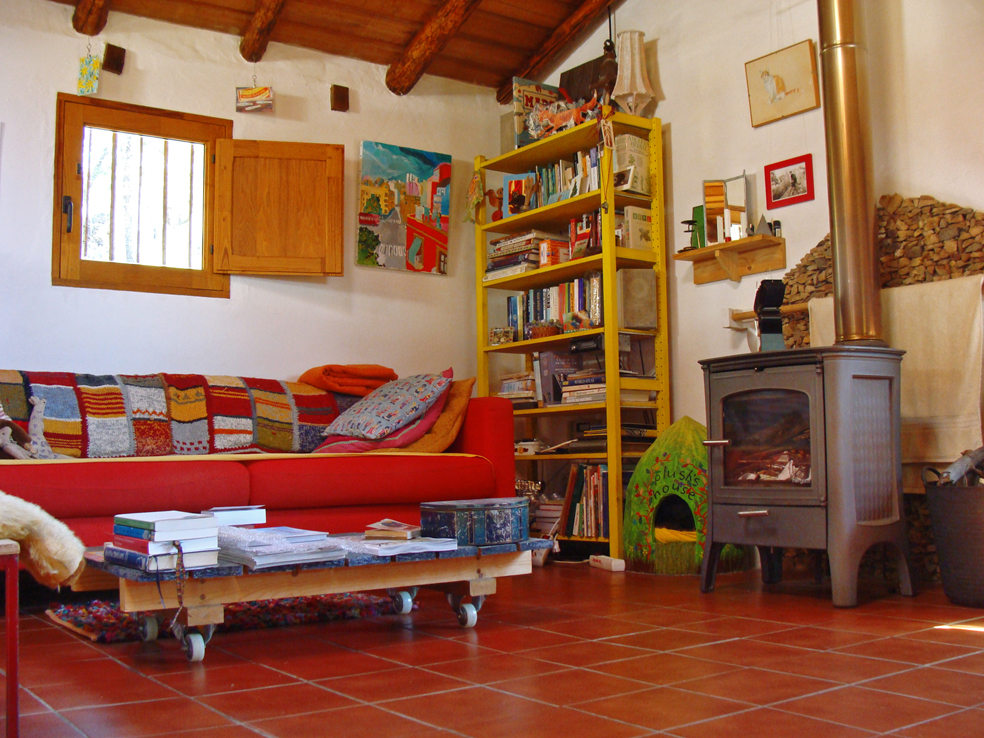
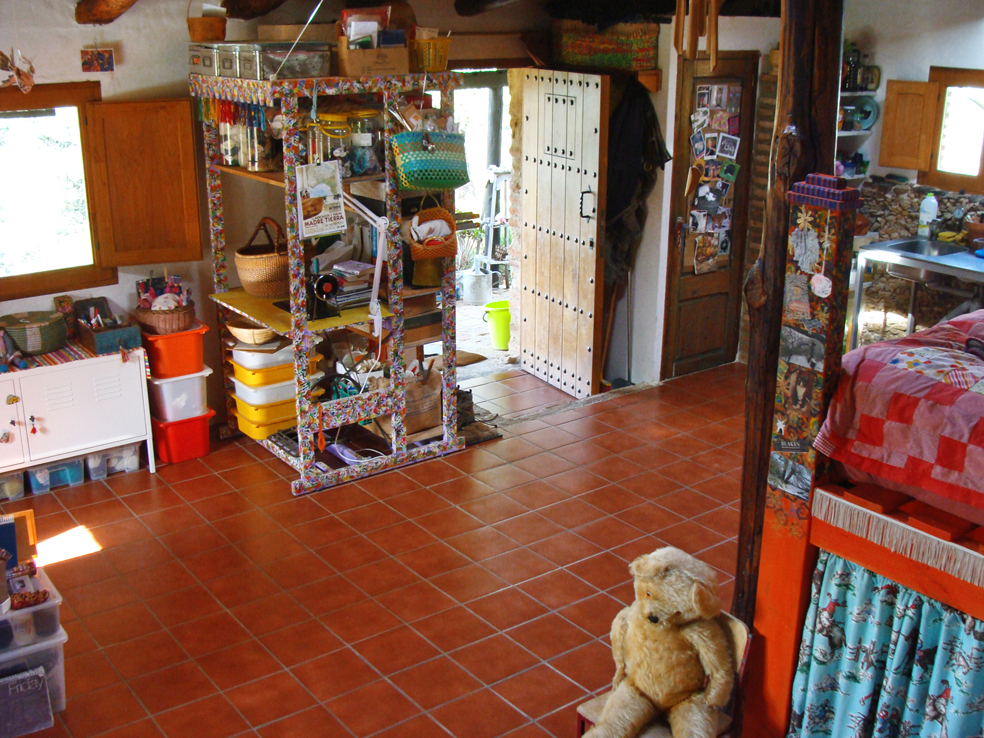

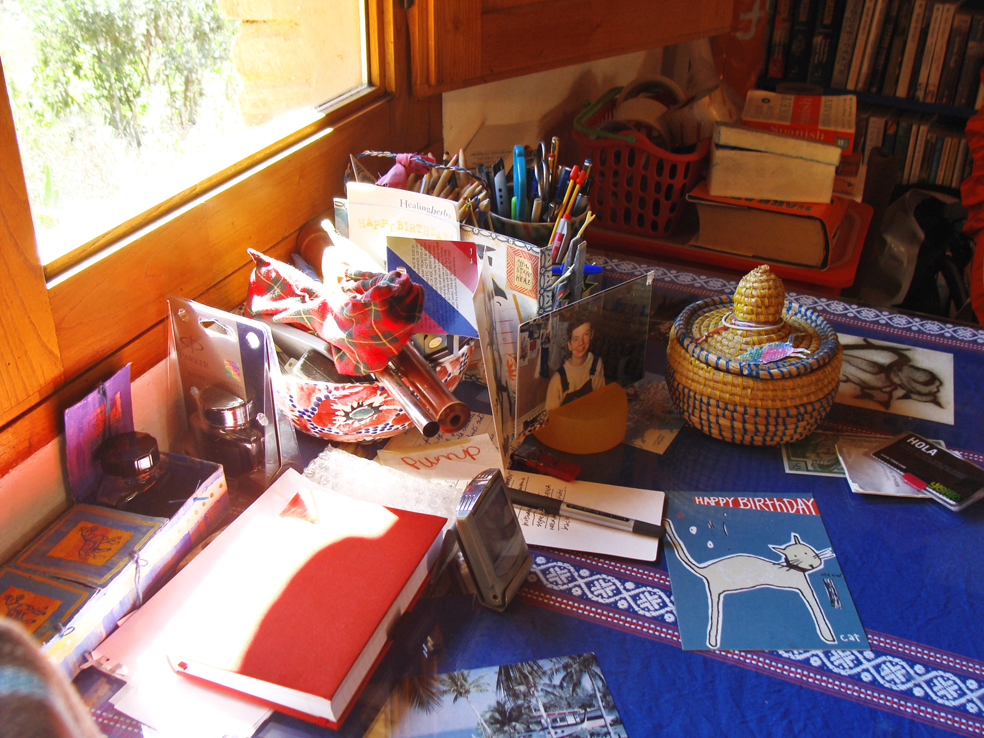
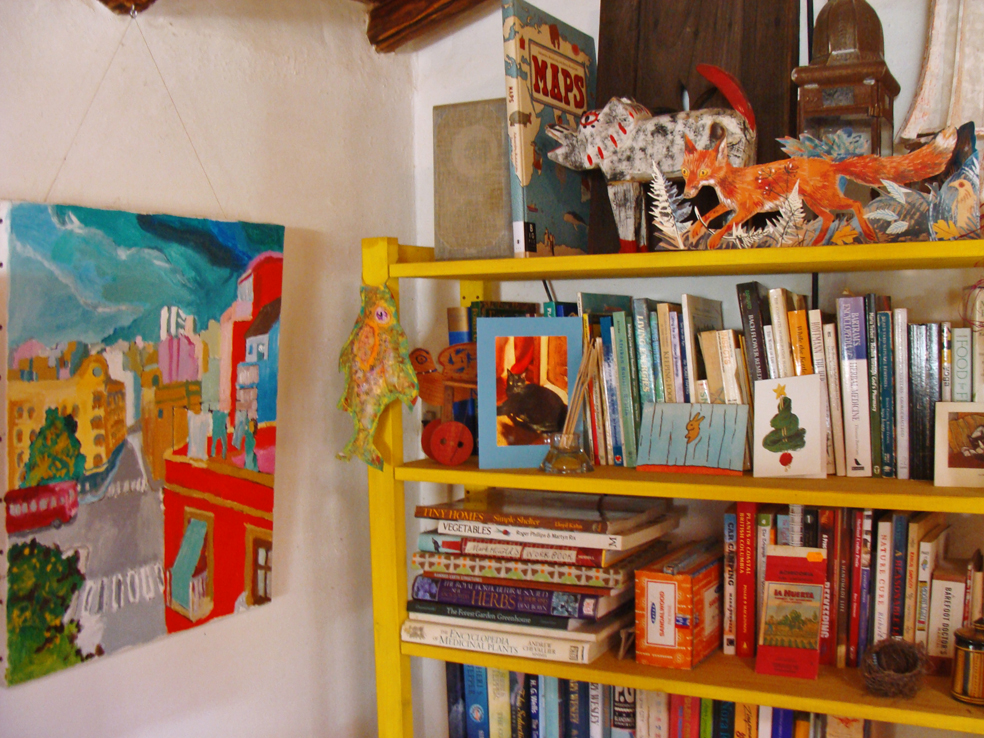

swipe to see more photos
*
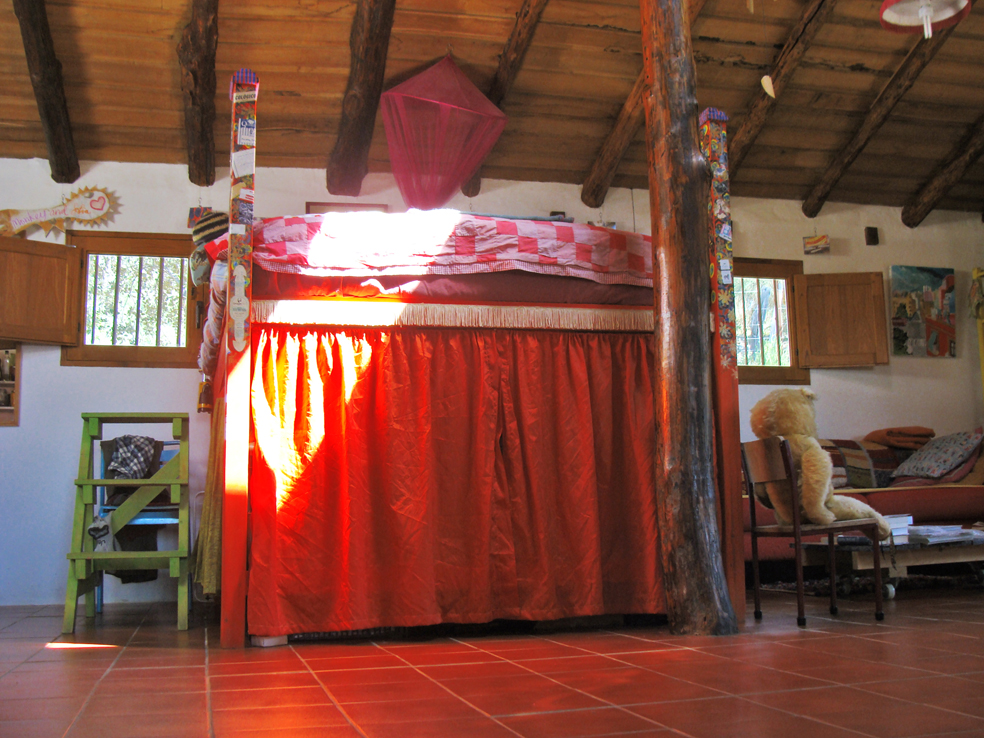
the bed on a platform (with storage below)
With no previous experience of making something this big it took me forever to design and using only hand tools about three months to build. Total cost was 130 euros (about £110). After ten years of use it has stood the test of time and taught me a lot for future projects. Plans are available as a free download below. Not shown are two cross braces, added later, one at the head and one at the foot, which stop any sideways movement. Made from 15 mm x 3 mm steel strips.

click here for download of platform bed drawing
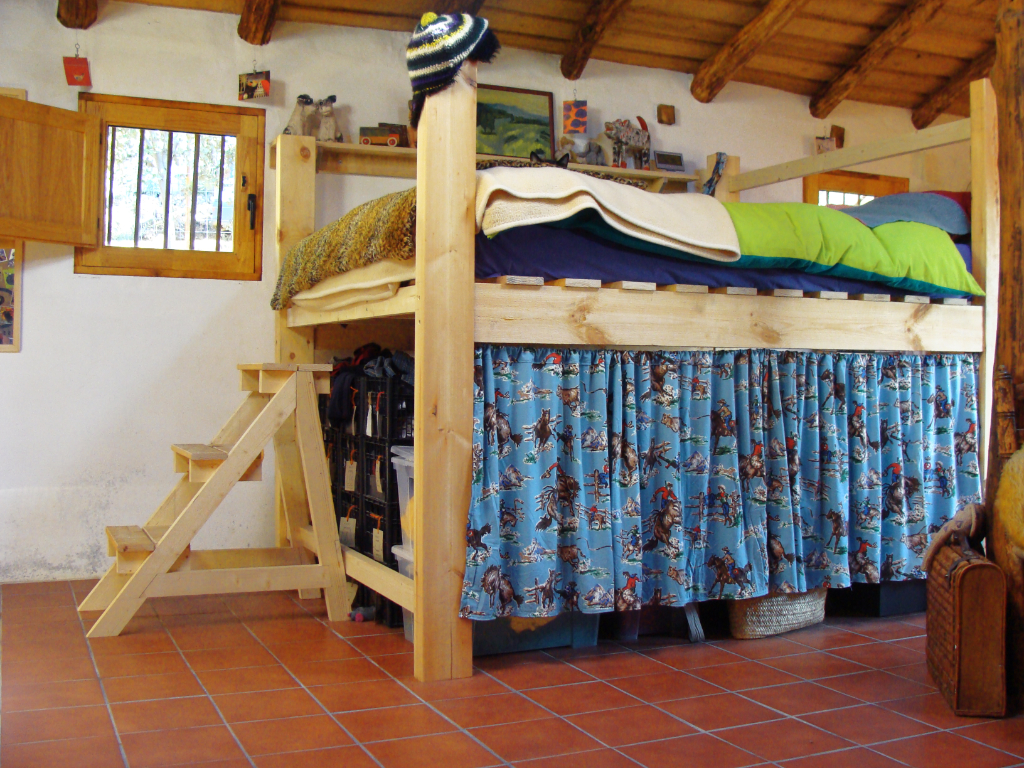
The bed before it was painted
*
hand tools
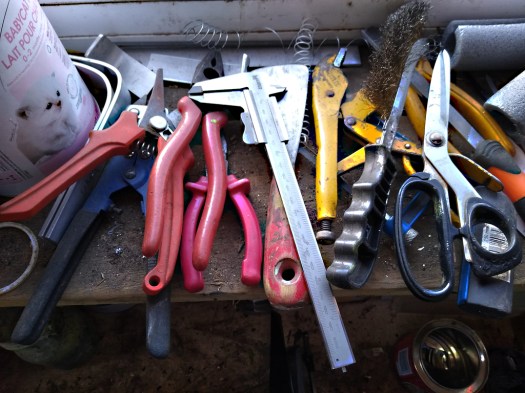

swipe to see more photos
Without electricity, the job of making anything takes on a whole new meaning.
It’s more time-consuming, but also more satisfying. And all you need are a few basic tools (most of which can be bought second hand), plus understand how to keep those that need sharpening in peak condition.
Here’s a list to get you started:
spirit level – 6” chainsaw file (buy in packs of 12) – bastard file – micrometer – pop riveter (+ relevant drill bit + blind rivets) – set square – tape measure – chisels (6mm + 12 mm + 25 mm) & mallet – bench vice (the small 3” size is fine, but try and get one with a swivel feature) – wood saws (22”/ 550 mm + 14”/ 360 mm) – hacksaw (12”/ 300 mm blade, get a selection of these) – (hand) drills (with a full set of drill bits for metal/ wood/ masonry + countersink) – clamps (3+) – workbench (or portable version) – adjustable spanners – screwdrivers – sandpaper (much cheaper bought on a roll, 60/ 80/ 120 grit) – wirewool (finest grade) – wood planes…
If you buy new, choose reputable brands and avoid large resellers like Amazon/ eBay, where counterfeit goods abound.
To sharpen anything metal start with a bastard (coarse) file, in one direction, away from you. Then finish this off with the finer chainsaw file. The deeper the edge you have the longer it will stay sharp. An edge is sharp when you can no longer see any metal, looking down on it from above. With chisels and planes always measure the length of the slope from the edge before sharpening and make sure to keep it at that length.
*
heating
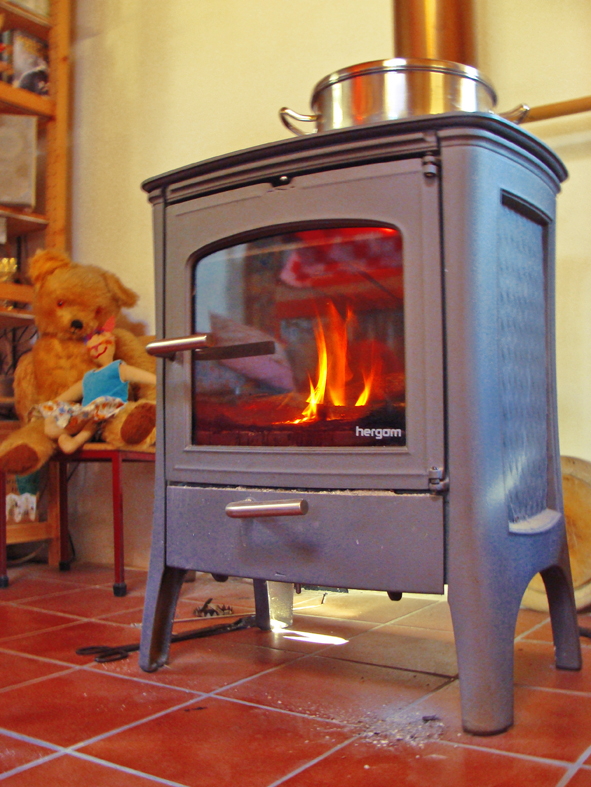
I had no idea this part of the house design would be so complicated, or important to get right. We had wood stoves in the UK for decades, but assumed in Spain there would be no need for one. Wrong, very wrong. It gets cold everywhere in the world and in Spain that’s from November through to May, no different really to the UK.
At El Pocito we decided to go for a wood stove again because they were familiar with them and had hundreds of trees on site. A good choice, it kept us very warm and snug (always 20 C or above) for free over the ten years we lived there, but in hindsight we could have done it a lot better.
Like putting in more insulation (even though there is plenty), not only to keep the house warmer in winter but but cooler in summer. The traditional houses in town have walls of stone or rammed earth over one metre thick, which proved to be the bare minimum when it can reach 50 C outside in summer. Also, we should have used natural cork in the roof (which wasn’t available locally then), rather than conventional manmade materials.
What we did with the floor though was spot on. It already had a very thick lime cement base, on top of which had been laid 30 mm of reclaimed (but very bizarrely mismatched) terracotta tiles, so we added to that with yet another layer, making the floor a great heat store.
Having triple glazing in the windows would have been better than the double glazing we went for, but the shutters we had made for them were an excellent idea, making a huge difference to both keeping the heat in during winter and out in summer. Good sound insulation too, miles better than curtains or blinds. You could feel the difference the moment they were opened in the morning. We had a local carpenter make them from local sweet chestnut and they look as new today as they did then.
Our single exterior door should have had another door added further inside, creating a lobby/ buffer-zone for heat loss/ gain.
Most important of all, we should have added a lean-to greenhouse to the entire SE-facing side of the house, at least 3 metres deep, to allow the winter sun to heat the air inside and trained a grapevine across it to provide shade in summer.
I would have also liked an EARTH TUBE. This is a 10 cm diameter tube that is buried 3 m deep in the ground outside and is 30 metres long. With a small solar fan it takes in air from the outside, warms or cools it underground and aids with combustion of the wood stove.
The wood stove we wanted for this was another MORSØ, because we’d already had two in the UK and they functioned more or less fine, but they don’t sell to Spain. In fact wood stoves aren’t that popular now so there is only the national brand to choose from, HERGOM.
The stove we chose unfortunately got damaged in transit, but a replacement didn’t take long to arrive and over the ten years we were there it functioned okay. The firebricks cracked regularly, needing replacement, but they could be bought for next-to-nothing at any builder’s merchant and easily cut to size. What I particularly liked was the way the rear fitting flue (a 90 degree elbow) was made of the same cast iron as the stove, and it and bolted on, making the task of removing for cleaning really easy. MORSØ could learn a lesson from that.
What I didn’t realise at the time though was that most wood stoves now come with more than one way of taking in air. In the past there were usually one or two vents, either just below or above the glass, and another at the back. Both of which could be closed off, effectively starving the fire of oxygen and putting the fire out, a great safety feature if it ever got out of control. Now however, there is another source of air, hidden away, and this allows a draw from the room even when the stove is shut down. Not only potentially very dangerous, but when the fire isn’t in use heat in the house soon disappears up the chimney. Or worse, condensates in the flue and drips down as water (which on a flue that enters the top of the stove can destroy it). The only way to get round this is to make sure when you buy a wood stove there is the option of fitting an exterior air intake. This is a tube that bolts onto the back of the stove and goes outside to get the air from there, which is how coal fires used to work back in the 1920s+. This should also be considered if your existing wood stove (even if it doesn’t have this option) smokes a lot or has problems staying lit. The reason for this being your house is so airtight the stove can’t draw sufficient air for combustion to take place (you can check this by opening a window or door when it happens). Also, if your wood stove is in a van you will need this for it to function efficiently and safely.
There was another stove option, and that was to build a (Finnish) MASS OVEN/ ROCKET STOVE. These are hand-built in-situ and made not from metal but firebricks, so stay warmer longer. It is claimed one firing will keep the ambient temperature of a house constant for up for 24 hours, as opposed to just the evening. Hard to believe but they are very popular in Scandinavia. They can also incorporate an oven as well as heat water. Facebook hosts many groups that contain designs/ courses/ and help.
Operating any wood stove is an art, each brand and location has its own quirks. If you have never used one, here are some of the general rules:
● Use thin logs (30-50 cm) rather than thick.
● All types of wood give off the same amount of heat, when measured by weight.
● The longer wood is allowed to dry (6 months minimum) the better, both in terms of heat and preventing the chimney from catching fire.
● Maintaining a thick bed of ash is a good thing.
● Recycle the rest of the ash in the compost heap (never compost or bury coal ash, it is toxic and possibly radioactive).
● If the stove is made of cast-iron never heat it up quickly, this could crack the castings.
● Use solid stainless steel pipe, not the flexible kind, for the flue. Much easier to clean and will last a lifetime.
● Make sure you sweep the flue at least once a year, more often if there are any bends, and try to fit an access point to facilitate this rather than going through the stove itself.
● Clean the glass either with a damp cloth or old scourer sponge dipped in the ash, or bicarbonate of soda. This will cut through the soot but won’t scratch the glass. Also available readymade as Bicarb Cream by dp.
● If you ever have to remove any bolts/ screws from the stove make sure you soak them in penetrating oil beforehand. They become very soft with the heat and have a tendency to shear off if too much pressure is applied. Far better to keep adding more and more oil until they are ready to undo easily.
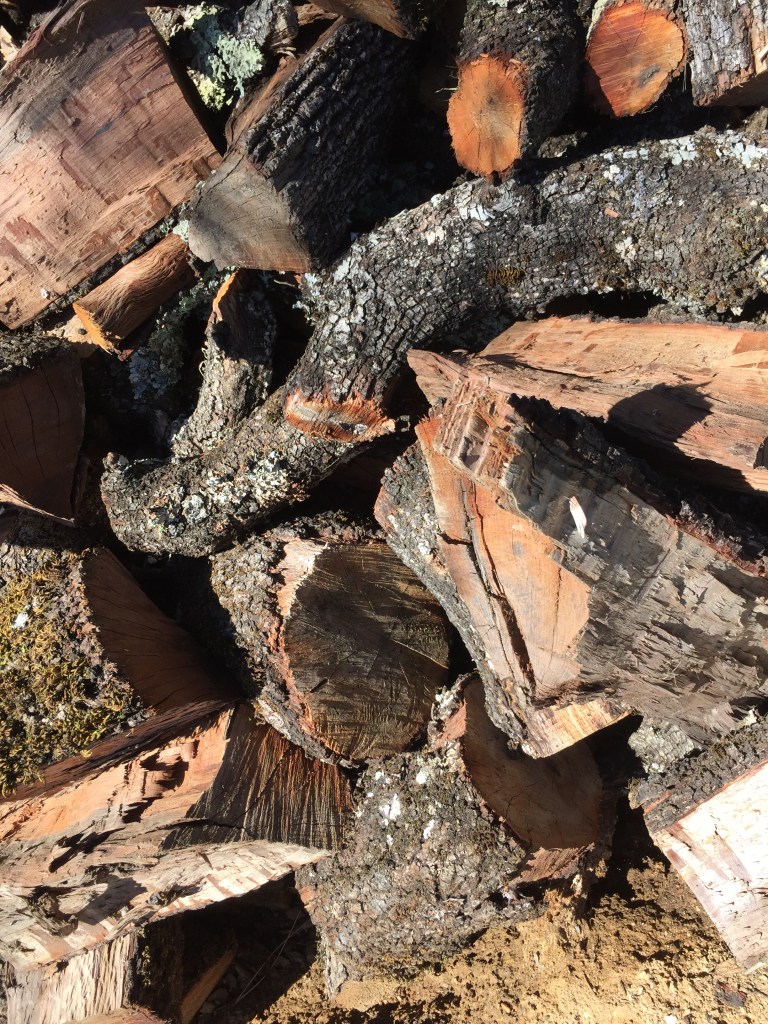
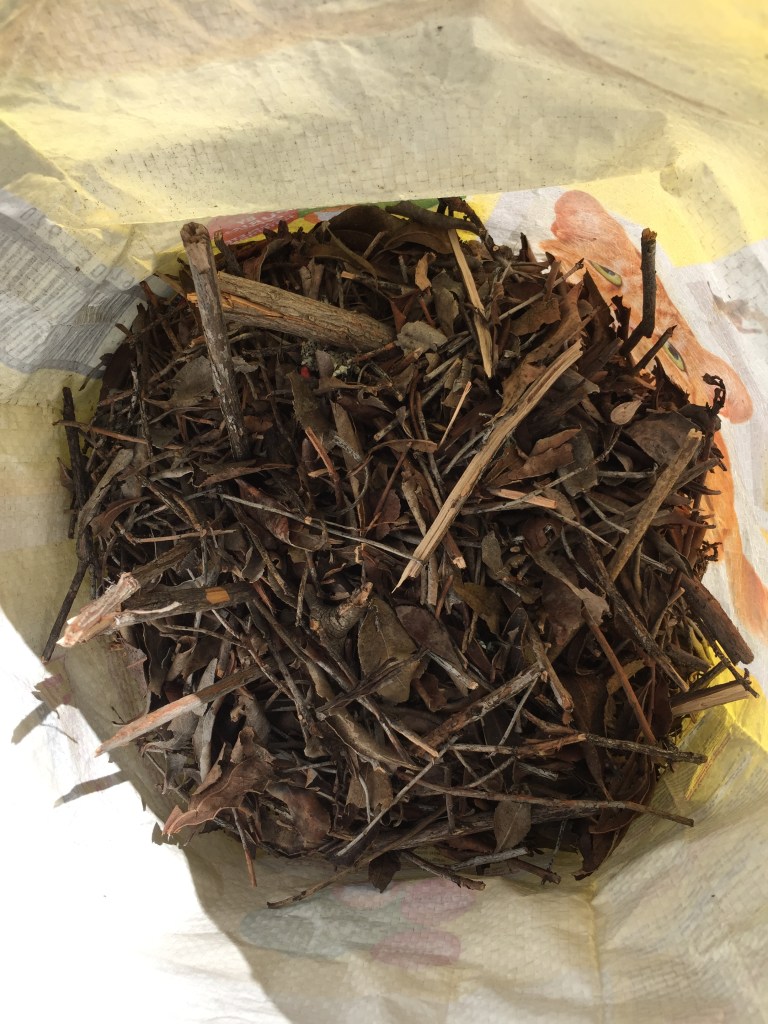
– Prepare your winter supply well in advance and store it somewhere dry. You will also need to prepare sufficient kindling. This is basically very thinly cut/ split wood, which will catch very quickly to heat the fire enough for the logs to burn. In Spain we used the local arbutus unedo (the “strawberry tree”) for this, as it grew very fast and we were coppicing it. I would leave one to grow into a tree, then stack the rest in a pile for at least six months to dry. The very thick ones we used as logs, the thinner as kindling.
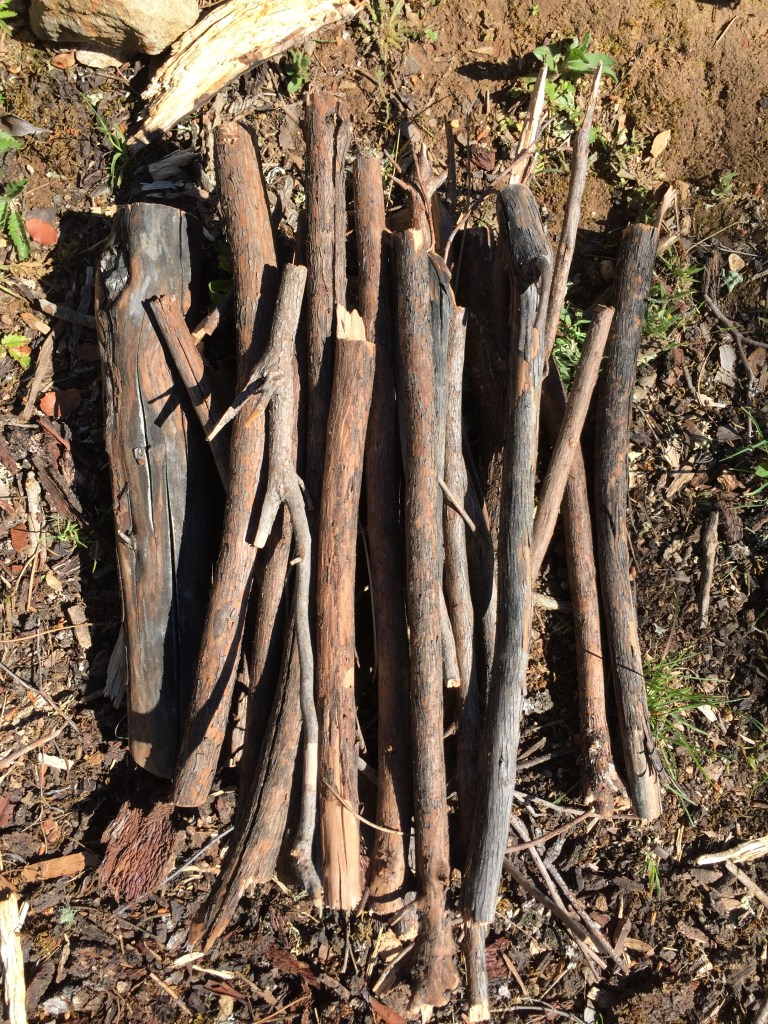
We mainly used encina (“oak”) for logs. I split them with a wedge and lump hammer. If you use an axe wear very thick gloves. A friend didn’t and he cut his thumb off.
You can also use dried leaves and other dried plant material as kindling.
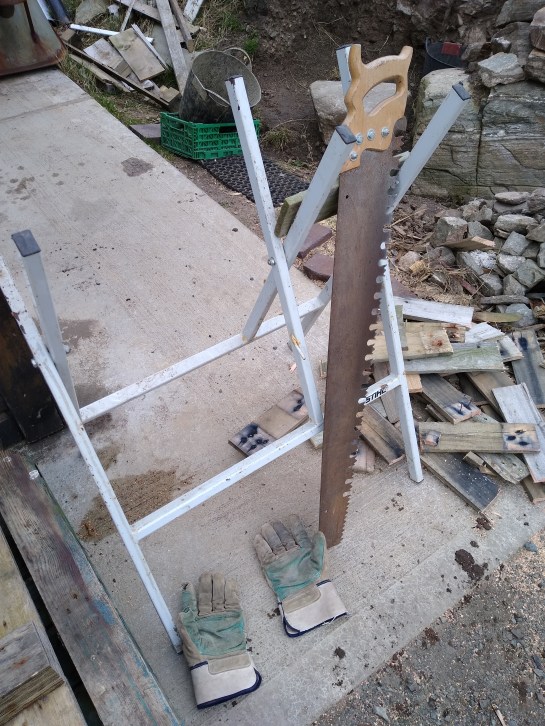
When sawing logs to fit the stove, use a saw horse. This not only makes the job much easier it is far more ergonomic so will save your back from injury. Choose a heavy one (this is a Stihl), with the supports spaced so you can cut small pieces too.
The saw I prefer to use (having long given up on chainsaws) is a ONE MAN CROSSCUT. It is 3 ft long and kept sharp with an Oregon 6″ chainsaw file.
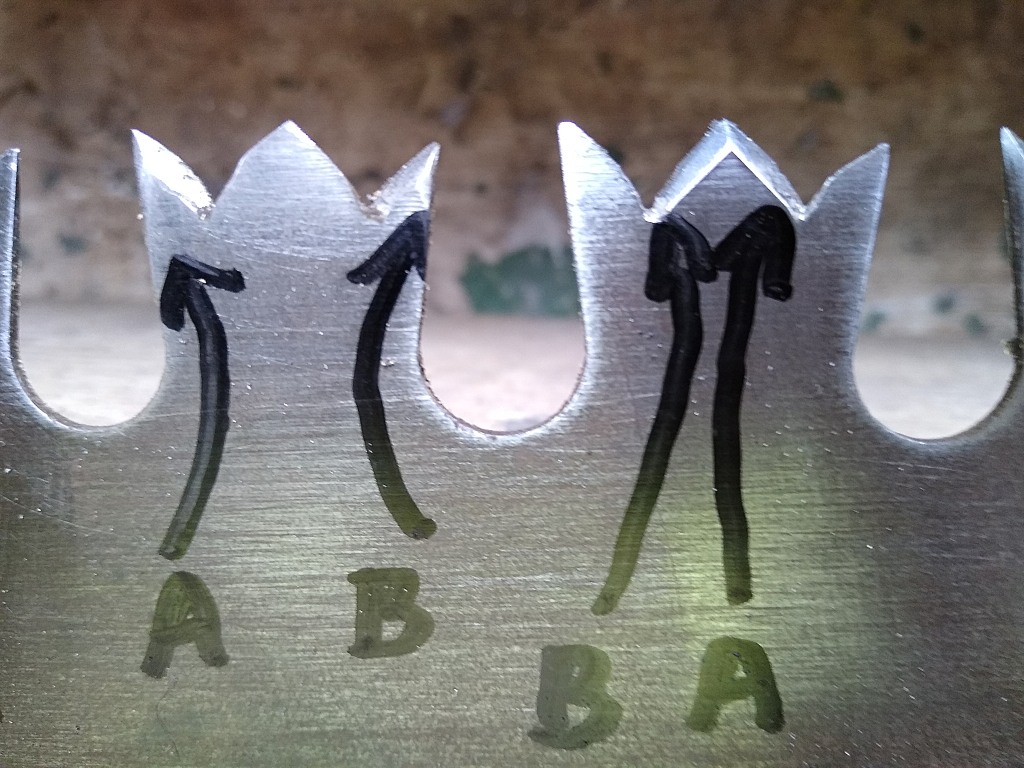
As with chainsaws it is important to keep the blade at its best. I resharpen after every session. Took me a while to work out the best method, but what I’ve settled on (while possibly not correct) seems to work well. I place the saw on a thick block of wood with the teeth facing away and overhanging. Each side has to be sharpened and there are two directions to the teeth on each side, so basically you work your way along all the ones facing in one direction, then come back and do the others, after which you turn the saw over and do the same thing again.
Actually it isn’t that straightforward. If you look at the photos below you can see I have labelled the teeth A or B, denoting the direction of the angle on each tooth, and that they come in pairs which to confuse things alternate (AB – BA – AB). You sharpen all the As then come back doing all the Bs. If you get confused, the direction of the edge of tooth will indicate whether it is an A or B. If you can’t see an edge this means it is meant to be sharpened from the other side.
Remember to keep the file at the right angle, as well as parallel to the edge of the tooth, so the entire edge is sharpened evenly. Run it across the tooth lightly, four times in the same direction.


swipe to see more photos
I also use a bow saw, which is a lot cheaper, but only works well with living/ green wood. Replacement blades are also very cheap, but they can be re-sharpened too. In the same way as the other saw, but because the metal is so thin it is best to clamp it to a piece of wood first.
And finally, the perfect primer for learning all about heating with wood:
*
electricity
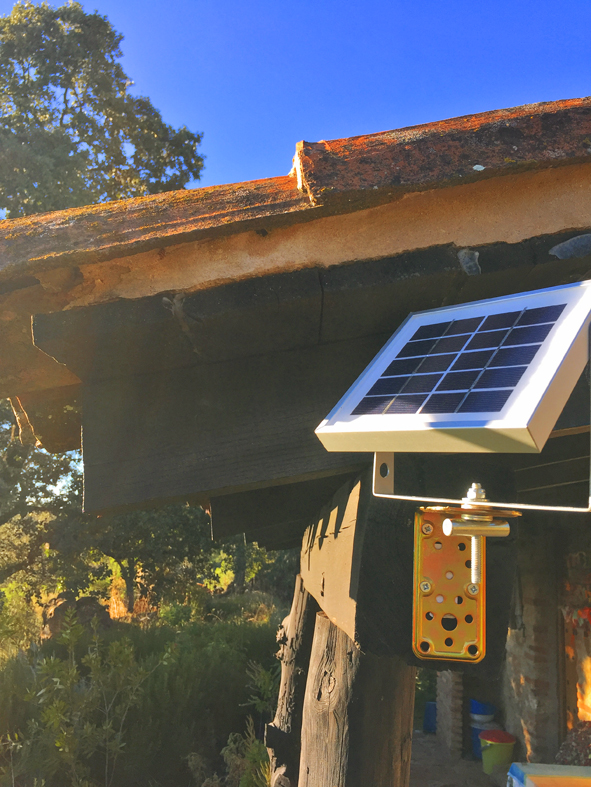
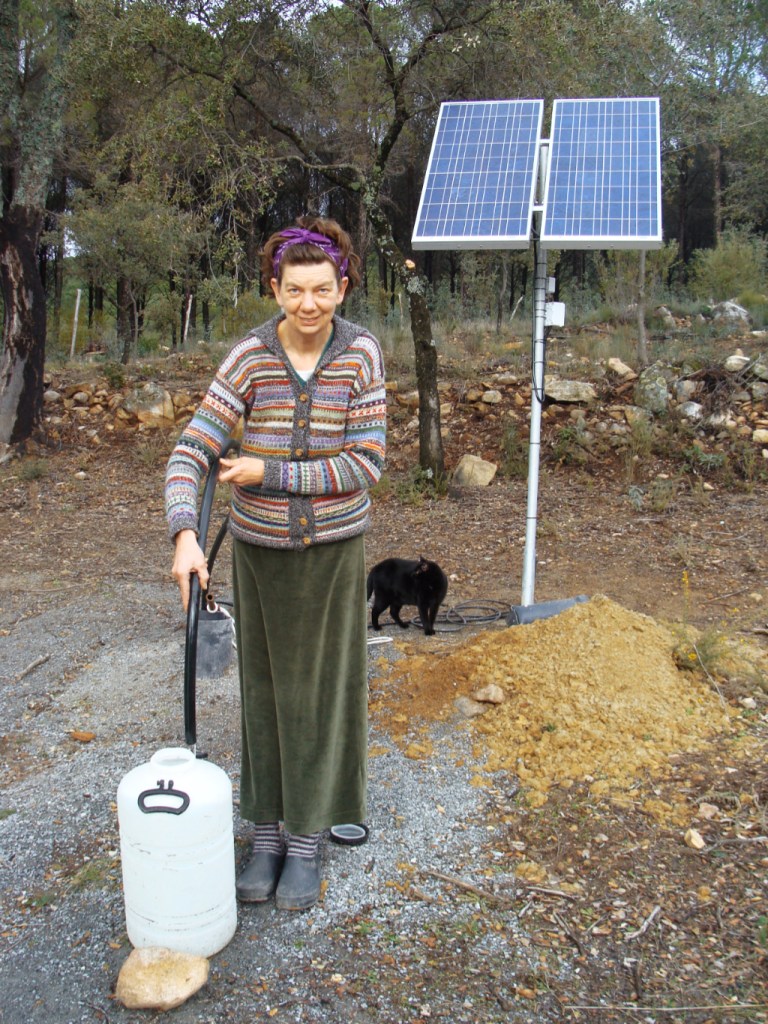
One of the reasons we chose to buy El Pocito was because living 3km into a forest it wasn’t possible to connect to the national grid. We also wanted to be free at long last from EMF radiation, one of the many serious risks to health created by new technology (found anywhere near mobile phone transmitters/ pylons/ power cables/ house wiring/ and now here in Shetland, wind farms). We also reckoned generating our own would be a lot cheaper, especially when the standing charge for mains is so high. You can read the full story how we did this on the alternative energy page, but very briefly what we had was the most basic set-up possible. Most of which was second hand, but if we had bought new would have cost no more than 1000 euros.
Comprising:
– two solar panels. Ours were rated at 50 watt/ 12 volt DC each, wired to generate 100 watts at 12 volts. Prices have come down so much since we started it would now be possible to buy 400 watts panels at the same price and taking up the same amount of space.
– one 12 volt DC car battery, rated at 250 Ah. These are the cheapest type of battery you can buy (lithium being the most expensive) and looked after properly can last up to ten years.
– a charge controller/ regulator. Which ensures the battery is charged properly and all done automatically.
– and a 220/ 240 volt AC inverter to convert the DC power to run conventional AC appliances.
What this small system gave us on an average Andalucian sunny day (8 hours and they have about 300 of these a year) was:
recharging the battery (for evening use), which took about an hour
then the ability to run appliances all day, as long as it stayed sunny, up to a maximum of 100 watts (or 400 watts with 400 watt panels) at any one time.

*
lighting
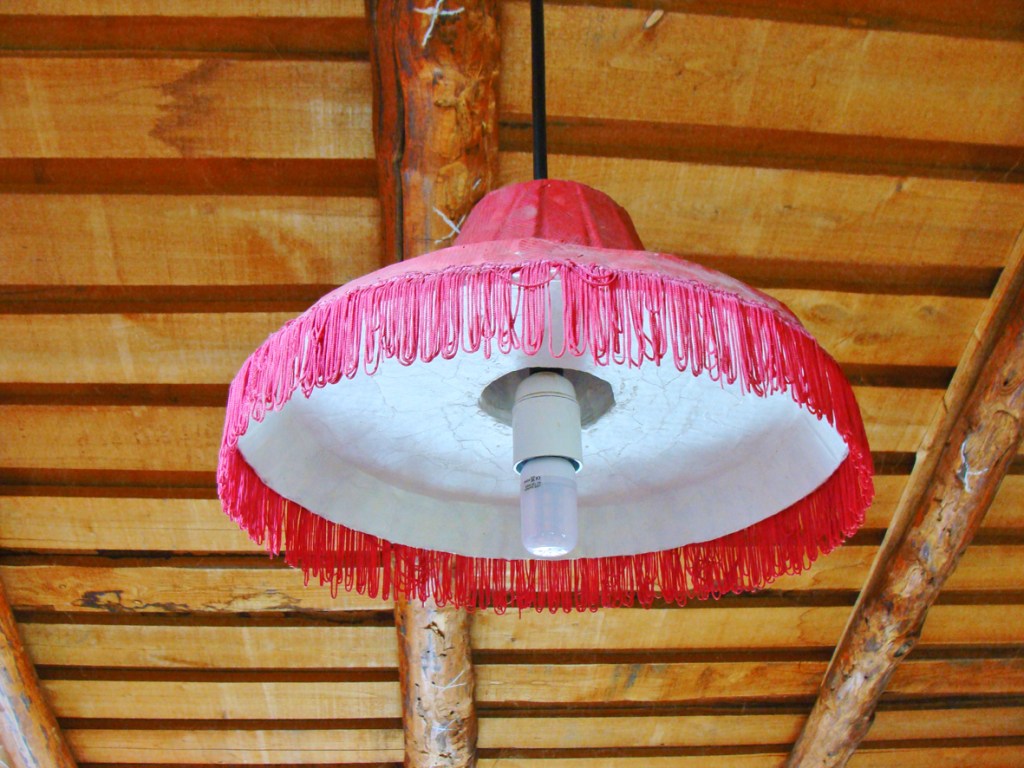
swipe to see more photos
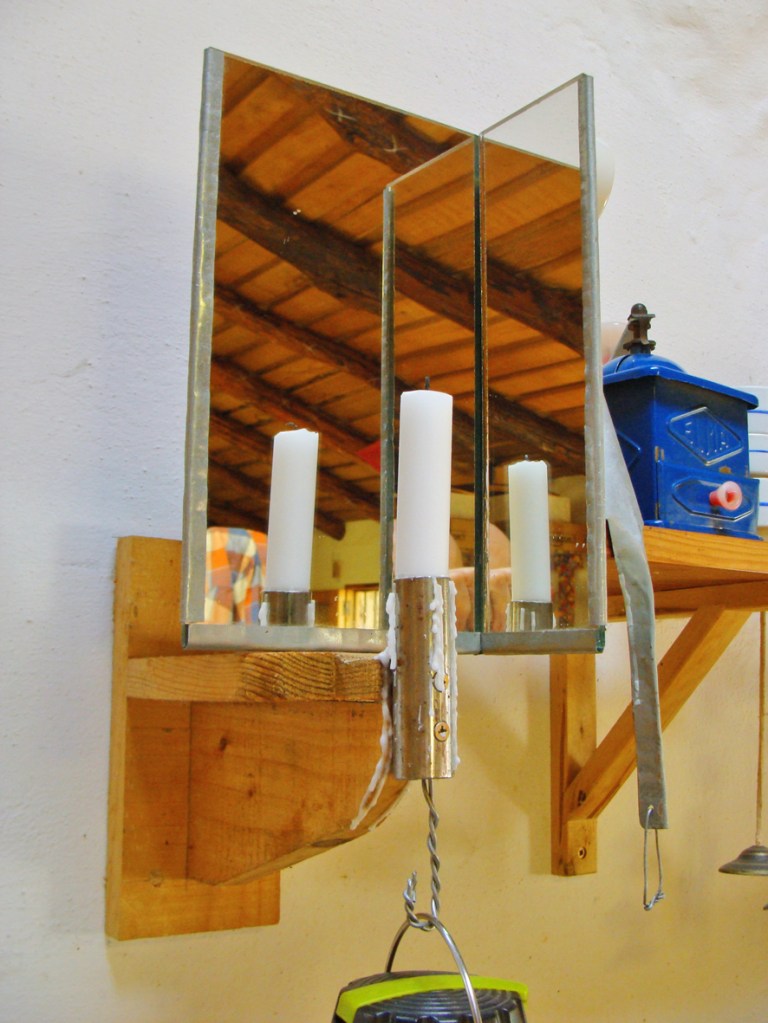
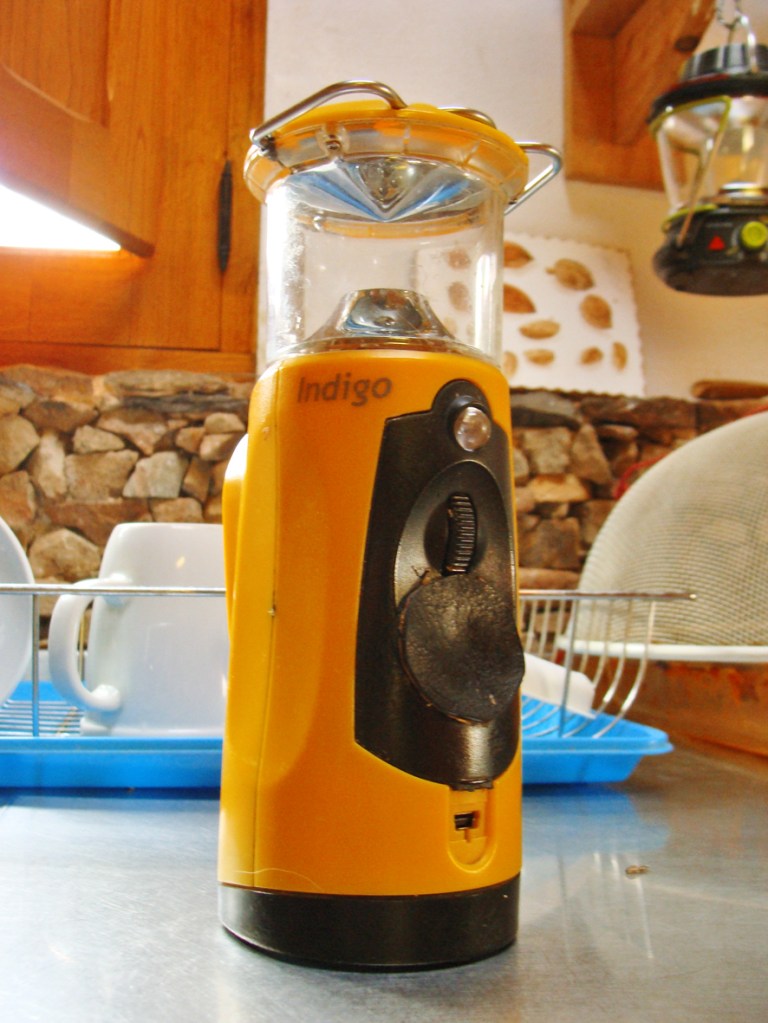
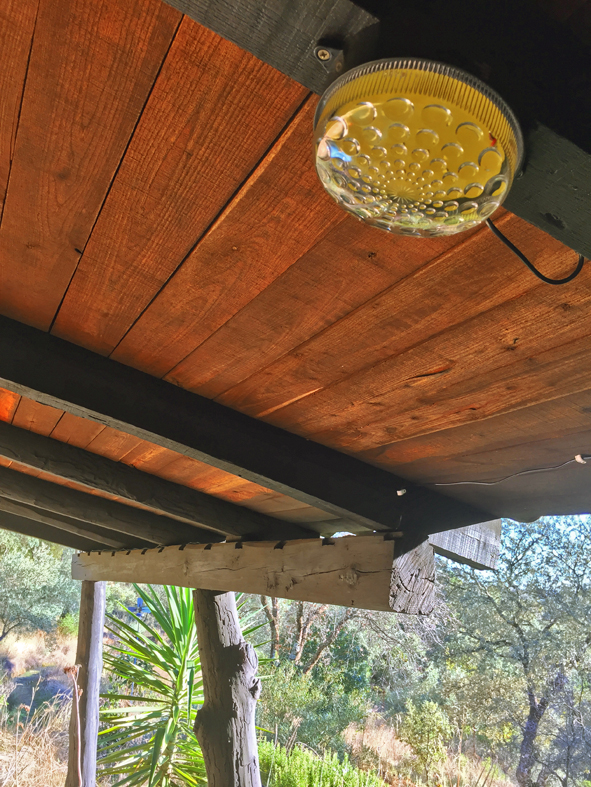
To begin with we only used candles for all our lighting needs, along with a couple of now very old-tech FREEPLAY INDIGO wind-up torches (bought during our camping/ restoration phase). The candles were cheap enough (bought in bulk) but crap at producing enough light to read by, even with the double mirror wall-holders I subsequently made. They also proved costly in the longer term (@ 20 centimos each). Then we found a 12 volt/ 11 watt energy-saving incandescent bulb. This was back in 2009 and these things we not cheap then, but the light they gave was a lot brighter and the energy used (relatively) free. Compared to a conventional 100 watt bulb this was also a huge saving on power, but during the winter this was still not ideal as it used a lot of our small amount of battery power. Then Ken Harbour at OnSolar Ltd – http://onsolar.co.uk got in touch. He’d read our blog and wondered if we’d like to try out a new kind of bulb technology, a 12 volt/ 6 watt led filament bulb. This was a lot better, giving off a very pleasant warm white/ yellow light, perfect for illuminating an area of about 4 m x 4 m. Bright enough to read by and using 50% less power.
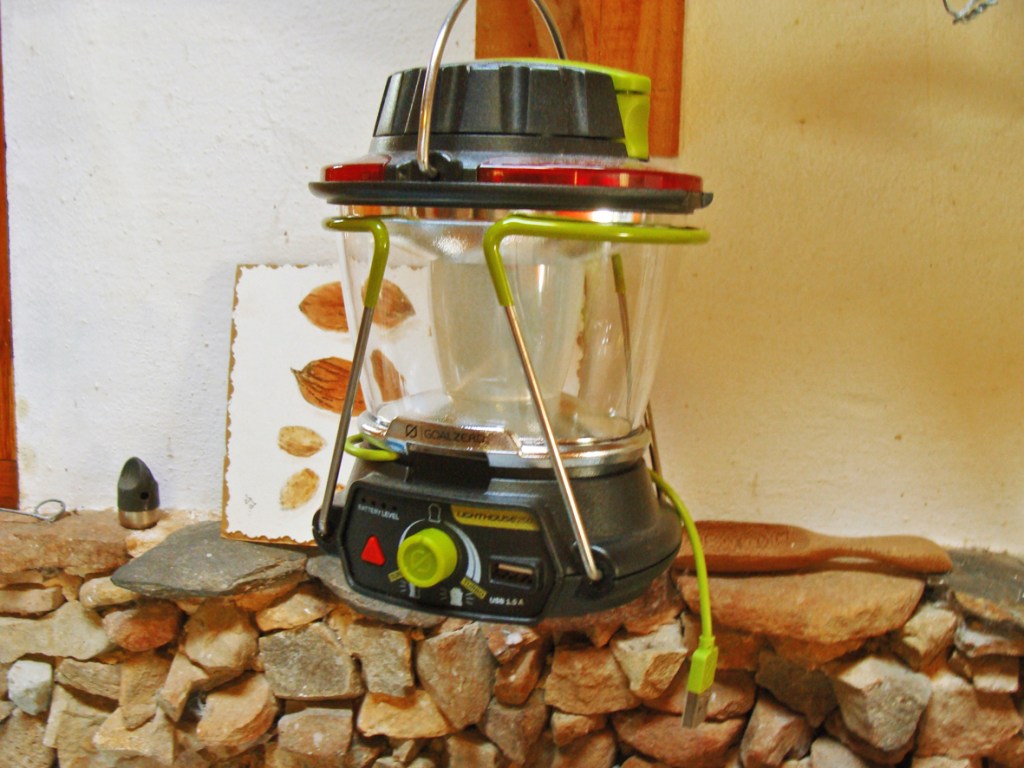
In 2018 we added a led USB rechargeable lantern, ostensibly for when we were working in the kitchen area, which up ’til then had always been in shadow at night. This was perfect too, especially on dark mornings when I can’t abide bright artificial light and this can be dimmed. The only quibble we had with it was with the integral cable for recharging via USB (there is also a wind-up facility), which broke pretty much immediately. A socket instead would have been a much better idea. Recharging took about an hour, once a week. Made by GOAL ZERO, ours was rated up to 250 lumens and called the LIGHTHOUSE 250 LANTERN. Cost around £40 (including postage).
I also added an outside solar light. This worked fine, no problems, and was definitely bright enough for when I needed to use the porch at night (aka the toilet). With an integral battery it was charged during the day by its own solar panel, which was a great idea if the main system ever failed. Came with 5 metres of cable fitted.
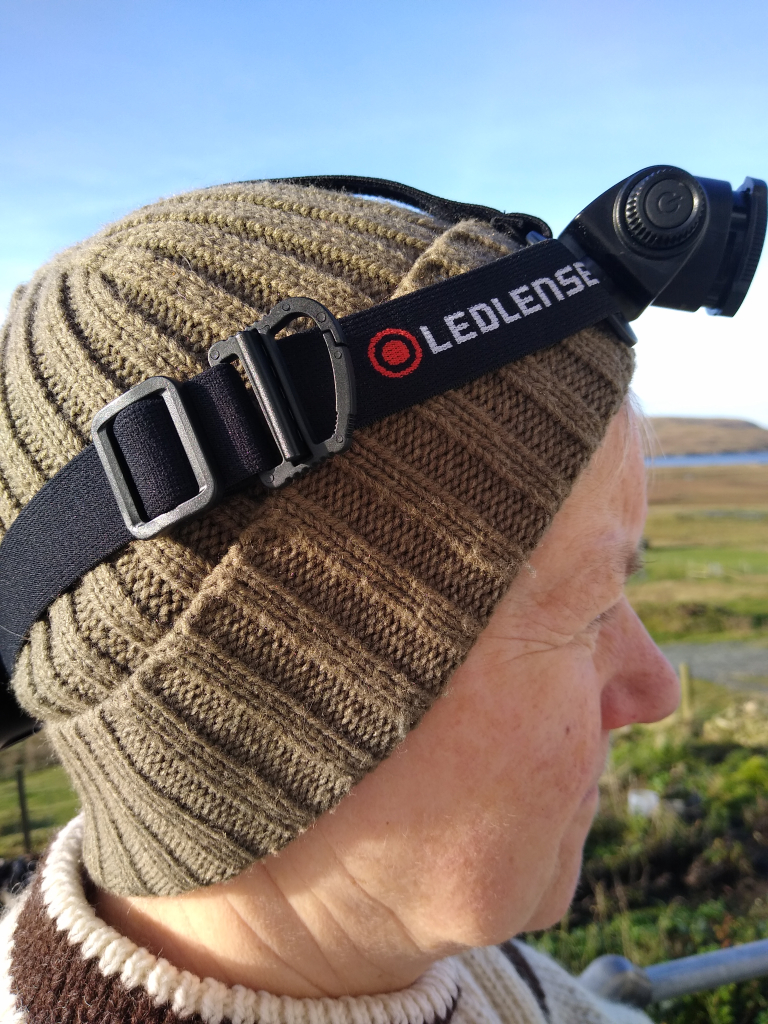
Now fast forward to today, and technology has really moved on. When I lived in the forest in Spain I would often be walking home at night. When the moon was visible this wasn’t a problem, but in pitch darkness a torch was essential. A friend gave me a headtorch and that proved perfect, especially the hands-free aspect. But for doing anything they requires good illumination it just wasn’t up to the task, so I have just replaced it. Buying one of these is a minefield, there are so many to choose from and they all use different ways of describing the amount of light they give out. In the end I went with LEDLENSER H7R CORE. It wasn’t cheap, but the long battery life and 1000 lumens output were essential. Comfortable to wear, doesn’t slip off, very adjustable beam, simple to operate, and recharges quickly.
*
tools
When we lived off-grid in Spain there wasn’t enough electricity to use power tools and very little money to buy specialised ones, so we made do with the basics. Here is a selection (by no means exhaustive):
● files for sharpening metal tools. Forget sharpening stones and the like, all you need for virtually any sharpening job is 2 kinds of file. A coarse one (often sold as a bastard file) and fine one (chainsaw files are perfect for this). I prefer the 6″ length for both.
● galvanised metal sheet. This is what I use to make things from that I want to last and not rust. Before you buy make sure you will be able to bend and cut it easily. I recently bought some 1 mm thickness and it was a nightmare to work with. I suggest looking at between 0.5-0.7 mm.
● hacksaw. For cutting metal, 30 cm long with 18 tpi blades. Plus a close work handle.
● sheet metal snips. Make sure they will cut up to 0.8 mm.
● chisels. Buy the best quality. I have three different widths.
● metal punch and bradawl. Make sure both always have a sharp point.
● hand riveter. Mine has various size options from 2.4 mm – 4.8 mm. You will need a drill bit of the same size as the rivets.
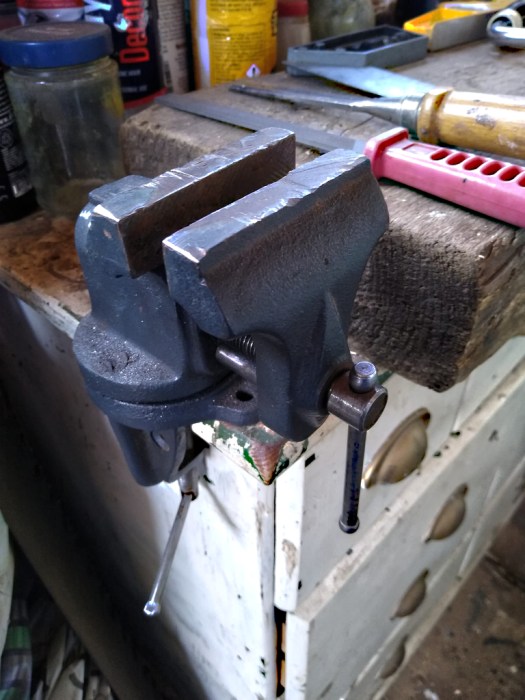
● set square and metal rules (30 cm & 1 m). Make sure the set square is actually true before buying.
● bit brace and hand drill (double pinion). Both hard work but better than nothing.
● adjustable spanners and water pump pliers.
● vernier calliper. Measures thickness and diameter.
● allen keys and torx key set.
● rolls of sandpaper, 60/ 80/ 120 grit and wet/dry paper 180 grit.
● goggles (Uvex is a good brand).
● ear defenders (30 dB or greater).
● handsaws. One 550 mm – 8 tpi. One 350 mm – general purpose (Bahco is a good brand).
● gloves. I have three types. Rigger type for dry jobs, thick pvc (Showa Chemrest 660) for wet, plus thin cotton inners for both when working in the cold.
● drill bits. Sets of drills are very handy. I have one with 1-10 mm for wood/ metal. 3-8 mm for masonry. 12-32 mm for wood using the bit brace.
● marker pens and pencils (HB and higher).
● cutting knife.
● wooden or rubber hammer for shaping metal sheet.
● clamps for securing work when drilling or glueing.
● bolster and lump hammer.
*
water

swipe to see more photos
If there is one aspect of off-grid living you have to get absolutely right it is a source of year round water.
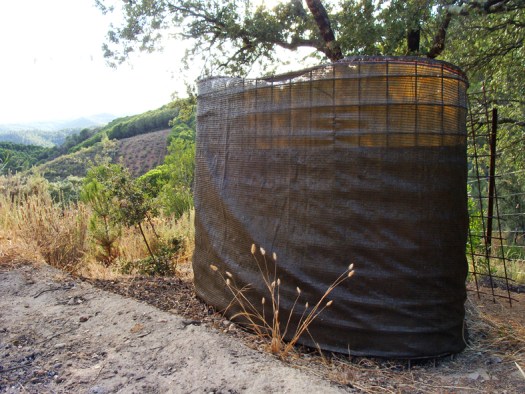
When we bought El Pocito there wasn’t any. Nor did we have any idea how to go about getting any. We asked the locals but they had no idea either. Consequently we made a lot of expensive mistakes. The first being to opt for having a borehole (more on that in a moment), which not only cost us a fortune, as well as a year to sort out, completely missed the obvious: rainwater.
For while this is not really suitable for drinking long-term, around 90% of what we use is for other things. The only downside is the initial cost of building sufficient storage. In Spain it generally only rains in the winter and you need it most during the summer (for irrigation), so this would require an insulated tank of at least 30,000 litres. Which works out at 30m3 (1,000 litres of water = 1 m3 of storage = 1000 kg in weight), a small swimming pool with a roof on it. The rest of the equipment though is relatively cheap. A filtration system to remove any debris and a cheap 12 volt on-demand pump to send the water to the house.
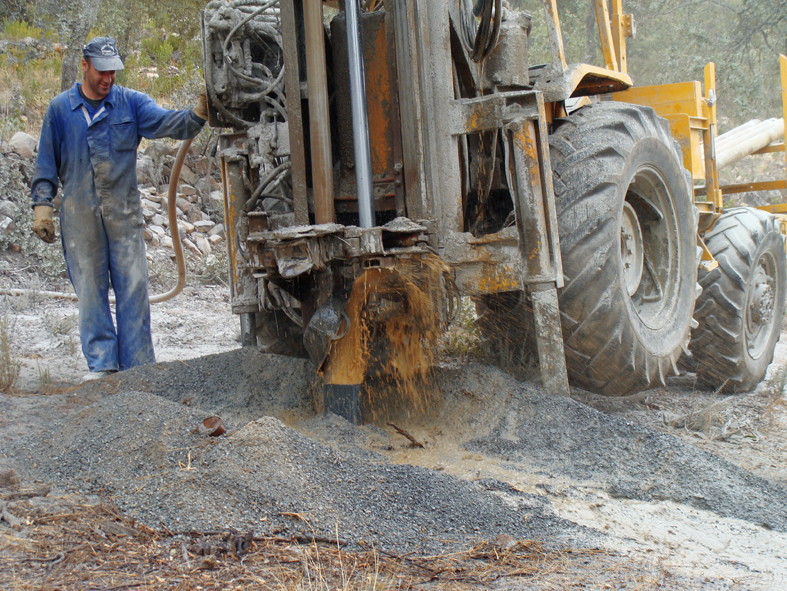
However, we decided on the borehole. Based on no previous experience whatsoever. Not surprisingly it was stressful and expensive. Just getting permission to drill took ten months. During which all our water had to be brought to the house from a spring in town, 3kms away. We did this using 25 kg containers (4 of them every day = 100 litres = 100 kg), the last half kilometre carted by wheelbarrow. We were lucky it could have dragged on a lot longer and then ended in a refusal. Which is what is happening now, with global warming hardly anyone can get permission for a borehole. In other countries (especially the UK) the process can be even worse, as well as a lot more expensive. You will also be metered on what you use.
To apply for permission in Spain we were required to present the regional authority (Diputacion) with an extremely comprehensive and technical document (saving them the cost of having to do it themselves, though they probably employed the staff anyway), in order that they could decide whether it was okay to extract water in that area (already some parts of Spain were forbidding it). Obviously this has to be done by an accredited engineer, who in turn makes a very nice sum for very little work (ours cost us 600 euros). Then any additional information they may or may not want, has to be submitted in person, in our case involving a 340 km round trip each time, of which there were many. Failure to comply with their demands terminates the whole process, which basically means you have to go back to the start all over again. By the time our acceptance letter finally arrived the file of correspondence had grown to three inches thick, and we had aged noticeably.
Drilling followed that and here we made another stupid mistake. There was only one local firm doing this kind of work and as we thought (wrongly it turned out) looking further afield would be more expensive, we went with him. Ending up costing us far too much for a very poor job. We were lucky though, a friend who had the same person was charged 3,000 euros without them having found water.
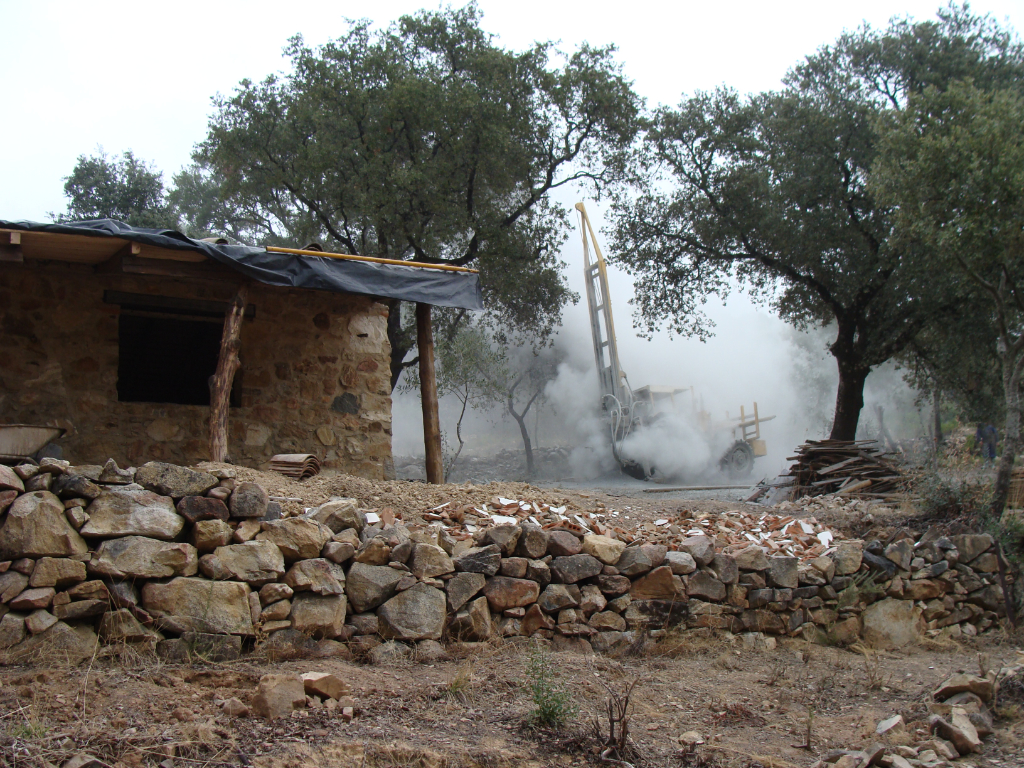
The machines they used were huge. There was a converted JCB to do the drilling, along with an even bigger vehicle containing the necessary compressor/ power unit, plus a trailer with enough drill bits to reach 100m. All of which needed good access and a flat working are. El Pocito is 600m up the side of a mountain and reached by a very rough 3 km forestry track. Consequently, when it came to deciding where would be the best place to drill, instead of searching for a suitable aquifer they simply set up by the gate and started drilling there. 30 minutes later the giant auger shattered and getting a replacement took another two days. Then finally they got going in earnest. For a whole day deafening us and showered everything in rock dust. Water was encountered at a depth of 11 metres, but as they were charging us by the metre they carried on until a depth of 60 m had been reached.
With that part finished we could then proceed with the work of getting the water to the house. This was another thing we had absolutely no idea about, nor did anyone else we asked, which is how we ended up with a system so unique I doubt there is another like it in Spain.
Starting with a storage tank. Most systems like this rely on a pump kicking in when you open a tap in the house, ie tankless. In our case this was not possible because we didn’t have sufficient or constant electricity to do that. Also, most boreholes replenish very slowly, so you can’t take out too much at a time. Therefore, we had to come up with another way to do this.
The first problem with how to calculate the amount of storage needed and what kind of tank. Locally there were despositos de agua, which look like small swimming pools (which is one of their unofficial uses) and are used for irrigating crops. They are about 1.5 metres high/ deep, come in any length and are constructed from brick/ stone/ cement. Generally they are old, having been built when labour was free and materials a lot cheaper. Not surprisingly then, to get one made like this was going to be expensive, far more than we could afford. Another reason not to go down this route was the water is being constantly exposed to the sun, which means a massive loss through evaporation and the need to treat the water before using.
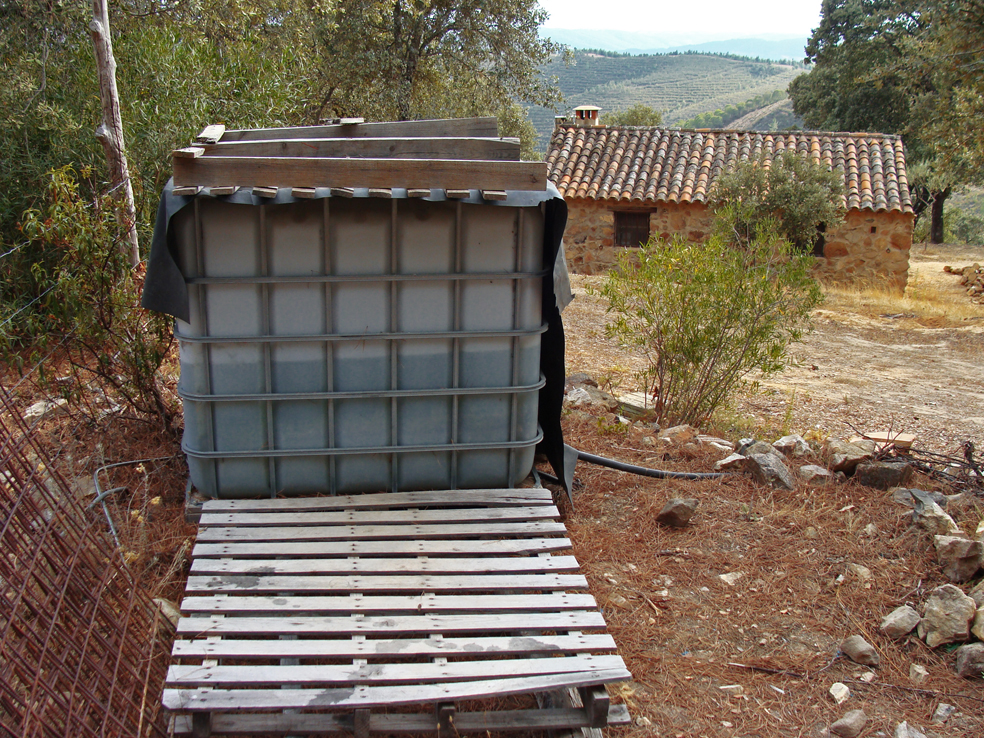
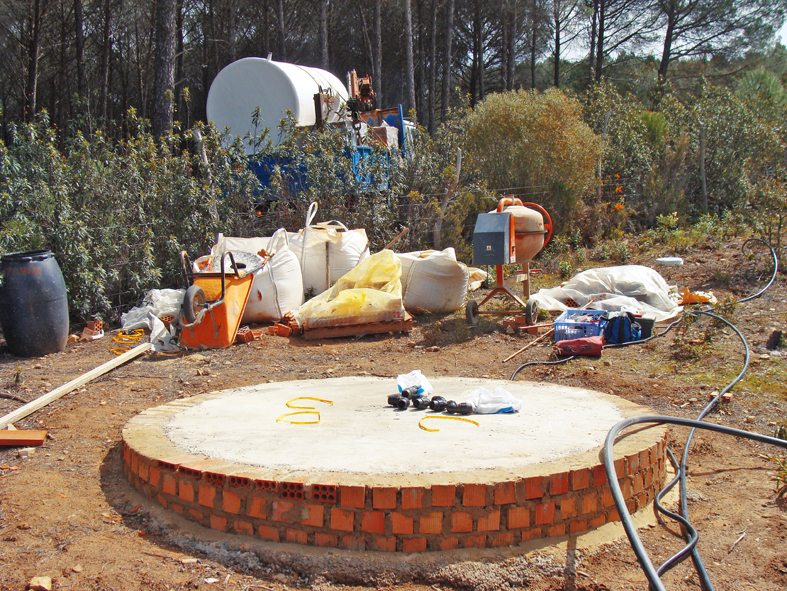
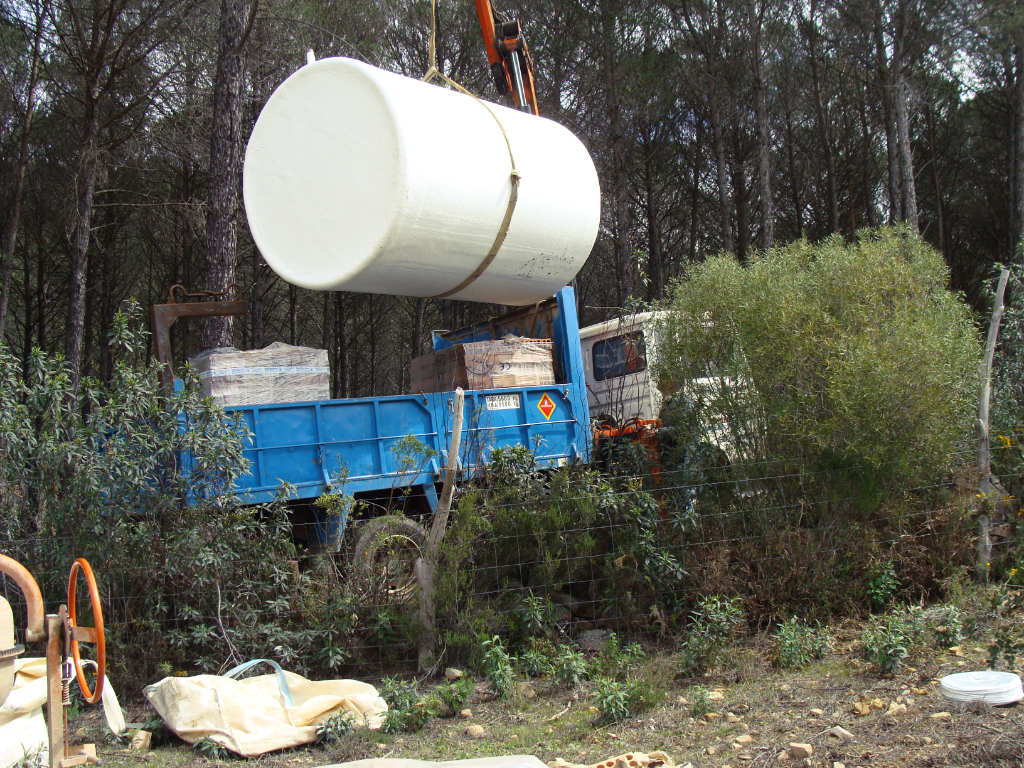
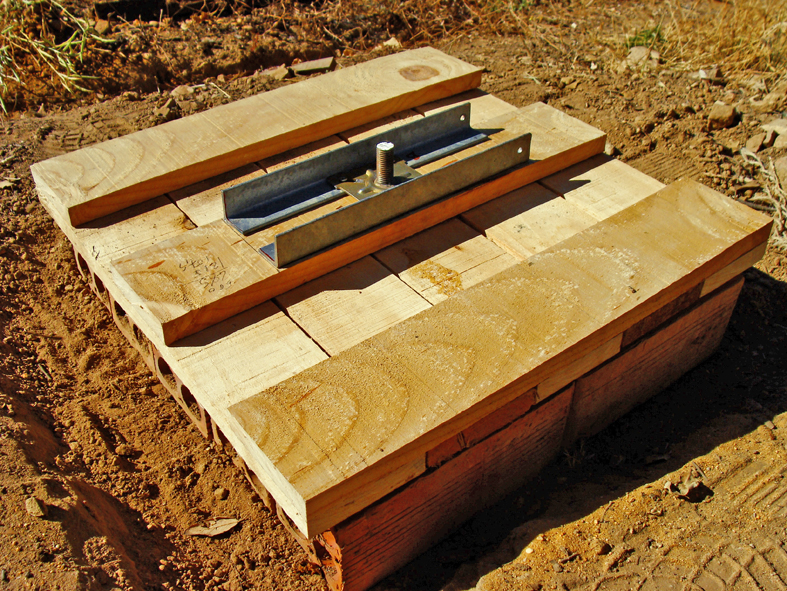
It was the local plumber who suggested a cheaper alternative, a fibreglass tank. What he didn’t tell us though was we could go to the local builders’ merchant and they would deliver. I guess he was on some kind of commission, because the next thing we knew we were having one custom made in Sevilla (120 km away). The good news was it wouldn’t take long (getting things from our local merchant typically took months), especially as we now had the borehole and couldn’t wait to use it. However delivery wasn’t as straightforward as hoped. Instead of arriving at the house on the back of a lorry, a neighbour called round to ask if we were expecting a large tank, because there was one lying on the side of the public road 3 kms away. Apparently there had been some mix-up with the measurements and instead of making us a traditional deposito shape, we now had a 3 metres high cylinder, 2 metres wide. So big and awkward they had sent it on a low-loader, which couldn’t negotiate the forestry track so the driver had just dumped it on the road and driven away. Where it stayed for a couple of weeks, until our local builders merchant took pity on us brought it up the rest of the way on their lorry. But only as far as the perimeter fence, about 100 metres short of the gate. Which actually proved providential, because this was the highest point on the property. Height being crucial if you don’t want to use a pump. Situated 11 metres above the house it meant there was sufficient drop down to create 1.1 bar of working pressure. Not a lot (mains is usually around 3 bar), not enough to run a shower for example (if we had one), but fine for two sinks and a drip irrigation system. We built a base to stand it on (5,000 litres weighs 5,000 kg) and then to keep the water cool in summer/ from freezing in winter (which it does) a stone skin was built around it.
After that, connecting up was relatively easy. We used 50 m of 40 mm drinking water quality pipe to run from the borehole up to the tank and 50 m of 25 mm from the tank down to the house, all of which were buried deep in the ground to insulate them.
The water was brought up from the borehole by submersible pump (SHURFLO 9325 – 24 volt DC), which was dropped down on a stainless steel wire to a depth of 30 metres. Powering this, two dedicated solar panels (each rated at 80 watts each and wired to run at 24 volts instead of 12). This part of the installation turned out to be frustrating too, it took me nearly six months to get working properly. To begin with the plumber dropped the pump and shattered it, so we had to wait for a replacement. Then the mount for the panels (which a local electrician had made) fell apart, which meant I had to design one (see drawing below) and get that fabricated by the local blacksmith. The plan then was to install a float-switch (like a ballcock but electronic) in the top of the tank, to control the pump automatically. Except this kept malfunctioning, even after replacement, until I finally realised this wasn’t a good idea anyway (running a solar pump when it is cloudy isn’t good for the pump) and replaced it with a simple ON/ OFF switch located inside the house. We now had water on tap. But no idea how much was in the tank to keep it topped up. The only way to do this was climb up the side of the tank, lift the lid and look inside. Not very convenient. Working out a solution to that took me another three years, despite all the suggestions from so-called experts. Which was to install a pressure gauge on the tap in the kitchen, which took me all of ten minutes and cost 10 euros. Though eventually not necessary, as with time we got into a rhythm of knowing how much we were using and how long that took to pump.
You would think that by taking water from the aquifer the water-table would start going down, even though we used very little water. Yet the opposite happened, it began to rise, even with hotter summers. Why? Because instead of clearing the land of new growth each year with a brushcutter, as the previous owners always had, we left it alone. Add in all our tree planting and the soil was being shaded from the heat. So in hindsight we could have probably got away with digging ourselves a traditional well instead of the borehole.
Pumping with solar is best done in one continuous session, it conserves the life of the pump. Optimum time of day being first thing in the morning, when the sky is cloudless, temperature coolest (solar panels do not function efficiently in heat) and the movement of the sun is slowest, requiring less realignment of the panels. Our water usage eventually settled to around 50 litres of water a day (for the two of us), so we decided top up pumping was only required once a week (although the total amount of storage could last us 100 days), taking about 80 minutes (the pump therefore running at 4.5 litres a minute).
If you are thinking of installing a similar system, make sure you use 3M SCOTCH tape (TEMFLEX 2151 self-bonding rubber) for tying the cables together at the pump end and making all the underwater electrical connections. It’s specifically designed for this. Make sure also to tie the three sensors to the power cable (these prevent the pump from ever running dry), as they have a tendency to get ripped off when you are removing/ reinstalling the pump.
Ideally, there should be a back–up pump handy too, which could be an identical pump (they are repairable) or a hand operated pump.

*
hot water
We haven’t had hot water since 2000 as we consider it wasteful and unnecessary. So there was a deliberate choice not to install a system for heating water in El Pocito. However, we did spend time experimenting with some alternative free ways of heating water.
The first (MARK I) being to lay another run of 25 mm black plastic pipe above ground from the storage tank to the house, to be heated passively by the sun. Thankfully this never got past the idea stage, as it should have been obvious that heated water moves uphill, in the opposite direction. Heating the pipe would also release carcinogenic chemicals.
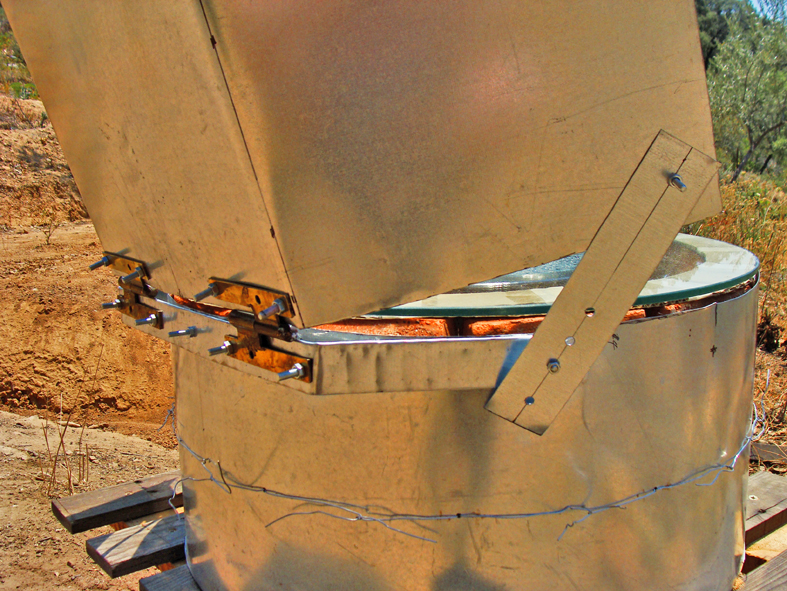
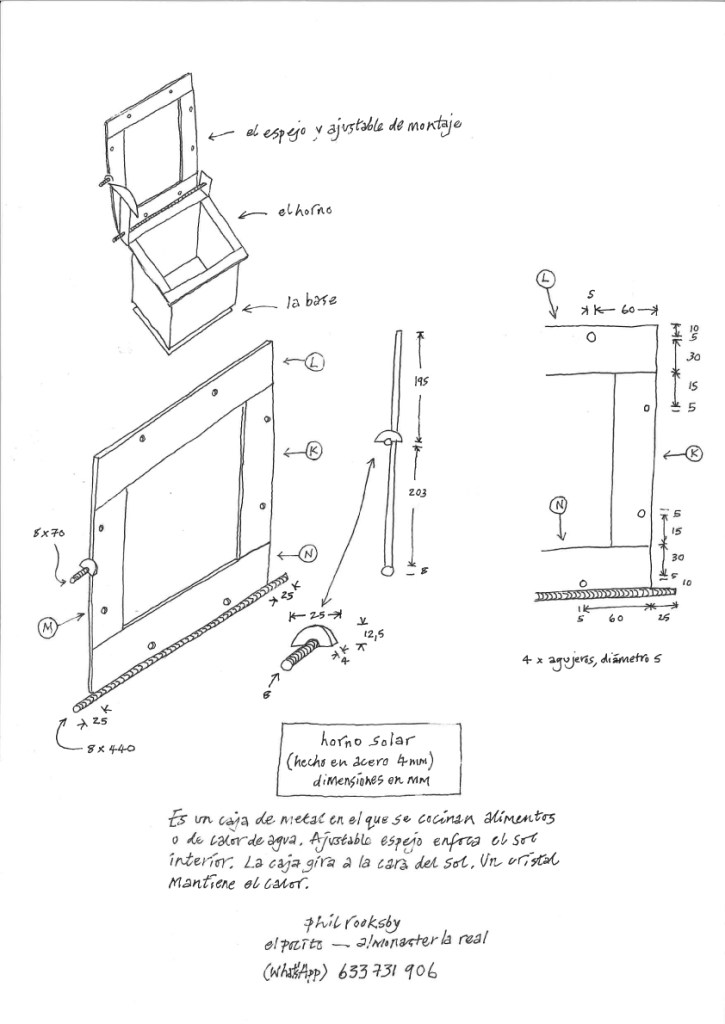
MARK II was a different approach. Instead of having hot water on demand, why not just heat a set amount when you need it? This we were already doing during the winter, with a kettle on the wood stove, so why not create a solar version for the summer? According to the internet it was simple. Well maybe it is, if you have a workshop/ the appropriate tools/ and access to free raw materials. I had none of those. What I could make though, was a solar oven. This is a parabolic reflector, that looks like a satellite dish and when angled correctly and kept in line with the sun, focuses a very intense spot of heat (rather like a magnifying glass) where you can place a vessel containing water or saucepan to cook food, allegedly as hot as a conventional hob. That may or may not be true, but from my experience, to achieve that kind of temperature requires precision craftsmanship and the best reflective materials money can buy. Which is probably why they cost so much (upwards of 300 euros). The best I could manage was a very cheap copy.
There were several prototypes over a number of years. The first was going to utilise a stainless-steel washing-machine drum, as it not only revolved (on the drive spindle) making it easy to track the sun, the stainless steel was highly reflective. However it also proved impossible to cut or drill with hand tools.
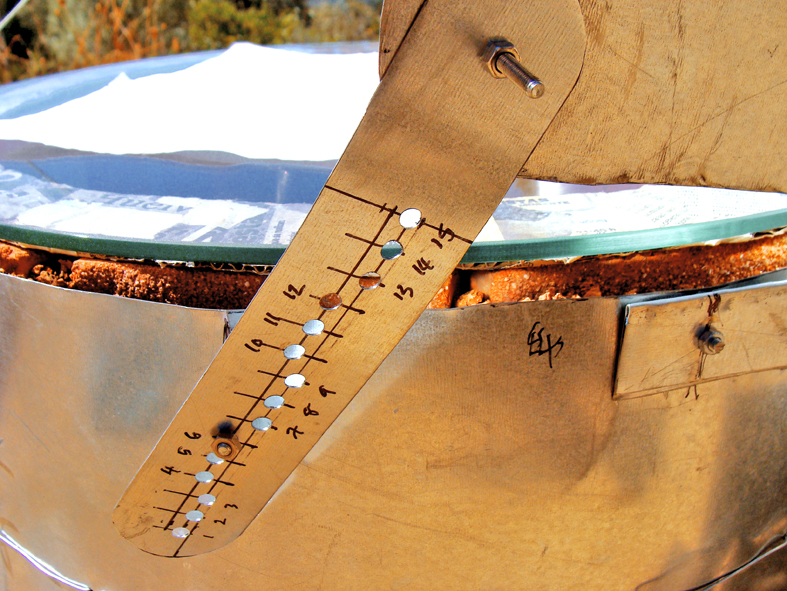
Next I incorporated other items that could be sourced for free: wood, a sheet of glass, some fire bricks and the spinning mechanism from an office chair. Though I did have to buy a 2 m x 1 m sheet of galvanised steel, which cost 6 euros. This is wonderful stuff, cuts like card/ drills & files easily/ doesn’t rust/ and when polished with a chrome paste can be made to reflect with an almost mirror quality. Putting it all together took no more than an hour (see photos below), though getting the reflector to work properly took a lot longer. For heating water it proved adequate, almost reaching boiling point and we even cooked some biscuits with it, but the potential wasn’t anywhere close to what I’d hoped. I think this was due to the shape of the reflector and the reflective quality of the steel. Professional versions are parabolic in shape and use aluminium sheet, which proved impossible to buy locally. The surface area of bought ones are also many times bigger than mine.
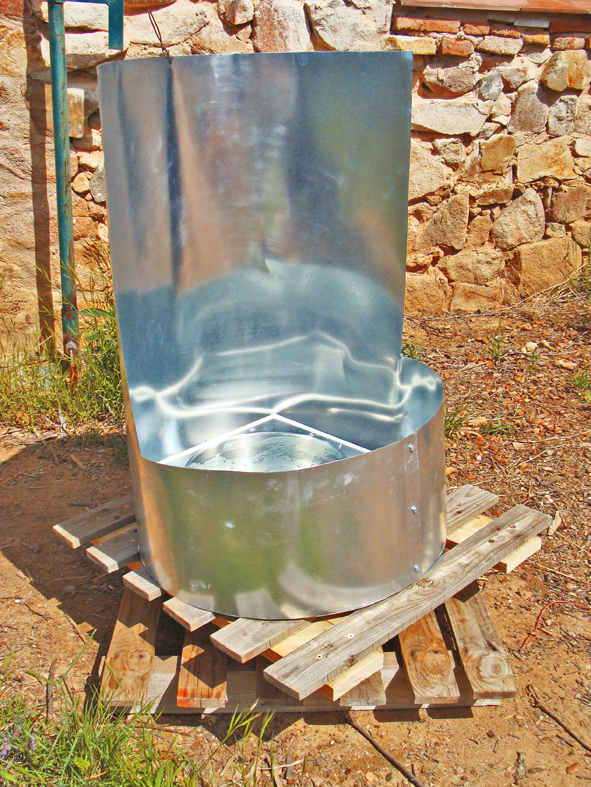
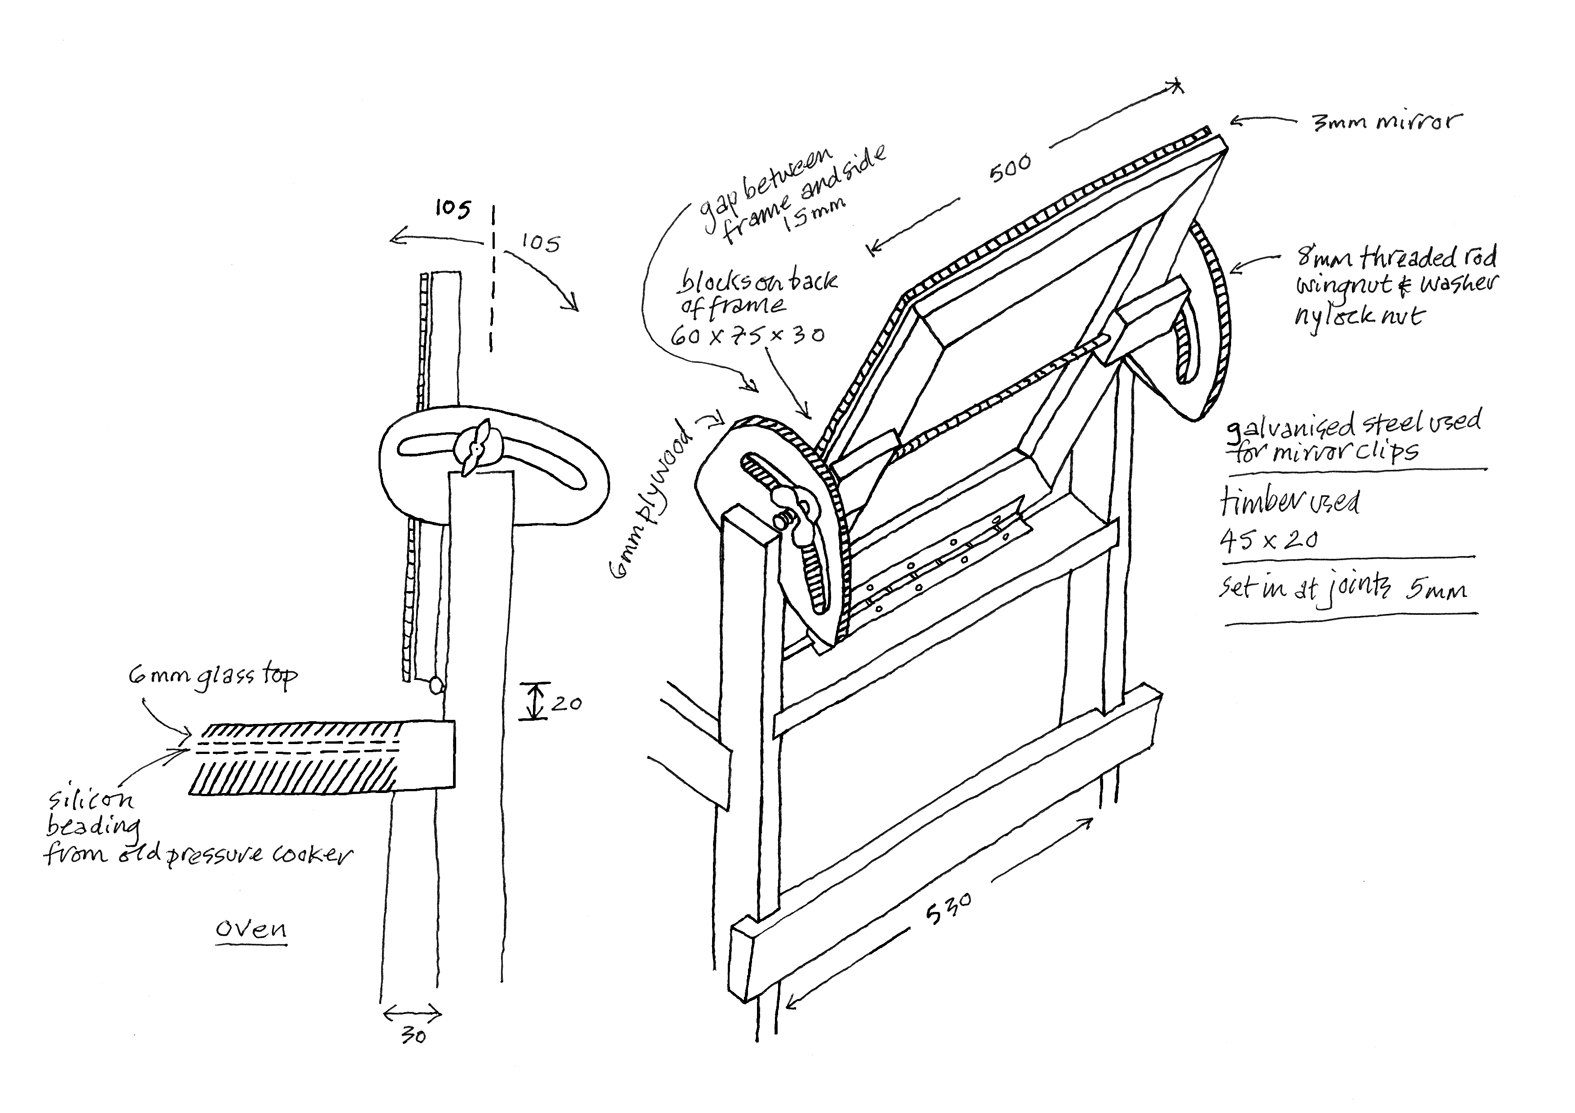
Then I came across Trev’s site, and that inspired me to try something else, using off-cuts/ mosaic of mirror for the reflector. Utilising many of the same parts, MARK VI now had a new bigger reflector plus a far better adjustment system. The additional cost 10 euros. So how good was it? Well, still not hot enough to actually boil water or cook anything, but a significant improvement. Unfortunately I used an old pallet for the base and after a couple of years termites turned that into a heap of dust and by then it was too heavy to lift, so without dismantling the whole thing I decided to design a replacement (MARK VII), this time with everything made from metal. The only problem then was I couldn’t find anyone to make it up. The drawings are below.
Postscript: When we find our next home I am going to install a copper pipe around the flue of the wood stove to heat water in the winter. You can see this how this can be achieved by clicking here.
Other fundamental truths about solar cookers generally are:
the importance of the outside (air) temperature – anywhere below 20 C and none of them will work. The picture below was taken when the outdoor temperature was 40 C (maximum here is 52 C) showing a temperature of 100 C inside.

The angle of the sun (and clear blue skies) – is critical, the hottest time being when it is at its zenith (directly above) and a couple of hours after that (at El Pocito, from 13:00-17:00).
The amount of water you are heating – a 5 litre saucepan of water will take a lot longer than 1 litre and remember you’ll need a temperature of at least 110 C to reach boiling point.
Insulation – my last working model used firebricks inside with a single layer of thick glass on top. The metal one would have had thicker firebricks (cemented together), a double-glazed glass top sealed with silicon and a side door for access, rather than relying on lifting the glass, which lets the heat out each time.
Where you live – anywhere more northerly than 38 degrees latitude and you can pretty much forget solar (even conventional roof-top water heaters). They are also going be totally useless in the winter.
Below are some photos which show the development of my heaters (swipe).


swipe to see more photos
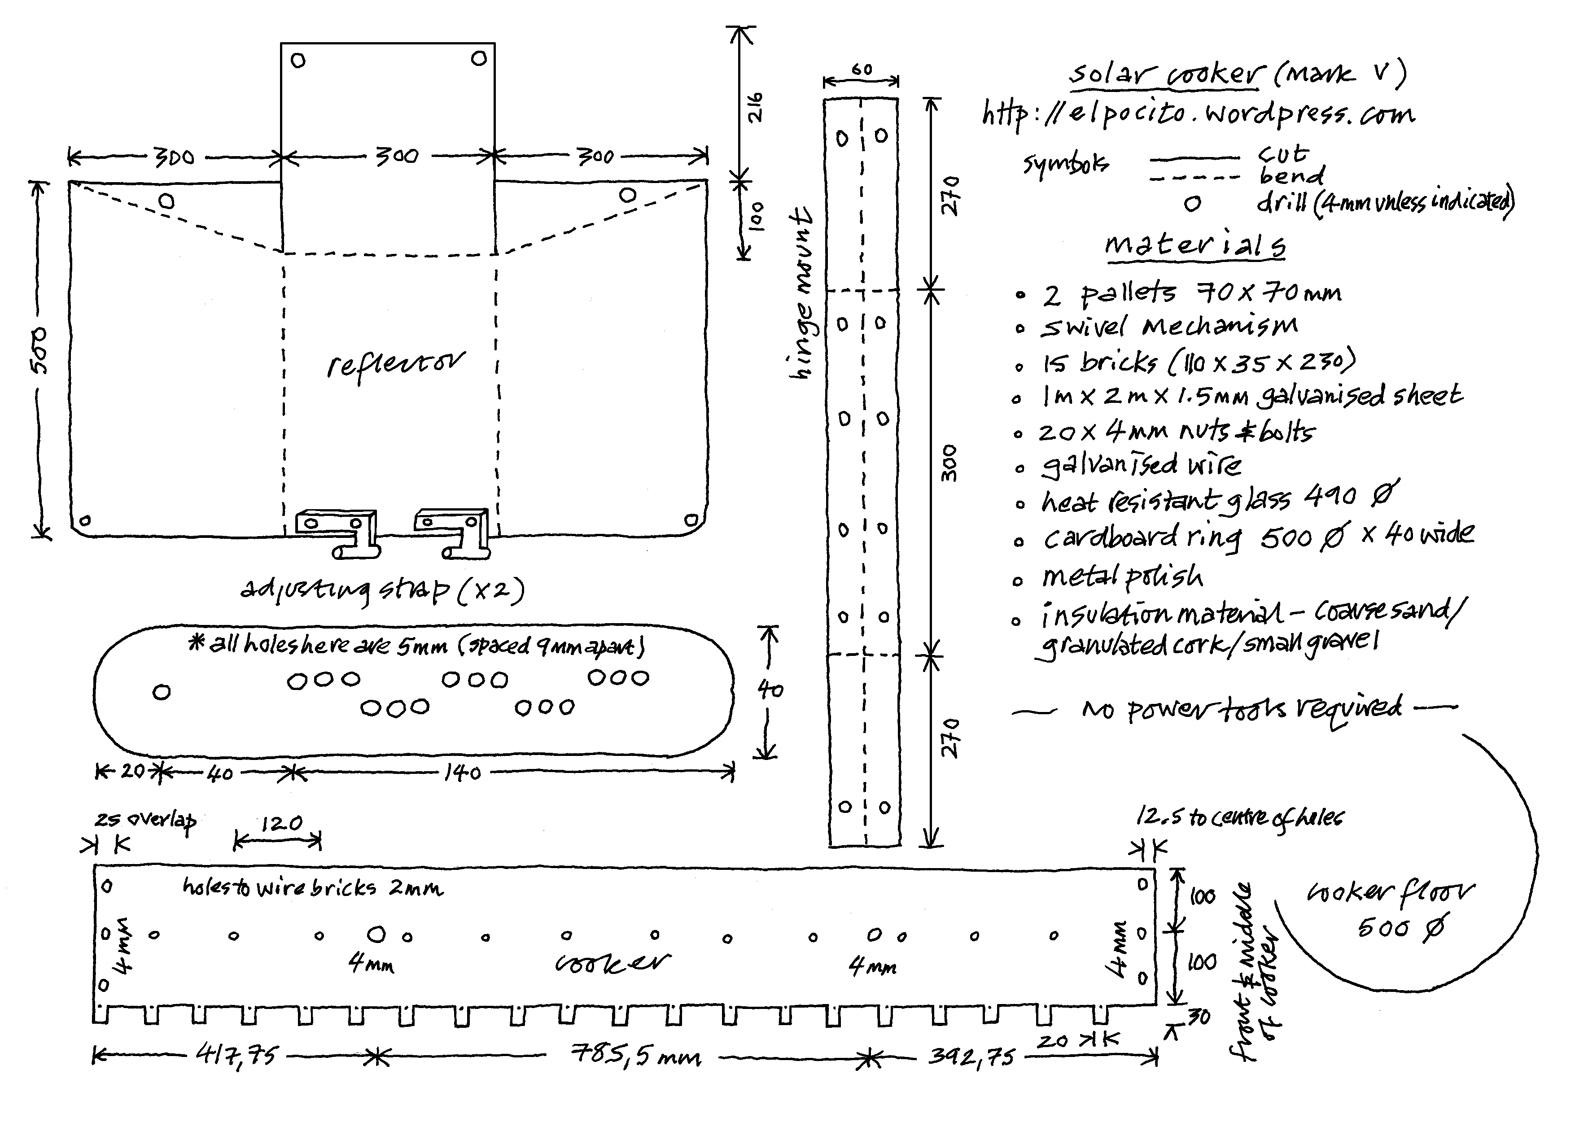
click here to download print version of drawing
click here to download print version of drawing
click here to download print version of solar oven MARK VII page one
click here to download print version of solar oven MARK VII page two
*
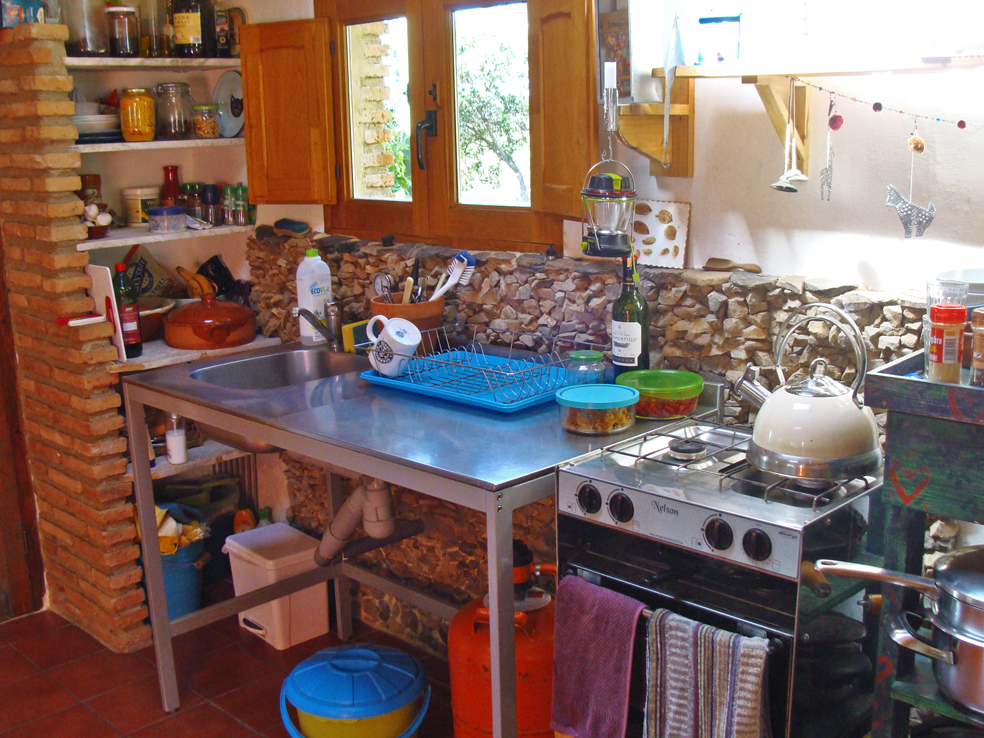
kitchen
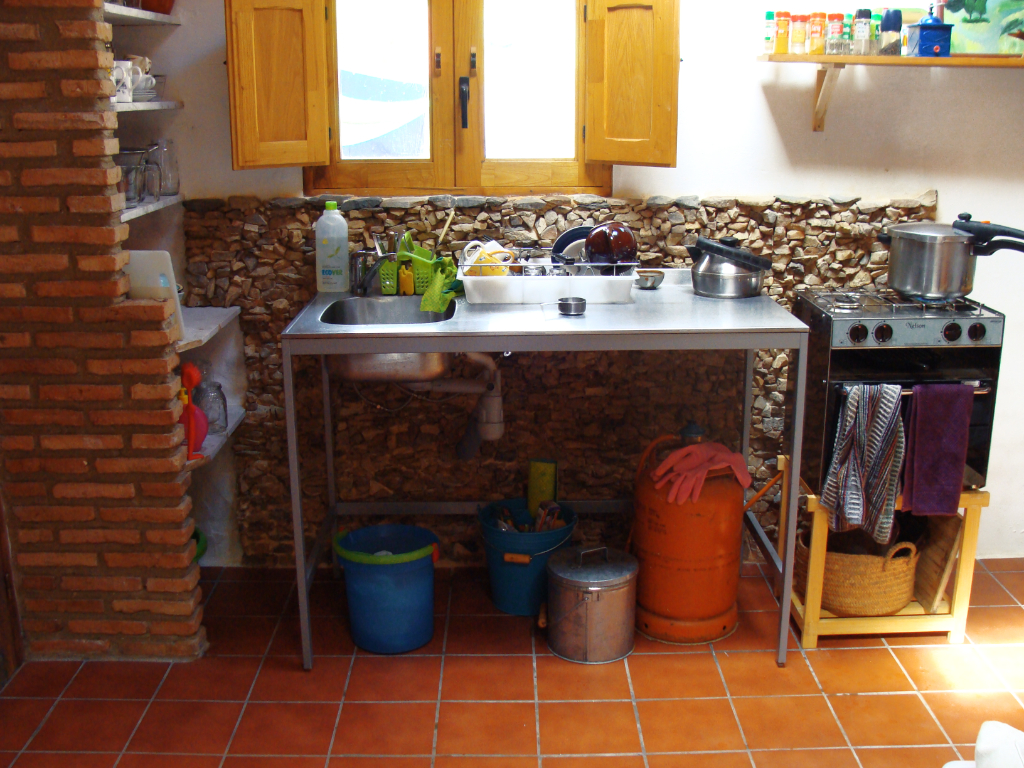
Not a lot to say about this part of the house, as there is hardly anything in it you would normally expect. Just a small butane cooker/ stove (SPINFLO NELSON) we brought with us in the van (the kind designed for caravans/ boats), which has two rings/ a grill/ and oven underneath and for the last 22 years has been sufficient, plus very economical on gas. There’s an industrial-type stainless steel sink, freestanding with space on one side for draining dishes/ food preparation. That’s about it. No other workspace. No electrical appliances.
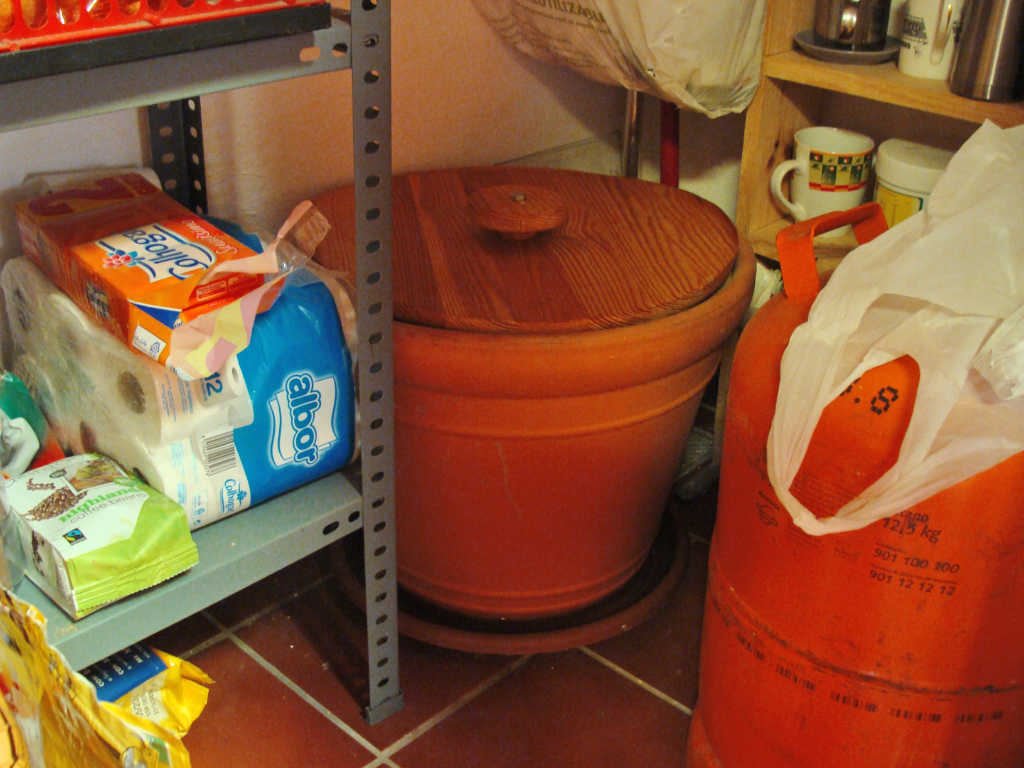
What about a fridge? Well for the first 13 years we did without (not easy when the temperature indoors can reach 30 C), then I saw an article about a zeer, which is not a fridge as such but keeps things cool at around 20 C by the principle of evaporating water. There are models you can buy, but they cost around 100 euros (incl. delivery from India). This one I made myself for 25 euros using two large terracotta flowerpots. One is slightly smaller, so they can fit inside each other, with a layer of sand in-between, all stood on a deep saucer for the water. It does work, albeit with reservations. You are supposed to keep the saucer filled, but this created far too much humidity, making everything inside mouldy unless the things inside were sealed in a plastic bag. In the end I did away with the saucer and the temperature inside stayed cool enough without water.
*
bathroom
We didn’t have one at El Pocito, or a toilet. We didn’t feel it was necessary, not even during Maureen’s illness. Why? Because we lived in a small space and didn’t want to make it any smaller for something that is only used a few minutes in the day.
Even when we lived in the UK we were part the way there, experimenting with reed-bed water treatment. I’d also been to visit loads of examples of composting toilets, read all the books, gone on some pretty intensive residential courses, and weirdly had a job with the local water authority in sewage treatment for a while, so plenty of hands-on experience. Which I suppose is what eventually led to the revelation that simple is better than complex. The reason why our culture insists on us having bathrooms in our homes and removing our sewage to treat it elsewhere is because it helps keep us fearful, fearful of disease if we don’t. While the harsh reality is that what they do with it is damaging the eco-system, you just never get to hear about that part. The only way to deal with human waste properly is to follow nature’s example. Compost it. Don’t put anything in that isn’t 100% natural, then let the rain/ sun/ and micro-organisms do their job.
So, this is how we did it at El Pocito:
Nothing was brought in from outside which couldn’t be recycled or composted ourselves en situ.
Not a drop of water was ever wasted.
Instead of having a conventional toilet pedestal/ composting-toilet, we adopted for the most natural approach. Peeing into a bucket (which was then added to the compost heap) and squatting (a much healthier pose) into a bowl (or potty). In which a layer of water or wood shavings have been added first (the latter available free from carpenters). The contents then upended straight onto the compost heap.
Cleaning the bowl afterwards was simple, requiring no more than a quick rinse under the tap. And that’s it. To be honest I had more worries about this than any other aspect of off-grid living, but it proved to be fine, no disasters whatsoever. It’s also as comfortable as the usual pedestal arrangement, plus healthier (the squatting position allegedly more efficient at eliminating toxins/ plaque, which otherwise cause major health problems, or as one practitioner explained – fat people are literally full of shit). Plus, we got to do it out in the fresh air (on the patio), so no odours and with this amazing zen-like atmosphere of nature all around us. A really inspiring moment in the day. The only difficulty we had at the start was finding the right size bowl for the squatting part. Has to be small enough to fit between your feet, but deep enough to deal with the worst scenario. My one was circular, 28 cm wide by 12 cm high. Oh, and you don’t need to use toilet paper either, because the bidet experience is a lot better and can be had simply with another bowl of water to spritz with.
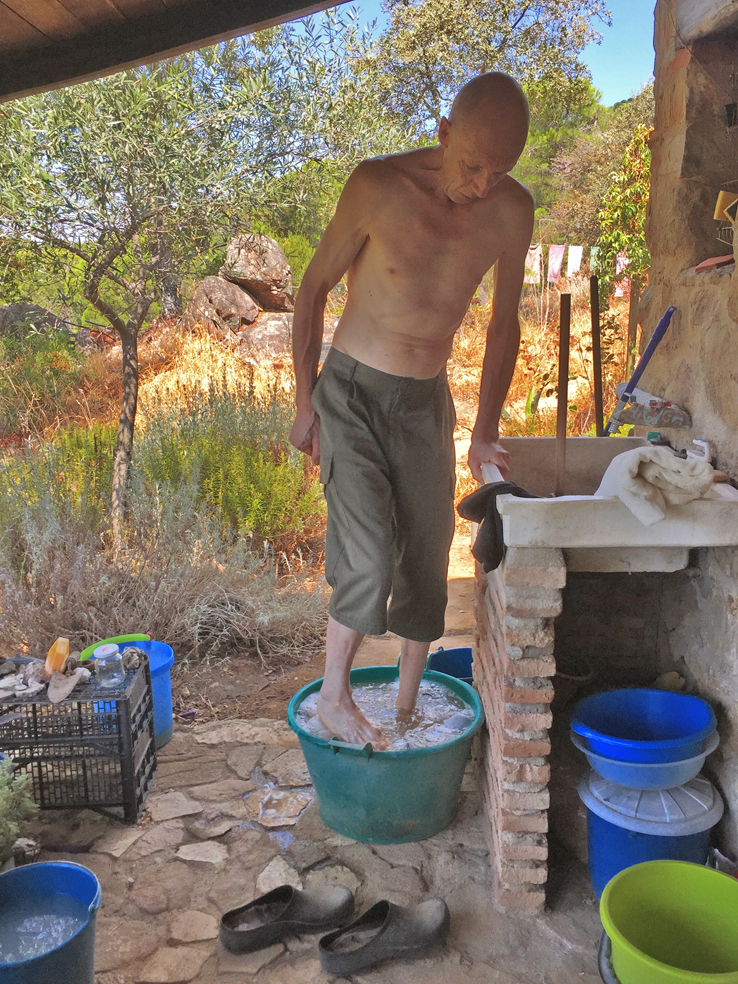
There was no shower or bath either (nor is there in our current home). Instead, we used a bowl into which the juice of a lemon had been added, then filled it with about a litre of nearly boiling water, topped up with just enough cold to prevent scalding. This is placed on the floor in front of another bowl in which you stand/ squat to prevent flooding. Using a mitt or flannel, rubbing/ washing the entire body, starting from the top and working down (cleanest parts first). Finished off by emptying the water into the bowl you are standing in to soak your feet. No rinsing required. Five minutes and the whole job is done. All of which probably sounds terribly unhygienic and primitive, but having done this for nearly twenty-five years there hasn’t been a single complaint. It is as effective as conventional washing/ 100% non-toxic/ all the body’s essential oils are retained/ hair & skin stay softer/ and it’s a hell of a lot quicker and more pleasant than any bathroom we’ve ever been in.
*
waste water (grey) treatment
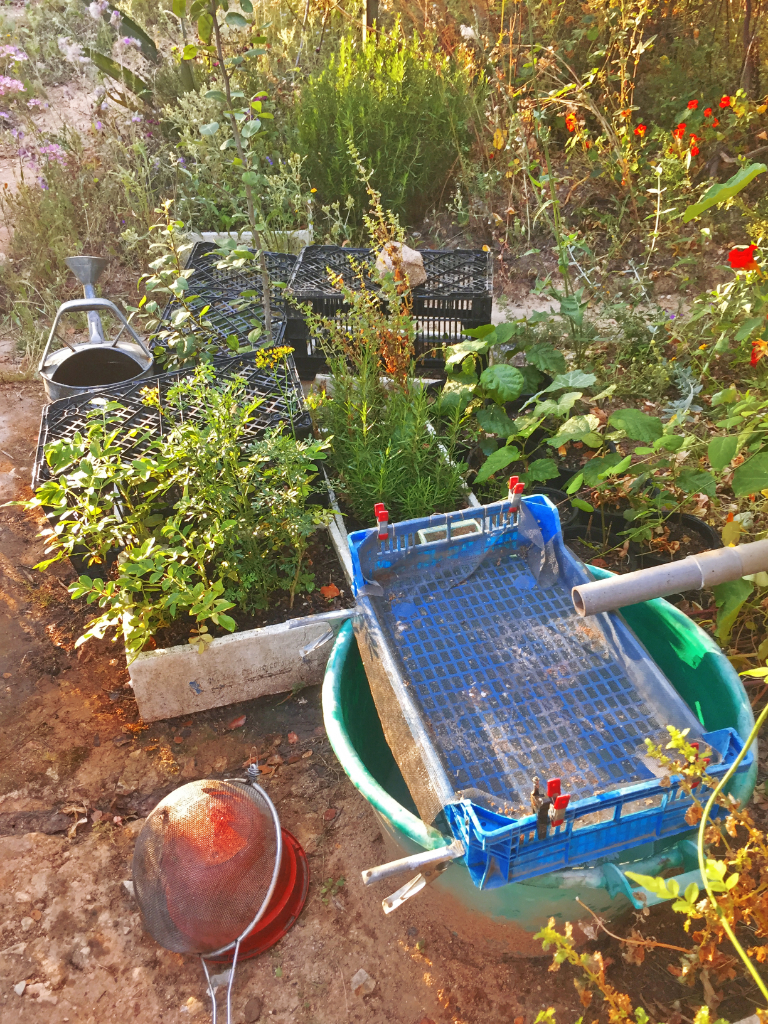
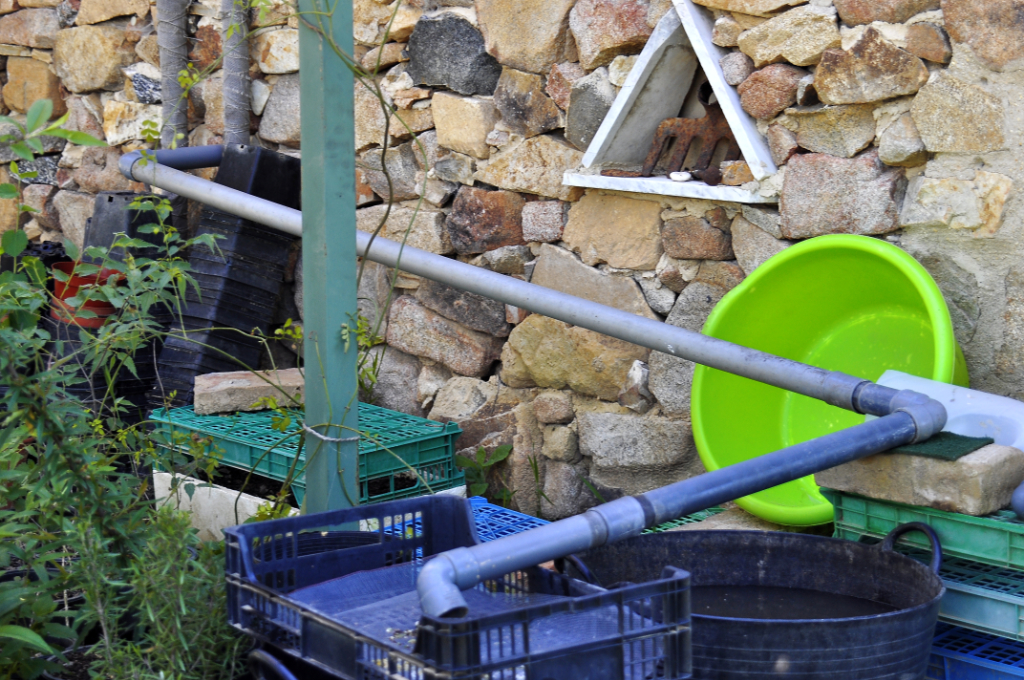
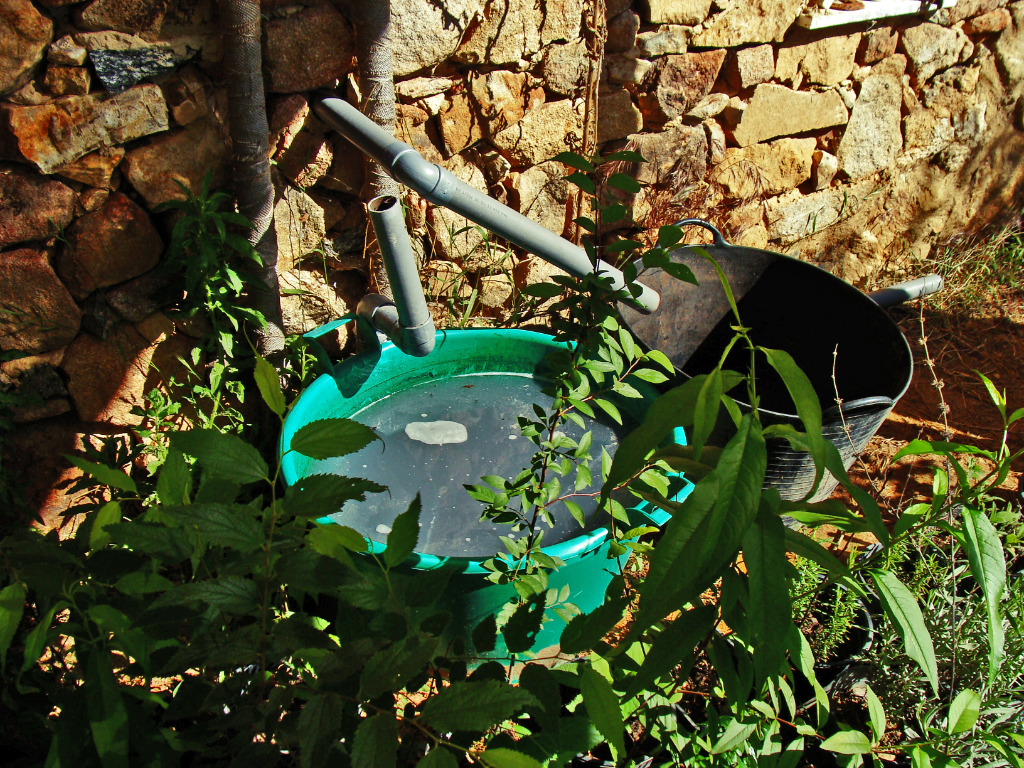
In the summer all the wastewater from the kitchen sink at El Pocito was diverted into a series of large buckets just outside, located conveniently next to the plant nursery area. Before it actually reaches the bucket a mesh filter removes any bits. This water then was used to water the plants each evening. In winter the pipework was simply changed so it went down a pipe to the reedbed/ pond, where it is cleaned naturally. Attested to by a large colony of frogs and dragonflies.
There has only been one problem with the wastewater system as it is and this has been a regular build-up of grease in the pipework, because we don’t use any hot water, causing blockages about once a year. However this is simply unclogged using the same rods I have for sweeping the chimney.
One of the projects for the future, had we stayed there, was to build a pre-cleaning pond, before it goes down to the main pond. This is not essential but would have added a useful cooling/ passive heating feature in front of the house. Also providing a habitat for the many frogs/ toads/ lizards/ snakes/ wasps/ flies/ and bees that currently seek the water in the various bowls of water dotted around.
All of which begs the question of why if Maureen & I managed for so long without the need to use products that aren’t totally biodegradable, why can’t the industry be forced to make them as standard? Then there would be no pollution and no need for waste disposal sites. If you have to use products make sure they are ONLY biodegradable ones.

swipe to see more photos
*
off-grid washing machine
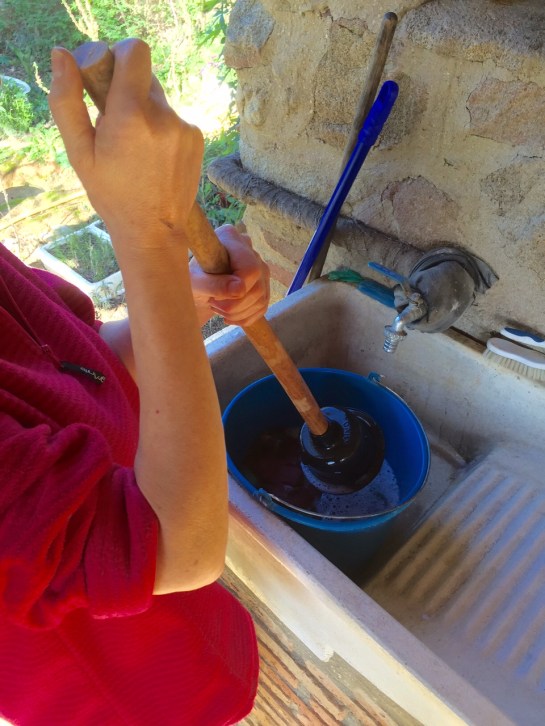
Until now we’ve managed without a washing machine, that’s 19 years! It’s not always been ideal (especially in the winter), but over time we honed the job so it only took up a small amount of time, in fact far less than using a machine and using less water/ detergent. The only niggle, as I said, was during the winter months when the water got so cold your hands risked getting frost-bitten. At first I tried wearing rubber gloves, but they were neither thick enough to keep the cold out, or durable to last more than a couple of weeks without disintegrating. Then Pauline came up with the idea of using fishermen’s gauntlets, thick pvc jobs which are big enough to wear woollen gloves under. These were perfect for keeping fingers toasty.
An even better solution, thanks to a YouTube video sent by my good friends Dennis & Jessica in Dumfries & Galloway:
http://www.youtube.com/watch?v=RtbkXyWFFm8
This shows how, with just two buckets and a rubber sink plunger, you can have a proper washing machine. One is filled with cold water and detergent (biodegradable liquid soap). Then the other does all the work, aerating and forcing the dirt out.
Eventually we got rid of one of the buckets and used a plumber’s plunger instead (with some very small holes drilled in it to let the soap/ air do their work). Upgrading then to a brass posser. Two rinses are all that is necessary. So amazing you wonder how washing-machines got to be so darned complex and expensive.
For larger items (blankets etc) there is an even easier solution:
*
paintwork
There are just four walls inside El Pocito that needed painting and we only did them once, when we moved in. It took us a day. The paint we used was a material called Cal (Calcium oxide/ lime/ or whitewash) and spookily turns out to be exactly the same as the stuff we bought for our previous house in the UK but cost us a fortune. In Spain this has been in continuous use for hundreds of years so is a lot cheaper. You can even buy the raw material and make your own, simply add water, the only other ingredient. However this can be rather hazardous, as on first contact with water the Cal literally boils and can be highly corrosive. When cooled it is perfectly safe though.
Painting is messy, as it drips excessively, so you will need someone on hand to clean up all the splashes straight away, especially on some types of bare wood as this can be stained permanently. When you brush with Cal it looks white (or you can add pigments) but goes on totally transparent, so unless you keep going at a fair rate you won’t be able to see where you’ve been. Only when it dries does the brilliant white finish appear. Best bit though is the smell, there isn’t any. Nor toxicity. Though it’s not washable and will come off when touched.
*
wood treatment
This is something else we’ve spent a lot of time and money trying to solve ecologically. The perfect solution for protecting woodwork in and outside the house (roof beams/ windows/ and doors) from the effects of sun/ humidity/ and termite infestation being LINSEED OIL and NEEM OIL (mixed 5 parts to 1 part). You apply it when the wood is perfectly dry (by brush or cloth) and each subsequent year will absorb less and the job speed up, until eventually needs treating only occasionally. Neither contain solvents or other hazardous chemicals. Very quick and cheap.
*

very nice post, i certainly love this website, keep on it
LikeLike
Amazing story! Discovering what really works has been a rich life journey. Makes me realise why I’ve not progressed beyond the dreaming and wondering stage. The toilet story intrigued me as did the washing story. Thank you for sharing it in such detail.
Best wishes,
June
LikeLike
Really inspiring! Looking forward to meet you tomorrow!
LikeLike
Best site I have read to date. So many useful tips and ideas. Grateful for all the plant lists and data.
LikeLike