
(Neal Street, Covent Garden, and the FOOD FOR THOUGHT vegetarian cafe in the 1980s, where we were first inspired to stop buying meat & fish)
*
Life, as I have only just begun to realise (why did it take this long?), is all about becoming more and more inquisitive about the natural world around us, the one we really depend on, and less all the virtual crap that we can otherwise get immersed by. Life is also about acquiring new skills.
For example, at the age of 67, teaching myself to play the drums (rumba & flamenco), and how to create tasty and healthy meals.
This page is dedicated to the more successful recipes, and each time I come up with a new one I will photograph it and post the recipe here.
None of these will contain any fish, meat, dairy, eggs, or ultra-processed ingredients. Please note though, they are generally on the spicy side, so if you don’t like this kind of taste then simply reduce the amount of cayenne pepper/ chilli to suit.
There are no specific instructions on how to prepare the vegetables, that’s for you to decide, we all have different ways of doing these things, but for other newbies out there the thicker it is the longer it will take to cook.
Preparation can take as much as 75% of the time to prepare a meal, so make sure your knives are always kept sharp. I use a flat 6″ chainsaw file for this, which takes no time.
You’ll note that I am a big fan of curly kale and cavolo nero. When preparing these it is best to discard all the hard stuff (stems/ veins more than 1 mm thick). But with cauliflower and broccoli you can eat virtually all of it, including the thick stems, just cut those into smaller pieces so they cook in the same time.
Unless stated all the cooking is done on a mid-low heat.
Most of the recipes are for six servings (batch cooking), as this is a much more efficient use of time and ingredients. If this is too much, you can freeze what you don’t need or refrigerate in a sealed container for use within 48 hrs. A tip on re-heating, always do it slowly on a low heat, that way it won’t stick to the bottom of the pan. We also buy (all our non-fresh ingredients) in bulk, which is not only a lot cheaper, but if you buy enough are usually delivered free of charge. For example, organic flour we buy in 25 kg sacks, as the shelf-life is at least 6 months.
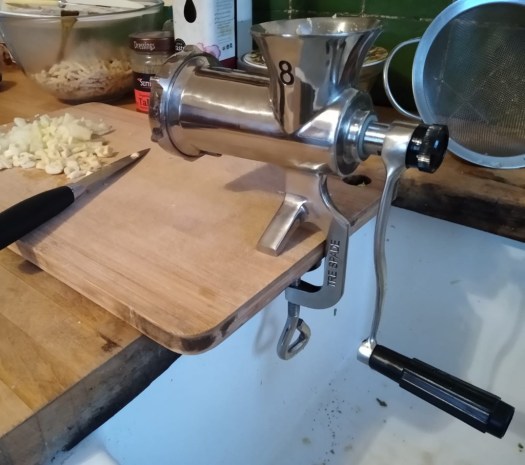
With regards to kitchen implements, we like to keep it basic here, so really there are only two recommendations.
A cast-iron wok, which we do most of our cooking with and has the benefit of staying hot longer than stainless steel, plus is large enough for the batch portions (6 or more) we prefer. Ours measures 37 cm in diameter.
And a cast-iron manual meat mincer. Not a big fan of electrical kitchen gadgets, this is perfect for making the burgers and hummus with. You can either find them second-hand on eBay, which is where we got our first one, or buy new. I personally recommend going for an all stainless steel model and a 4.5 or 5 mm disc.
Where tinned beans are mentioned in a recipe this is solely as a convenience for those just starting, we actually prefer to use dried beans and cook them in a pressure cooker. This way they have much more flavour/ nutrients and do not contain any harmful preservatives. As a very rough guide (worth checking on the internet), one 400 g tin of beans is the same as 1/2-3/4 cup of dried beans. Always soak them the night before.
Rice is featured a lot. I’ve listed it here as basmati, but actually we prefer brown/ whole grain. Basmati is a lot simpler though. If you wash it thoroughly (to get rid of the starch) first, then soak in a bowl of boiling water for an hour, followed by cooking, the taste is better. Or, as I prefer, wash/ soak for an hour in cold water/ then cook for two minutes in a pressure cooker. 1/3 of a cup to 1/2 a cup per person is a good portion.
Use the best extra virgin olive oil you can afford, it will make all the difference to the taste, and is much healthier than cheaper oils.
If you’ve not come across them before, tamari and miso impart to cooking that unique unami taste. We use the Clearspring brand, and get the cheaper larger sizes (2.5 ltr & 1 kg respectively).
Please feel free to adapt and hone the recipes, and do let me know what you think or how to improve them.
The order they appear in is most recent first.
- chickpea curry
- jalfrezi
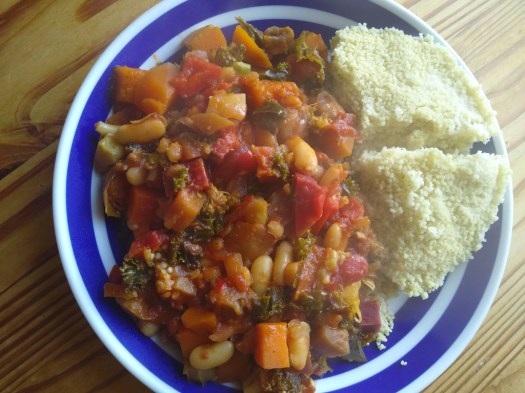
- moroccan chickpeas
- hungarian goulash
- biryani
- nduja aubergine & chickpeas
- green pulao
- mumbai potatoes
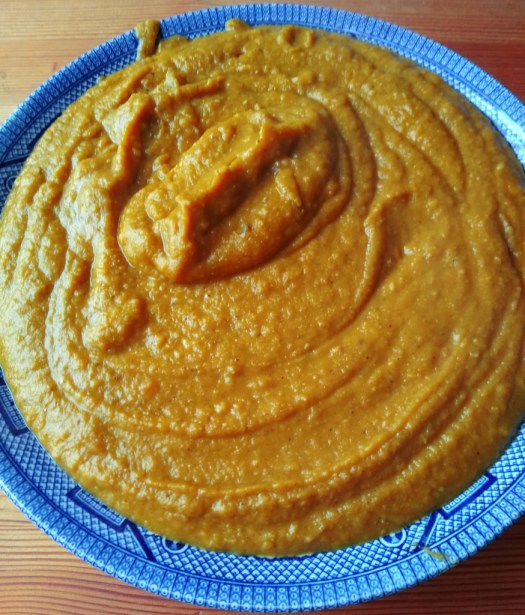
- spicy moroccan carrot soup
- hearty lentil, butter bean & greens soup
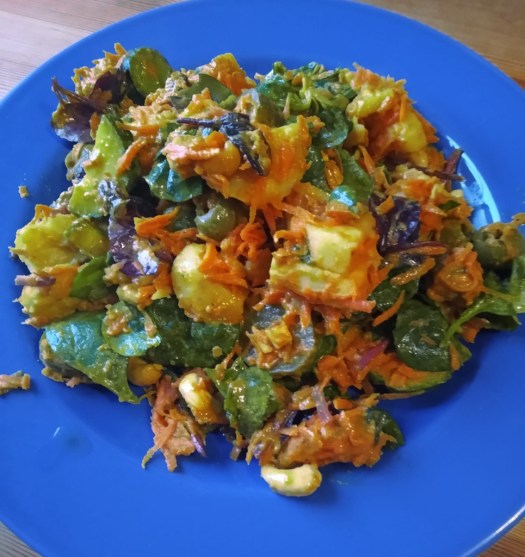
- quick curried salad
- north indian kidney bean curry (ramja)
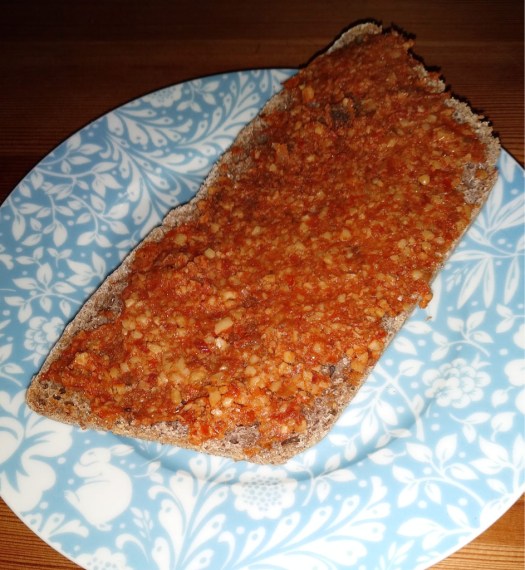
- vegan sobrasada
- beetroot bourguinon
- chilli sin carne
- smoky butterbean and orzo soup
- spicy lentil bean stew
- goan vindaloo
- borscht
- white bean balls in garlic tomato sauce
- aubergine & bean stew
- korma
- kale pesto pasta with mushrooms
- curried pumpkin & ginger soup
- cuban black bean soup
- rogan josh
- tomato & bean soup with noodles
- saag aloo
- pauline’s curry
- curried cauliflower and sweet potato soup
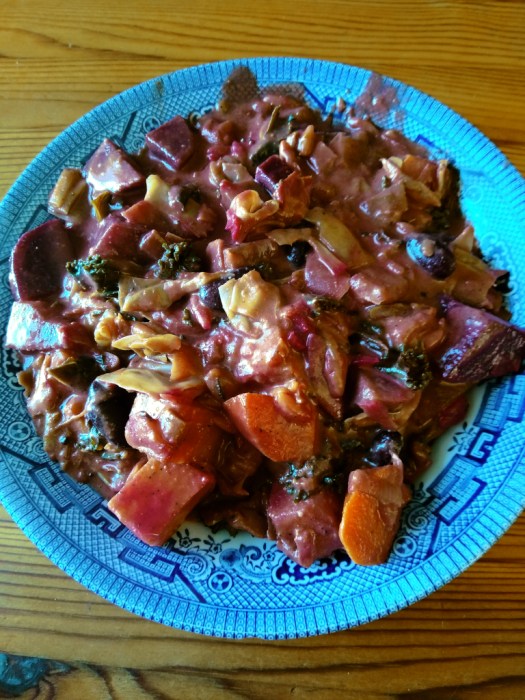
- irish stew
- spaghetti bolognese
- rice and beans
- fresh herb tea
- mushroom stroganoff
- pan con tomate
- hummus
- veg makhanwala
- selma’s basmati rice
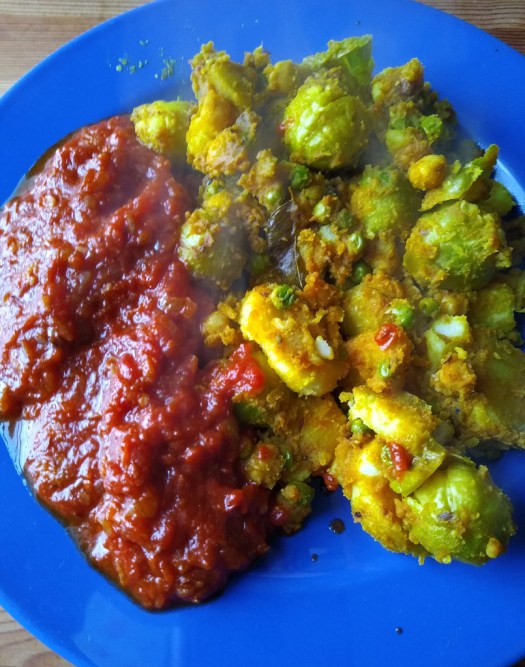
- brussels sprouts curry
- spicy bean burgers
- minestrone
- sourdough recipe (tried & tested)
- pizza dough recipe
- dundee-ish cake
- easy sauerkraut
- even easier kimchi
- espresso off-grid
- make your own plant milk & plant cream
chickpea curry

click here to download recipe
*
jalfrezi

click here to download recipe
*
moroccan chickpeas
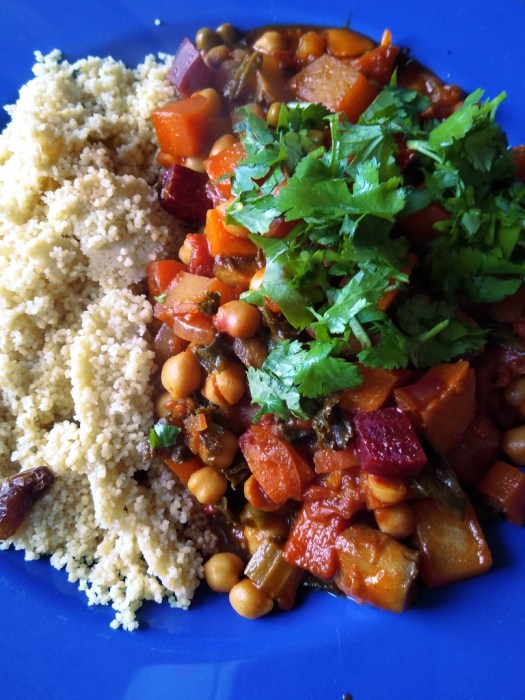
click here to download recipe
*
hungarian goulash
click here to download recipe
*
biryani

click here to download recipe
*
nduja aubergine & chickpeas
click here to download recipe
*
green pulao

click here to download recipe
*
mumbai potatoes
click here to download recipe
*
spicy moroccan carrot soup
click here to download recipe
*
hearty lentil, butter bean & greens soup

click here to download recipe
*
quick curried salad
A salad that you can eat at any time of the year.
click here to download recipe
*
north indian kidney bean curry (ramja)

click here to download recipe
*
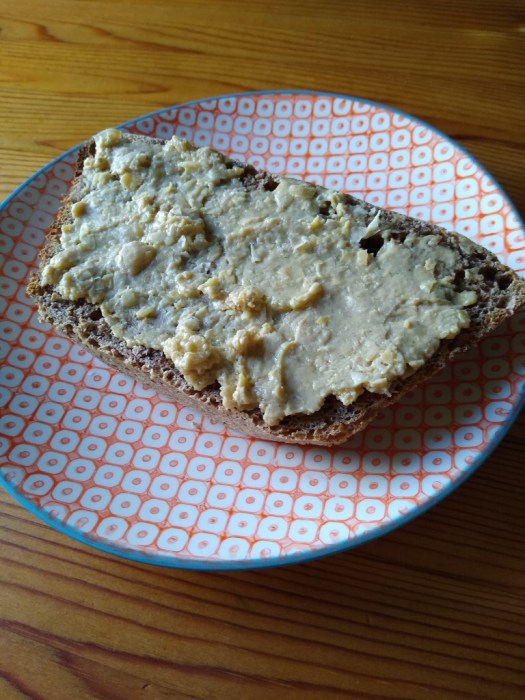
vegan sobrasada
This is without doubt the best breakfast spread I have ever had, sublime on hot toast.
click here to download recipe
*
beetroot bourguinon

click here to download recipe
*
chilli sin carne

click here to download recipe
*
smoky butterbean and orzo soup

click here to download recipe
*
spicy lentil bean stew

click here to download recipe
*
goan vindaloo
Despite the name this is a very mild curry, though you can simply increase the red chilli flakes to make it hotter.

click here to download recipe
*
borscht

click here to download recipe
*
white bean balls in garlic tomato sauce

click here to download recipe
*
aubergine & bean stew
click here to download recipe
*
korma

click here to download recipe
*
kale pesto pasta with mushrooms
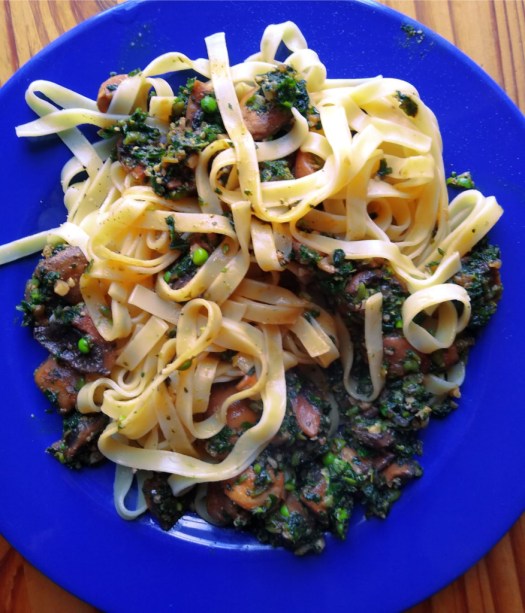
click here to download recipe
*
curried pumpkin & ginger soup

click here to download recipe
*
cuban black bean soup
Teamed here with spelt & rye sourdough bread (recipe below).

click here to download recipe
*
rogan josh

click here to download recipe
*
tomato & bean soup with noodles

click here to download recipe
*
saag aloo
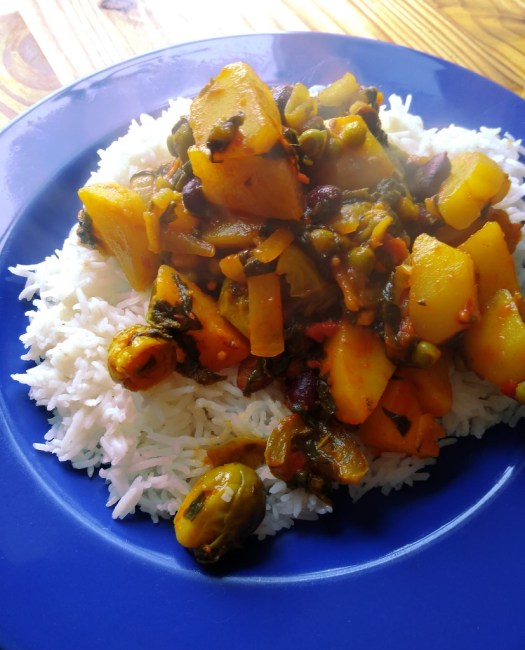
click here to download recipe
*
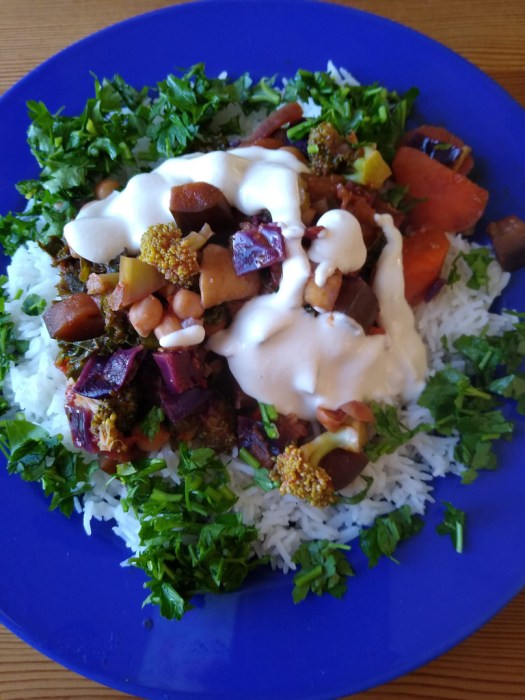
pauline’s curry
This is one of our staple meals. Served with Naan bread.

click here to download recipe
*
curried cauliflower and sweet potato soup
The photo doesn’t do justice to the amazing taste of this soup. It can also be used as a curry.

click here to download recipe
*
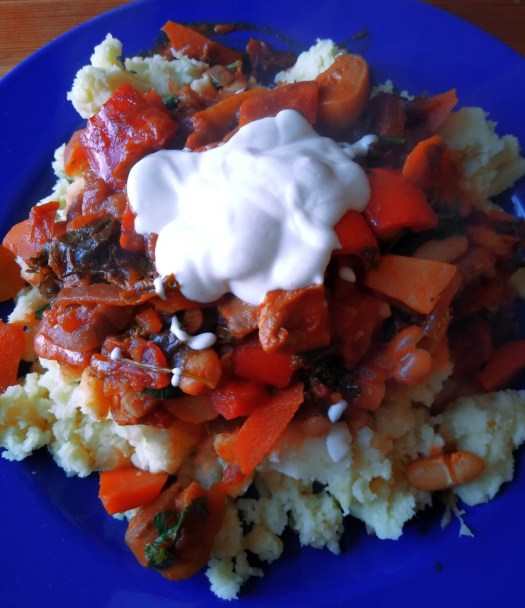
irish stew
A very warming recipe for a cold day. It does contain beetroot, so if you are not a fan then just substitute your favourite root vegetable(s). Same goes for the smoked paprika (not to everyone’s taste), simply use the ordinary kind of paprika. For more information about making cashew cream, visit the chapter make your own plant milk & plant cream.
click here to download recipe
*
spaghetti bolognese

click here to download recipe
*
rice and beans
I got the idea for this from a wonderful Peas & Rice dish we had in an authentic (ie not for tourists) Bahamian cafe in the back streets of Nassau. The only time on that trip we felt comfortable eating out.

click here to download recipe
*
fresh herb tea
For at least six months of the year in Shetland it is possible to go out and pick fresh herbs to make tea. Not only does this taste so much better than dried herb tea, every day is a different selection. This one was the fresh new growth of rose petals + catnep + blackberry leaves + nettle + three types of mint + daisy + mugwort + yarrow + valerian + tarragon + common figwort + silverweed. Always pick the newest part of the plant and steep in boiling water for 10 minutes.

*
mushroom stroganoff

click here to download recipe
*
pan con tomate
This is one of the many things I really miss not being able to live in Spain any more, tomato on toast. It doesn’t look that special, but paired with an espresso (or cafe as it is properly called) this makes for the perfect breakfast.
To make at home all you need is a good quality sweet tomato, small to medium size. Simply grate it into a bowl and spoon on. That’s all.

*
hummus
Have you noticed that shop-bought hummus doesn’t taste like it used to? That’s because the food industry has dramatically reduced the amount of chickpeas and tahini they use, replacing them with a lot more water, then whipping it into a foam. Luckily, making your own is simplicity itself.
click here to download recipe
Featured here on sourdough toast, recipe further down.
*
veg makhanwala

click here to download recipe
*
selma’s basmati rice
This is a very tasty alternative to simply cooking the rice. It’s from Selma, who owns the amazing Seabreeze Guest House on the seafront at Portobello, near Edinburgh. Well worth staying at if you are visiting the area, especially for her breakfasts!
click here to download recipe
*
brussels sprouts curry

click here to download recipe
*
spicy bean burger

click here to download recipe
*
minestrone

click here to download recipe
*
sourdough recipe (tried & tested)
Regardless of what the books tell you, there are no rules to making bread and the sooner you embrace that the quicker you will become a great (intuitive) baker. Experimenting is the only way to understand and succeed.
I currently make my sourdough as follows:
With two jars (originally they came with pickles, the 900 gm size). A long-handled metal spoon for stirring right down to the bottom of a jar. A 1/4 cup measure. Large mixing bowl. And finally a Pyrex dish with glass lid (or Dutch Oven) to bake it in (internal measurements of mine are 300 mm x 200 mm x 85 mm).
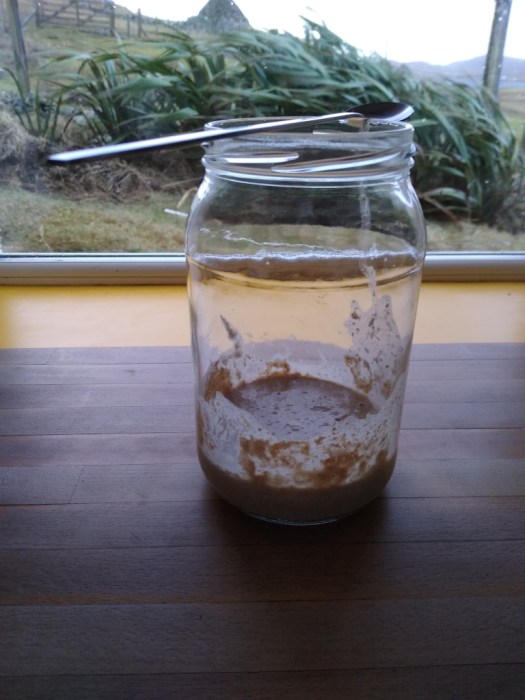
The term sourdough, I think, refers to using live yeast instead of an instant or dried one. You make this yourself (or if you live in a bakery the yeast is in the air, so no need to add) and it’s also known as a starter or mother. To get one of these going is really easy. You simply put a 1/4 cup of flour (organic wholemeal spelt is the best, as it is already full of natural yeasts) in one of the glass jars, along with enough water to make it into a porridge-like consistency (which is around 1/8 cup). Repeat this every day, for seven days, by which time the jar will be about half-full and you are ready to start baking.
Water. Using the mains supply, stuff straight from the tap can kill the yeast (if it has a really strong bleachy smell), so I draw off what I need a couple of hours beforehand to allow the chemicals to evaporate.
Now to the bread making part. Again, this is really simple, but you will need to allow a lot more time than with ordinary bread making.
On the last morning making your starter (day seven), at the same time set aside 400 ml of water. Allow enough time for the contaminants of the latter to vent off (a couple of hours), then stir the starter and decant enough of it into the clean jar to cover the bottom. This will be Day One for the starter of your next loaf, and you repeat the making a starter process for another seven days. Or you can refrigerate it (with a lid on) until you want to start again.
Next you add the 400 ml of water to the rest of the starter (the majority), stir thoroughly then pour into a large mixing bowl. Then gradually add spelt flour (or any other type of flour at this stage) until the consistency is becomes like extremely thick sticky porridge. Then leave it in a warm place until the following morning. This period is known as the first stage of rising.
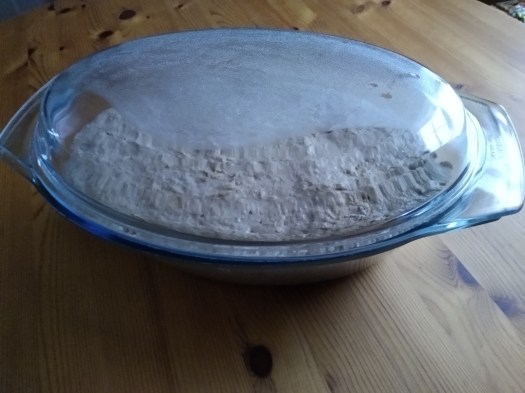
Next day the consistency will be a lot looser. Add more flour, mixing it in first with the long-handled spoon, then one hand only. When the dough begins to form a cohesive ball, but is still very elastic and moist, tilt the bowl and keep it in that position, making sure flour covers the dough sufficiently to lift it out without it sticking to your hand. Then leave it in the bowl for a couple of hours. This is the second stage of rising, and now you should begin to see some (it might not be a lot) increase in volume.
Please note that salt is not required in this recipe. Sourdough spelt has enough flavour of its own, and will keep fresh for ten days, without it.
Around mid-morning, using the long-handled spoon, lever out the ball (which will have become sticky again, but do not add any more flour) into the pyrex dish (which does not need to be greased). Level it flat and smooth using the back of the spoon. Put the lid on and place back in the warm again, for at least a couple more hours, at least until it has risen almost to the top. This is the third stage of rising, and will ensure a perfect chewy crust and light texture. Keep an eye on the rising, as you don’t want it to rise into the lid. As soon as you think it might then either start the next stage (below) or move it to a colder place.
Next comes the baking. I think this is the only difficult part, getting the temperature & timing exactly right. Because all ovens are different, and some are not as accurate as they should be. Ours for example is 20 C degrees hotter than it says on the dial, it’s also fan assisted so bakes quicker. I find that 140 C (on the dial) is what works best for me, which works out at 160 C in real temperature, and for a non-fan-assisted oven add another 20 C, ie 180C. Don’t worry if the first time it doesn’t work, eventually you’ll discover what does. Just don’t try adjusting both the temperature and the time, stick with one or the other.
Preheat the oven for five minutes, then place the dish with the lid still on, on the middle shelf (this will give you the benefit of steaming the bread, using the trapped moisture in the dough) and bake for 45 minutes. Then remove the lid (which is why it shouldn’t be allowed to rise too high, you’ll never get it off) and continue baking for another 15 minutes. Then switch off the oven, but leave the loaf inside with the door closed for another 15 minutes. Take out and allow to cool in a cold room for at least hour, so it starts to shrink a bit and naturally peel away from the dish, after which you should be able to slide a knife around the edge and the loaf will tip out. Place upside down on something like a sieve, to allow the air to dry the outside thoroughly, which will still be very damp and soft. The drying process can take a couple of hours or all night. But it is very important. If you forget to do this the loaf will stay damp and go mouldy. When it feels totally dry, store in a cotton drawstring bag. It should then keep fresh/ soft/ and chewy now for at least seven days, and still edible for several days after that.
This recipe makes a loaf that weighs around 1.45 kg, which incidentally is 650 g heavier than a similar sized artisan loaf bought from a shop. Because the lighter one will be full of holes. If you want to make a smaller loaf simply use less water. Nothing else needs to be altered.
Then, when you feel confident with all that, you can start improvising. Having recently tasted a Spelt & Rye loaf I am now using organic rye flour for my starter. It doesn’t seem to make a massive difference to the taste but the rye is certainly a very active starter. You can also substitute beer or stout for water, the possibilities are endless.

*
pizza dough recipe
I love proper Italian soft, thick crusts on a pizza, so if you do too this is the recipe. Makes enough for four proper servings.
The night before heat 220 ml of water and pour into a large mixing bowl. When it is cool enough (body temperature) add one teaspoon of dried yeast (or sourdough starter – 1.25 cups) and one teaspoon of honey. Stir. Then add Type 00 flour until the consistency is like porridge. Cover with a plate.
In the morning, with a long-handled spoon, add more Type 00 flour until it is no longer sticking to the bowl but is still elastic/ sticky inside. Cover and leave until the afternoon.
An hour before cooking oil a large tray and roll out the dough into it in a round pizza shape. Add your toppings then place in the middle of a pre-warmed oven. Mine is set to 200 C (actual 220 C/ fan-assisted). Bake for 10 minutes.
*
dundee-ish cake

4 bananas
1 – 1.25 cups of olive oil
2 tablespoons of treacle or molasses
1 lemon, grated to include skin, pith & juice
(25 ml)
1 teaspoon of sodium bicarbonate
(or baking powder)
30 gm ground almonds
230 flour (we use spelt)
300 gm sultanas
150 – 230 gm glace cherries, cut into
quarters
140 gm walnuts, broken into small pieces
120 gm dates or prunes, chopped
10 almonds, to decorate (optional)
Squidge the bananas in a bowl until they become completely liquid. Then add the treacle and lemon juice. Mix together. Sieve and fold in the flour. Add bicarbonate of soda and almonds. Add sultanas, cherries and walnuts. Mix well. The consistency should be like treacle, add a little more olive oil if it seems too dry, otherwise it will end up crumbly.
Pour into a greaseproof paper lined cake tin (we use one which has a removable base and side which unclips), 24cm diameter, 6.5cm deep. Decorate with whole almonds if you want
Bake in an oven, on the middle shelf, for 50 minutes at 115C (20C higher if not fan-assisted). You may have to experiment with this as most thermostats are not that accurate and size of ovens differ. Our last oven was gas and we set it to Mark 2.75 for 75 mins.
When the time is up test with a needle, or see if it still wobbles when shaken, if it does then put back for another 5 minutes.
The amount and proportions of nuts, fruit and treacle can be varied to taste.
A dish of water on the bottom of the stove will help to stop drying it out during cooking.
*
easy sauerkraut
This is really easy and not only much tastier than shop-bought, healthier (shop-bought has been pasteurised, killing off any goodness). Both as a natural probiotic (you need this for good stomach bacteria) and its anti-cancer properties.
I make enough each time to fill two one litre jars.
What you need:
a two-litre sauerkraut crock or two-litre Kilner jar. A large mixing bowl. A long wooden spoon. A pestle or something similar. Two one-litre jars with lids (optional for storing the sauerkraut).
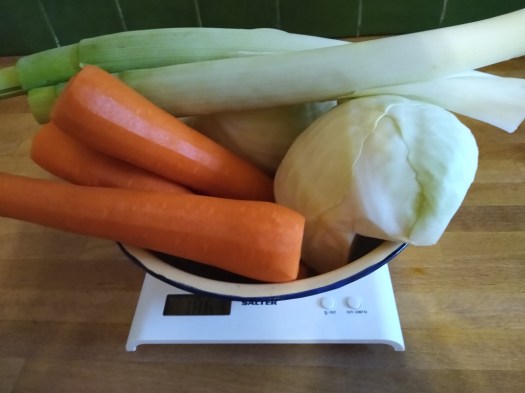
2 kg of vegetables (cabbage, carrot, turnips, parsnips, garlic, spring onions, radishes, chillies, whatever you want). 40 gm of sea salt (or 2% of the weight of the vegetables).

Allow up to an hour to do the first stage. Start by weighing out the vegetables to calculate how much salt you need. Then prepare the vegetables. Grate the carrot. Remove and discard the outer leaves of the cabbage. Then set aside a whole clean leaf, in one piece if possible. Slice and dice the rest of the cabbage as finely as possible.

All the cut/ grated vegetables go in the mixing bowl (I used two as I don’t have one big enough). As you do this, sprinkle salt evenly throughout.

When this is done let it rest for half an hour. Then the hardest part begins. You need to break down the vegetables so the water trapped inside them is released. Start by using the pestle, then go onto squeezing the mixture with your hands, until the level of liquid is higher than the vegetables.
Now decant everything into the two-litre crock/ jar. Using the long wooden spoon to pack the mixture down as tightly as possible, there shouldn’t be any pockets of air.
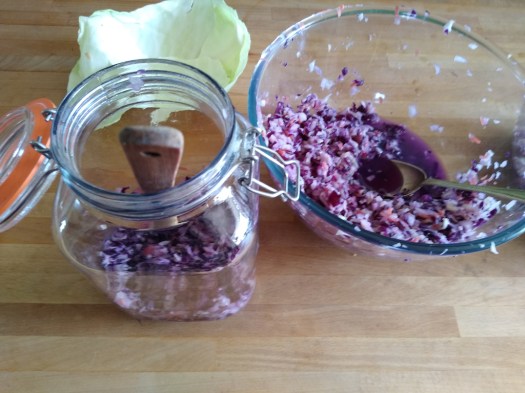
When you are finished the water level should be above the vegetables. If not top it up with some water from the tap that has been allowed to stand for a couple of hours.

Place the whole cabbage leaf (or pieces) on top to form a seal.

Then using a glass or cup, weight it down (in my case with stones from the beach).
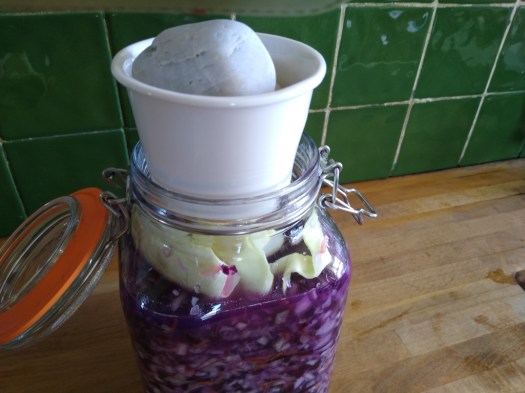
Finish off by sealing any gap with muslin or similar to keep the dust out.

Now all you have to do is wait, anything between 9-28 days (the longer you can wait the better the taste), keeping the jar at room temperature. When you are ready, decant into smaller jars and store in the fridge. Should last 6 months.
*
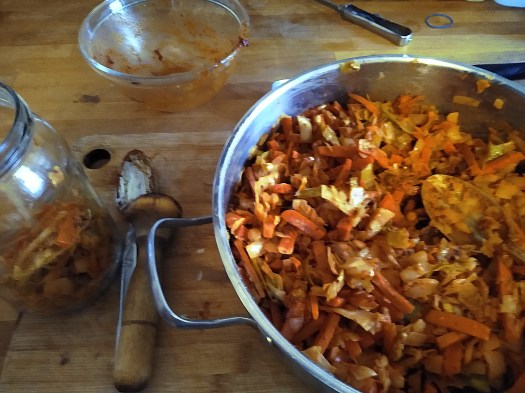
even easier kimchi
I thought the sauerkraut was amazing but then went on to discover Kimchi, which is even better. Really sweet & spicy, plus even simpler to make.
This is what you need to fill 2 x 500 gm jars and 1 partly-filled one.
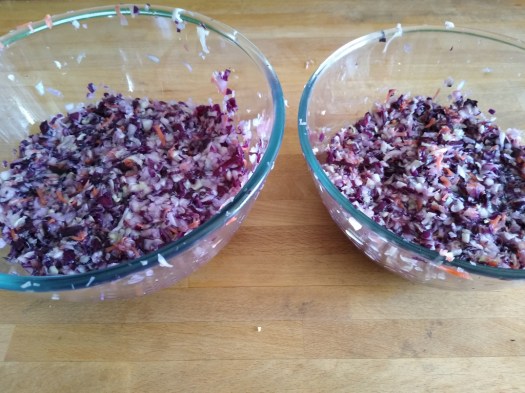
2 kg of vegetables (peeled & chopped weight) Of which approximately 600 gm is any kind of cabbage including curly kale, 500 gm is beetroot, plus a selection from the following: carrot, leek, sweet potato, red pepper, swede, parsnip, pumpkin, turnip, celery, green beans, plus anything else you think might be tasty….
40 gm salt (2% of the total weight of the vegetables) 1 dessertspoon of sweetner (eg agave syrup)
For the paste
1 tsp of coriander
2 tsp of cumin
1 tbsp of korean chilli flakes
1 tbsp of tamari
1 dessertspoon of sesame oil or tahini
1 tbsp of miso
4 garlic cloves
1 thumb of ginger
1 small sweet apple (Fiji are good)
4 spring onions (chopped)
virgin olive oil

Wash & peel the vegetables, then weigh them to make sure you have the 2 kg in total (remember this is just for the vegetables, not the paste ingredients) and adjust the salt quantity accordingly.
Cut everything into french fries sized strips (approx 5 cm long by 5 mm thick), discarding the tough root and stalk bits.
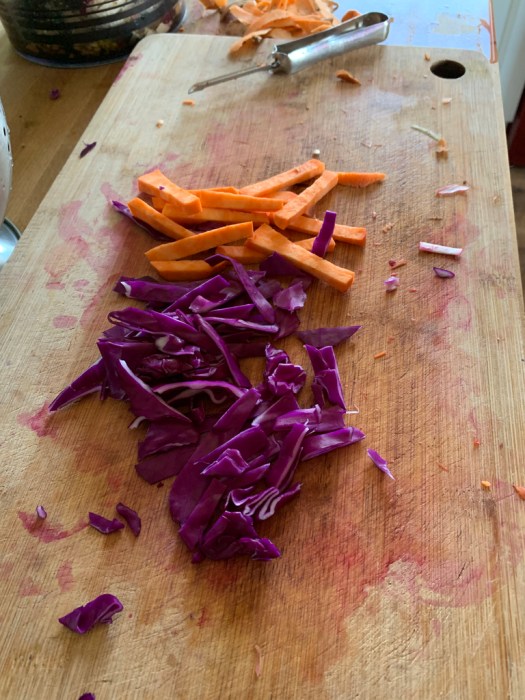
Now put them all into a large stockpot and add the sweetner & salt. Then using a mortar, pummel everything until it starts to soften. This can take 10-15 mins, so be patient. When they begin to soften you can use your hands to squeeze them instead. You will know when to stop, when liquid appears at the bottom.
Next, transfer to a saucepan, put a lid on and place in a fridge for 24 hours.

The following day start by preparing the paste. Grate the ginger, apple and garlic into a bowl. Add the coriander + cumin + chilli flakes + tamari + miso + sesame oil + spring onions, mixing well and adding olive oil if necessary to create a paste-like consistency.

Cut the spring onions, the white bits finely and the green bits into strips. Then take the vegetables from the fridge and using the lid of the saucepan drain off any liquid into a bowl and save. Then add the paste to the vegetables and using one hand squeeze everything together so it is thoroughly mixed and further compressed.
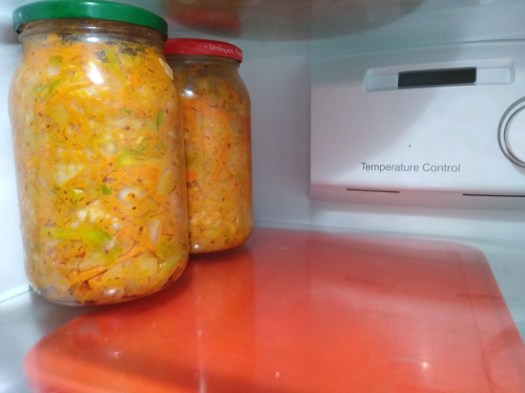
Then decant everything into the 500g jars, using a pestle as you go to make sure it is packed down as hard as possible and there are no air pockets. When the jar is nearly full add some of the liquid to cover the vegetables and wait for a few minutes to make sure it isn’t absorbed (top it up with some more if it does).


(photo above from a different batch, with beetroot)
Then screw on the lids and store in a fridge for two weeks, after which it is ready to use. Keep refrigerated after opening.
*
espresso off-grid
If you love coffee like I do then you probably would like to know how to make it off-grid, ie without electricity.
I grew up around coffee. My parents had an electric percolator and Cona Coffee maker back in the 1950s and 60s, and I remember clearly then there were coffee bars, my mum worked in one. My favourite as a teenager was Bar Italia in Soho, which opened in 1949 and is still there and still looks relatively unchanged. All these establishments had proper Italian espresso machines. It was also commonplace to buy your coffee freshly roasted/ ground from a local coffee & tea retailer. Most areas of London had one.
Then instant coffee arrived, and that killed it off immediately, save for a couple of Italian coffee bars in places like Soho.
After that it wasn’t until the 1980s that real coffee begun to make a comeback again. Spearheaded, like everything else at the time, by corporate chains opening their new-style cafes on every high street. Though it wasn’t good coffee, and still isn’t, but the younger generation didn’t know that. So the rest of us still had to wait, until this century and the emergence of micro-roasters, offering something a lot better. Today, 50 years later, it is finally possible to buy decent coffee beans wherever you live, and drink decent coffee in a few cafes. The only problem remaining has been how to make it taste as good at home as it does on a proper Italian espresso machine in a cafe. Who not only know how to grind it precisely, weigh the dose exactly, and the espresso machine is able to generate a massive head of steam at a specific temperature. To be able to copy this at home would require spending over £1000 on the equipment and acquiring the know-how that most people would find too daunting.
Luckily I spent 19 years of those dark days in Portugal and Spain, where instant coffee never caught on and the bars served consistently good coffee, as they had been doing for the previous 400 years, all at a much more reasonable price too. A fraction of what is being charged in the UK now. Sadly BREXIT ended that. So since then I have been trying to find a way to make a decent coffee at home.

It is possible. Not as good as from a bar with a proper Italian coffee machine, but definitely acceptable and certainly affordable.
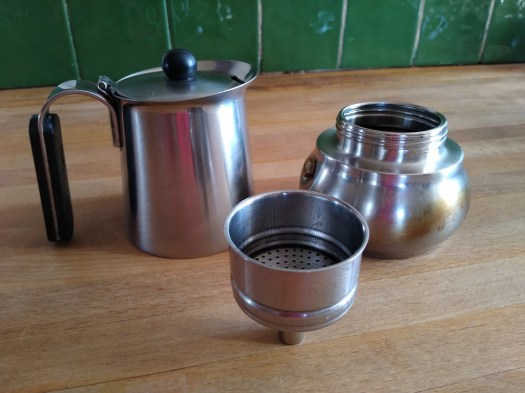
My set-up was as follows:
A stainless steel Bialetti New Venus – 2 cup Moka pot. Which we bought when we were living in British Columbia, back in 2007/8, but is still as good as new today. It’s called a 2 cup, but this is confusing as it really only makes the equivalent of one (double) espresso. To buy one of these today will cost about £30.
An Elma coffee grinder. Which cost me 13 euros new in Spain.
And a Duraflex LE PICARDIE 130ml insulated glass tumbler (about £1.65 new).
And this is how I made the espresso:
When we moved back to the UK in 2019, I hadn’t heard of micro-roasters, so foolishly bought my beans from the local supermarket, which stocked what I thought then were the big brand names. But after working my way through all of them, none tasted anywhere as good as the Delta coffee used in the bars of Portugal & Spain. Which at the time I put down to not having a decent coffee machine at home. Then we made a quick trip to Edinburgh and there I discovered not only some excellent cafes selling unbelievably good coffee, but had the sense to ask what the beans where they used and where they bought them from.
They also told me about the shelf-life of roasted beans. Up ’til then I thought buying in bulk was the most economic option. Wrong. As soon as beans are roasted their unique taste starts to dissipate, so you have to use them up very quickly, preferably within one or at the most two weeks of roasting. The beans you buy in the supermarket, regardless of price/ brand, will always be past this and so of poor quality.
The answer then is to buy direct from micro-roasters, in the smallest amount possible (250 g, which will make about 16 espressos). It took me a while to adjust to this idea, as it was so much more expensive, but when priced out, per cup, this way is still a lot cheaper than buying it in a bar, even back in Spain & Portugal, where it is typically about 90p compared to £3.30 in the UK.
How to make those beans taste as good at home took me a bit longer, but I’m getting there. It wasn’t easy, a very steep learning curve actually (for me anyway), so I’ll describe it two ways: the simple explanation first, then the more complex one.
As I have already said, buy your beans in the smallest quantity (200 g or 250 g), from a small independent roaster.
Then if the sheer choice offered seems too overwhelming, not to mention the different roasts (there are three basically – light/ medium/ and dark), then opt for the house espresso blend (it’s what most cafes offer anyway, so reliable), which is usually medium roasted.
You can either buy single (200/ 250 g) packets to try out various different roasters or opt for a subscription. I would suggest the latter, but make sure it gives you the option to change the frequency of delivery, which is very handy if you run out of beans or don’t use them fast enough.
Store in an airtight/ opaque container, or even better a vacuum cannister.
making a coffee with a moka pot
To keep this simple, you have three variables to get right: amount of coffee beans, the grind setting, and amount of water required.
Let’s start with the beans. To make a standard espresso (a double) you will need to weigh out 18 g of coffee beans, unless you have a 2-cup Moka pots, which only take 16 g.
In order to measure precisely I suggest investing in a good quality coffee scale, one that reads in tenths of a gram.
Next, the grind setting. For absolute beginners, who have only a basic grinder, there’s not a lot of choice, you just have to try and get it to produce a texture somewhere between granulated sugar and wholemeal flour.
With a more advanced grinder there’s a lot more choice. When starting out I would suggest beginning with the finest setting (in the range suggested for Moka pots) and if the taste is too intense then increase to a coarser grind in increments. The type of roast will have some impact too, but this can overcomplicate matters for a beginner, so it is probably best not to go down that rabbit hole just yet.
Finally, the water.
Ironically it needs to be hot, just under boiling.
A standard (double) espresso is measured as 60 ml of coffee. However, you may need to use more (hot) water than that to compensate for the fact your Moka pot may use a bit more, some of which doesn’t end up as coffee. For example, my Bialetti 2-cup needs 20 ml extra, so that’s 80 ml to get a standard espresso. The simplest way to discover how much yours uses is to fill the reservoir to just below the pressure release valve (that brass thing on the outside), pour that out into a measure to see how much it takes, then put that back and make an espresso without coffee, measuring how much percolates through.
It is important to be precise every time with the water, so I suggest investing in a 150 ml glass beaker marked with 10 ml graduations.
Now, having weighed out your beans (16 g for a 2-cup pot or 18 g for the larger pots) and ground them, take the filter funnel (see photo above) and balancing it on a hard surface (like a worktop or cutting board), spoon in the coffee, tapping the filter firmly after each spoonful, to make sure all the grinds are evenly distributed. Do not tamp.
Then pour the hot water into the base, place the filter funnel on top and screw the top part on firmly.
If you are using the small 2-cup Moka pot on a gas cooker, you will probably need a trivet, or even better a stainless steel heat diffuser plate, to place over the smallest burner, otherwise the pot will either fall over or the flame scorch the outside. These are readily available online.

With the Moka pot in place, light the gas to the middle setting (you don’t want the flames to burn the sides of the pot), then wait 4-5 mins until you start to hear a percolating noise. Lift the lid and watch the liquid appear through the central column. As soon as this flow begins to bubble/ foam turn off the gas and lift it off to finish percolating.
Pour your coffee then run cold water over the Moka pot base to cool it.
If everything goes to plan you should have not only the full 60 ml, but a taste which is exquisite. If not, then a bit more experimenting is required.
Not enough coffee could mean you lifted the pot off too early, or it needs more water next time.
Tastes bitter (and the colour is extremely black), then the grind probably needs to be a bit coarser.
Too watery and tasteless, finer.
When the pot is cool enough to handle, take everything apart and thoroughly wash everything. On the top part you can use a stiff brush for the underside filter/ silicon gasket, to remove any grounds. With the funnel blow through to ensure this is clear. Then leave to dry, do not reassemble before using again.
Eventually the silicon (for stainless steel or rubber for aluminium) gasket will need replacing. They last me about a year and I always keep a stock of several just in case they get hard to find. When you replace one make sure you also use this opportunity to clean the holes in the two metal filters using a sharp pin.

Epilogue.
This is still a very new adventure for me, so as I learn will update the chapter. As of now I am still using the same Bialetti Moka pot, but did find a Bialetti diffuser plate at 50% off, which has made a big difference, and succumbed to a better quality hand-grinder, along with coffee scales that measure in tenths of a gram. My beans still come from the same (independent) roaster though, on a flexible subscription (which means you can change the frequency of delivery to suit you), Artisan Roast. Their website isn’t very user-friendly, especially for the novice, none of them are, but after a few bad choices I have now settled for their Year-round blends Cobblestone blend. Next time I am in Edinburgh I will try some out other roasters in the many coffee shops they have there.
Moka pot coffee however is always going to be limited to what it can achieve, even with the best coffee beans. Capable of only 1-1.5 bars of pressure, compared to a real espresso machine which produces 9 bars, a lot of the flavour will be missed. It isn’t as hot either, so has to be consumed straight away. But for the moment I am more than happy to have achieved the best taste with what I have.
*
make your own plant milk & plant cream
If you have ever bought plant food substitutes and bothered to look to see what is actually in them, you will know that there is very little that is wholesome and a whole lot that is downright harmful (ultra processed and additives). Plus there’s all that packaging. Thankfully, making your own is a lot cheaper, healthier and easier.
Simply choose which nut or grain you want to use and soak (for example) 1 cup of that overnight. The next day drain the liquid and spoon one tablespoon of the now softened nuts/ grains into a liquidiser, adding just the tinniest amount of water to allow the blade to blend. If it won’t spin freely then add a tiny bit more. When that is smooth add another spoonful of nuts/ grains. This time see if it will spin without any more water. If not, add only enough to do that. Repeat this until everything is liquidised. The is what I like to call the cream stage and the secret to achieving that perfect smoothness is adding the least amount of water throughout. If you then want to go on to make milk, just add more water until you are happy with the taste/ consistency. That’s all. No straining or measuring required.
If you want to make your own coconut (milk) cream, you can use desiccated coconut. But first you to need to pour almost boiling water over it and no more than the quantity of coconut. Soak overnight, covered, then drain (saving the liquid) and liquidise in a blender as above.
If you want to make sour cream, this is really easy too. We soak 1 cup of cashews overnight, drain, then add:
1.5 tbsp lemon juice (add more later if necessary)
1.5 dsp apple cider vinegar
1 tsp mustard
1.5 tbsp olive oil
Blend together in a liquidiser, adding water if necessary until thick and smooth.
*
Please note that soya milk and any food containing soya beans, which has not been fermented, was linked with significantly increasing the chances of cancer in women who have had the menopause. Check the latest medical research on this to be sure.
*
